Disclosure: As an Amazon Associate, we earn from qualifying purchases. If you click a link on this page and make a purchase, we may receive a small commission at no extra cost to you.
DIY lash clusters can give you more control over length and volume than a one-piece strip lash, but the results depend heavily on choosing the right clusters and applying the bond carefully. The Pawotence Lash Extension Kit combines 280 lash clusters in 30D and 40D styles with 9mm to 16mm lengths, plus Lash Bond and Seal and an applicator. That makes it a flexible kit for experimenting with natural, winged, or fuller lash maps at home. Its main limitation is that application still requires practice, and the product information we verified does not provide a guaranteed wear time or complete adhesive ingredient list.
Quick Verdict
Rating: 8/10, Recommended with caveats
Best For: DIY lash users who want multiple lengths and two volume options in one kit.
Bottom Line: The 280-cluster assortment gives you plenty of flexibility for changing lash maps and mixing 30D with 40D sections. The tradeoff is that getting clean placement and comfortable bonding can require trial and error, especially if this is your first cluster-lash kit.
| Specification | Detail |
|---|---|
| Brand | Pawotence |
| Product type | DIY cluster eyelash extension kit |
| Variant | 30D & 40D KIT |
| Cluster quantity | 280 pieces |
| Volume options | 30D and 40D |
| Length range | 9mm to 16mm |
| Listing descriptor | 0.07D |
| Included adhesive product | 1 Lash Bond and Seal |
| Included tool | 1 lash applicator |
| Best use | Customizable DIY lash looks at home |
What Is the Pawotence Lash Extension Kit?
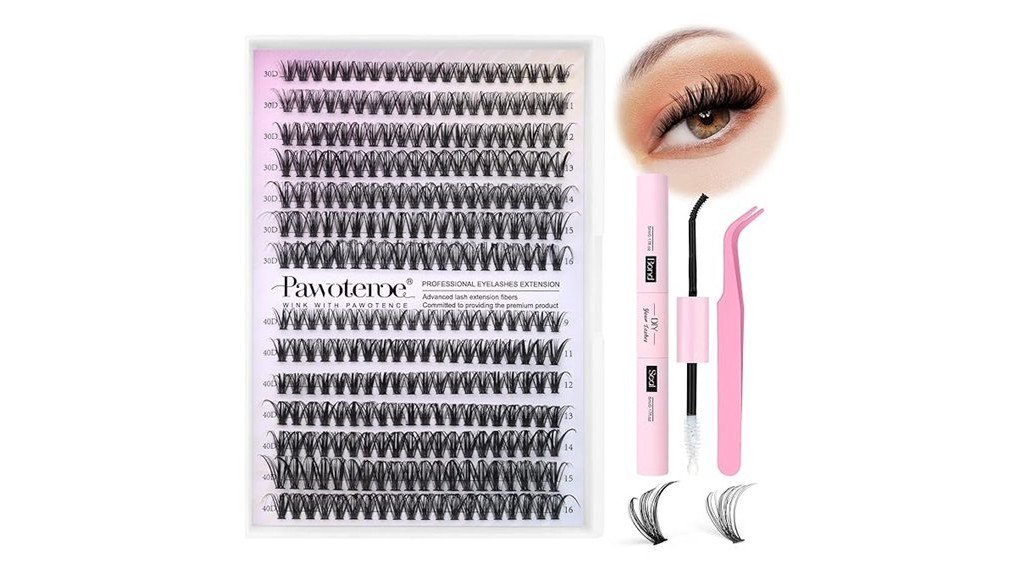
The Pawotence Lash Extension Kit is an at-home cluster lash system rather than a single strip lash. The verified kit configuration contains 280 individual lash clusters covering 9mm through 16mm lengths and two volume styles, 30D and 40D.
You also receive a Lash Bond and Seal and a lash applicator. This setup lets you build a lash line cluster by cluster, which gives you more control over where you add length and fullness. Shorter pieces can be concentrated toward the inner eye while longer pieces can be used farther out, or you can keep the lengths more even for a balanced look.
The product listing describes the cluster fibers as designed for softness, thickness, durability, and a fuller appearance. However, it does not clearly identify the exact fiber material in the information reviewed, so this article does not label the clusters as a specific synthetic fiber type.

Power your essentials anywhere with a 999Wh pure sine wave power station delivering up to 1000W continuous with 2000W surge. It supports fast charging via USB-C PD 60W and USB-A QC 18W, plus simultaneous output for multiple devices through AC, USB, wireless, and car/DC ports. Recharge using AC, car, or solar with a built-in MPPT controller and dual cooling fans, while the upgraded battery management system protects against surges, short circuits, and overheating.

1. Natural Blend: The wispy lash clusters seamlessly blend with your natural lashes, providing a flawless and natural look.
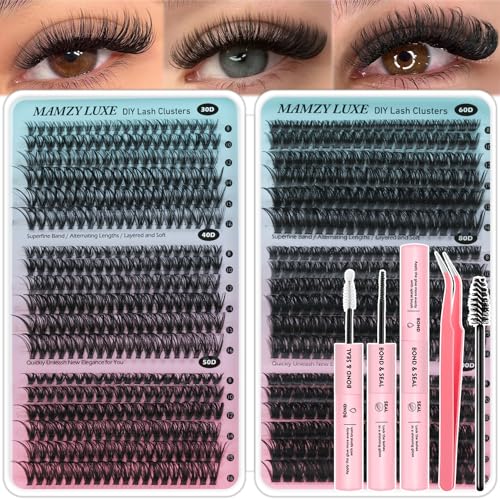
Multiple Choices & Professional Experience: 6 styles of lash clusters, ranging from natural to thick, can meet all makeup needs. This large-capacity lash extension kit includes 708pcs individual lashes in 10-16MM, along with lash glue bond and seal, eyelash tweezers and lash brush, offering a one-stop professional cluster lash extensions experience.
Who Should Buy It?
Best For
- You want several lash lengths for building custom lash maps.
- You want both 30D and 40D volume choices instead of committing to one density.
- You prefer an all-in-one starter setup with clusters, bond/seal, and an applicator.
Skip If
- You want a one-step lash that applies as quickly as a traditional strip.
- You are uncomfortable using adhesive products close to your eyes.
- You need a product with a clearly documented ingredient list or guaranteed wear duration before buying.
Before You Buy: Cluster lashes have a learning curve. The kit includes the tools you need for basic application, but correct bond amount and cluster placement still matter. Also check the current packaging and product instructions if adhesive ingredients or sensitivity concerns are important to you.
Length, Volume, and Styling Flexibility
The most useful feature of this Pawotence kit is its range. You get clusters from 9mm to 16mm, so you are not limited to one uniform lash length. This is helpful when you want the inner and outer portions of your lash line to look different.
The kit also combines 30D and 40D clusters. These are better treated as volume or density choices rather than simple lash thickness measurements. You can use the 30D pieces when you want a lighter section and add 40D clusters where you want a fuller effect.
You do not need to use every length in one application. In fact, keeping your lash map simple can make the first few applications easier to control.
Creating a Natural-Looking Map
A softer look can start with shorter clusters near the inner portion of the lash line and gradually increase toward the center or outer section. Using more of the 30D clusters can also keep the result from looking unnecessarily dense.
Creating a More Defined Outer Corner
If you prefer a winged effect, you can gradually use longer clusters toward the outer portion of the lash line. Avoid making a sudden jump from a very short cluster to the longest 16mm option because a smoother progression usually looks more intentional.
Adding More Volume
The 40D clusters give you another way to add fullness without relying only on length. Mixing 30D and 40D pieces lets you adjust both dimensions separately, which is one of the advantages of buying the mixed kit.
Bond, Seal, and Applicator
The package includes one Lash Bond and Seal and one lash applicator. That means you do not have to buy a separate basic application tool before trying the clusters.
The manufacturer’s listed application sequence is simple: roll the lash band down with the applicator, apply bond, place the clusters, and use the seal brush. The challenge is precision rather than the number of steps. Too much product or rushed placement can make the process harder to control.
The listing information reviewed does not state a guaranteed number of wear days. For that reason, you should treat wear time as variable rather than assuming every application will last for a fixed period.
How to Apply Pawotence Lashes at Home
Start by reading the directions supplied with your current kit, because packaging and formulas can change. Work with clean lashes and organize the cluster lengths you plan to use before opening the bond.
- Plan your lash map. Decide which lengths and volume options will go in each section before applying adhesive.
- Remove a cluster carefully. Use the applicator to roll or lift the cluster from its tray without pulling aggressively on the fibers.
- Apply the bond as directed. Use a controlled amount rather than coating the lashes excessively.
- Position each cluster. Place the selected cluster carefully and adjust it before moving on to the next section.
- Continue your planned sequence. Check the transition between lengths as you work.
- Use the seal. Finish according to the kit directions with the included seal brush.
Pro Tip: Lay out your 9mm to 16mm clusters in the order you intend to apply them before using the bond. A simple lash map reduces the chance of grabbing the wrong length while the adhesive is already on your lashes.
How It Performs in Real Use
For an Everyday Look
The mixed 30D and 40D tray gives you enough flexibility to keep an everyday set relatively light. You can emphasize the 30D clusters and use moderate lengths instead of automatically reaching for the longest pieces.
For a More Dramatic Look
The 16mm upper end of the length range and the 40D option give you room to create a more noticeable result. The kit is especially flexible if you like changing your lash map for different occasions rather than wearing the same arrangement every time.
For First-Time DIY Cluster Users
The included bond/seal and applicator reduce the number of separate items you need to collect. However, a complete kit does not eliminate the learning curve. Your first application may take longer while you learn how much bond to use and how to position individual clusters evenly.
For Frequent Style Changes
With 280 clusters and several lengths, the kit gives you more combinations to experiment with than a single-length tray. The exact number of complete applications you can create will depend on how many clusters and which lengths you use each time.
Eye-Area Safety and Materials
Lash adhesive is used close to a sensitive area, so application technique matters as much as appearance. Follow the instructions supplied with the current product, keep bond and seal out of your eyes, and stop using the product if you experience significant irritation or discomfort.
The product information reviewed describes updated lash fibers but does not provide a complete material specification for the clusters or a complete ingredient list for the included bond and seal. Because of that, you should not assume that the adhesive is automatically suitable for sensitive eyes or for every user.
If you have a known adhesive allergy, an existing eye problem, recent eye treatment, or concerns about using cosmetic adhesive around your eyes, ask an appropriate healthcare professional before use.
Pros and Cons
Pros
- Includes 280 clusters for flexible lash mapping.
- 9mm to 16mm range supports several length combinations.
- 30D and 40D options let you vary volume within one application.
- Bond and seal are included rather than requiring a separate starter purchase.
- Included applicator gives you the basic tool needed for cluster placement.
Cons
- Cluster-by-cluster application may require practice and extra time.
- The verified listing information does not promise a specific wear duration.
- Complete adhesive ingredients and exact lash-fiber material were not stated in the product information reviewed.
What Should You Expect Before Your First Application?
The biggest adjustment with a kit like this is learning to think in individual sections instead of applying one complete strip. You have to decide how many clusters to use, which lengths to combine, where to change from 30D to 40D, and how much bond is appropriate.
That extra control is also the kit’s main advantage. Once you understand the placement process, you can change the map instead of being locked into a fixed strip-lash design. Beginners should expect some trial and error rather than assuming the first set will be perfectly even.
Is It Worth the Price?
The Pawotence kit makes the most sense as a value-focused DIY option because it combines a large 280-cluster assortment with the bond/seal and applicator needed to start. You are paying for variety as much as for the lashes themselves.
It offers stronger value for buyers who genuinely plan to use several lengths or switch between lighter 30D and fuller 40D sections. If you normally wear only one lash length and one volume style, part of the assortment may be unnecessary for you.
It is also worth comparing the current seller and product details before buying, since Amazon pricing and offer status can change.
How It Compares to Alternatives
Other established DIY cluster-lash systems include KISS Falscara, Ardell Seamless Underlash Extensions, and the Lashify Control Kit. These systems take somewhat different approaches to cluster count, tools, placement, and supporting products.
The Pawotence kit makes the most sense when your priority is getting a large 280-piece assortment with 9mm to 16mm lengths and both 30D and 40D choices in one package. If you care more about a particular branded application system, documented adhesive ingredients, dedicated remover products, or a more guided ecosystem, compare those alternatives before deciding.
Frequently Asked Questions
How many lash clusters are included in the Pawotence kit?
The verified 30D and 40D kit includes 280 lash clusters. It also includes one Lash Bond and Seal and one lash applicator.
What lash lengths come in this Pawotence kit?
The listed length range is 9mm to 16mm. That range lets you combine shorter and longer pieces instead of building your whole lash line with a single length.
What is the difference between the 30D and 40D clusters?
They are two volume or density options included in this mixed kit. You can use 30D where you want a lighter effect and 40D where you want more visible fullness.
How long do Pawotence lash clusters last after application?
The product information verified for this review does not state a guaranteed wear duration. Your result can vary with preparation, bond application, placement, daily exposure, and how closely you follow the current product instructions.
Are Pawotence lash clusters reusable?
The listing information reviewed does not confirm a specific reuse claim or reuse count for this exact kit. Check the current package instructions rather than assuming the clusters can be repeatedly cleaned and reapplied.
Is the included Lash Bond and Seal suitable for sensitive eyes?
The information verified for this article does not establish that the included adhesive is suitable for every sensitive-eye user. Review the current ingredient information and instructions, and seek professional guidance if you have an adhesive allergy or eye-related concern.
What is the most common mistake to avoid when applying cluster lashes?
Starting without a lash map can make it harder to create smooth transitions between lengths. Decide your sequence before using the bond, then work carefully instead of changing lengths randomly during application.
The Bottom Line
The Pawotence Lash Extension Kit is a strong option if you want a large 280-cluster assortment, 9mm to 16mm lengths, and both 30D and 40D volume choices in one DIY package. It is less suitable if you want instant strip-lash simplicity or need more detailed adhesive and material documentation before using a cosmetic product around your eyes.
Its biggest strength is customization, while its main limitation is the practice required for consistent cluster placement. For buyers comfortable learning a multi-step DIY lash routine, our overall verdict remains 8/10, recommended with caveats.
Ready to Buy?
Check the latest price, seller status, and product details before you decide.