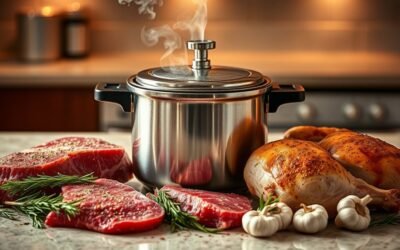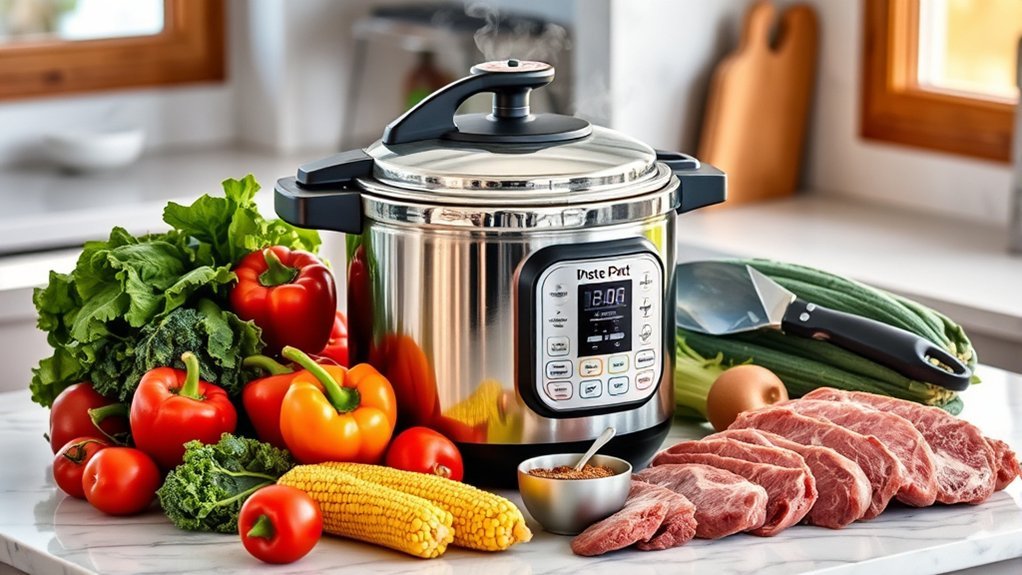
Pressure cookers are best for foods that improve with moist heat: dried beans, tough cuts of meat, soups, stews, stock, whole grains, potatoes, and other firm vegetables. They can also handle eggs, rice, and some steamed desserts, but timing and pressure-release choices matter. Use your model’s manual as the final authority because minimum liquid, pressure level, and safe fill limits vary.
Quick Answer
The best things to pressure cook are dried beans, lentils, beef chuck, pork shoulder, chicken, soups, stock, rice, quinoa, potatoes, carrots, squash, and eggs. Choose foods that benefit from moist heat, use enough thin liquid, leave room for expansion, and match the release method to the food.
Key Takeaways
- Beans, tough meats, grains, root vegetables, soups, and stock get the greatest practical benefit from pressure cooking.
- Cooking time begins after the cooker reaches pressure; preheating and pressure release add to the total time.
- Use a natural release for foamy, starchy, thick, or expanding foods unless your manual or tested recipe says otherwise.
- Check meat and poultry with a food thermometer rather than relying only on the timer.
- A pressure cooker is not automatically a pressure canner and should not be used for shelf-stable canning unless an approved process specifically covers that equipment.
At a Glance
| Time Required | About 15 minutes for quick vegetables to 90 minutes or more for large roasts, including pressure buildup and release |
| Difficulty | Beginner to intermediate |
| Tools Needed | Pressure cooker, approved inner pot and lid parts, measuring cup, utensils, and a food thermometer for meat or poultry |
| Cost | Usually low once you own the cooker; beans, grains, stock, and tougher meat cuts are often budget-friendly |
Best Things to Pressure Cook
The strongest choices are foods that normally need long simmering or steady moist heat. The pressure cooker raises the boiling temperature inside the sealed pot, so food can soften faster than it would in an open saucepan. The exact result still depends on the cooker, food size, quantity, starting temperature, altitude, and release method.
| Food | Good Starting Point | Typical Release | Best Use |
|---|---|---|---|
| Dried beans | About 20–45 minutes on high pressure, depending on type and whether soaked | Natural release | Chili, bean bowls, hummus, soups |
| Green or brown lentils | About 6–10 minutes on high pressure | Short natural release | Soup, curry, salads, meal prep |
| Beef chuck in large pieces | About 25–35 minutes on high pressure | 10–15 minute natural release | Stew, shredded beef, pot-roast-style dishes |
| Pork shoulder | About 15 minutes per pound on high pressure | Natural release | Pulled pork, tacos, rice bowls |
| Boneless chicken breast | About 5–8 minutes per pound on high pressure | Short natural release | Shredded chicken, soup, meal prep |
| Basmati rice | About 4 minutes on low pressure | Natural release | Side dishes and bowls |
| Quinoa | About 1 minute on high pressure | Natural release | Salads, bowls, side dishes |
| Whole potatoes | About 5–8 minutes on high pressure | Quick release when the recipe permits | Mashed potatoes, potato salad, baked-potato filling |
| Carrot chunks or squash cubes | About 1–3 minutes on high pressure | Quick release | Purees, sides, soups |
| Large eggs | About 3–5 minutes on high pressure | Brief natural release, then cool promptly | Easy-peel eggs, salads, snacks |
These are starting ranges, not guarantees. Compare them with your cooker’s official time chart and a tested recipe. The displayed cook time does not include the time needed to reach pressure or depressurize.

Power your essentials anywhere with a 999Wh pure sine wave power station delivering up to 1000W continuous with 2000W surge. It supports fast charging via USB-C PD 60W and USB-A QC 18W, plus simultaneous output for multiple devices through AC, USB, wireless, and car/DC ports. Recharge using AC, car, or solar with a built-in MPPT controller and dual cooling fans, while the upgraded battery management system protects against surges, short circuits, and overheating.

ABOUT THIS - These Replacement Silicone Gasket Seal for Instapot 5/6qt sealing rings fit pressure cooker's Models - IP-DUO60, IP-LUX60, IP-DUO50, IP-LUX50, Smart-60, IP-CSG60, IP-CSG50 and 6qt ultra, gasket rings Fit 5 & 6 QT IP Duo-60, Pro 6Qt, Duo Crisp 6Qt, RIO 6Qt, Nova, Duo Plus, Plus, Max, Lux, Gem, Viva, Smart Wifi 60,for 5/6 quart instant pot
Beans and Lentils
Dried beans are one of the best reasons to own a pressure cooker. Chickpeas, kidney beans, cannellini beans, black beans, navy beans, and pinto beans can become tender without hours of stovetop simmering. Rinse and sort them first, add enough water for expansion, and keep the pot below the limit marked for starchy or expanding foods.
Bean timing varies more than many guides admit. Bean type, age, soaking, water hardness, and desired texture all affect the result. Add acidic ingredients such as tomatoes, vinegar, or citrus after the beans are mostly tender because acid can slow softening.
Tough Cuts of Meat
Beef chuck, short ribs, brisket pieces, pork shoulder, and lamb shanks respond well to pressure cooking because moist heat helps soften connective tissue. Brown the meat first for deeper flavor, then deglaze the pot with a thin liquid so browned bits do not trigger a burn warning.
Do not confuse tenderness with food safety. A roast can be safe but still tough if connective tissue has not softened. If it is firm after the first cycle, reseal the cooker and add a short second cycle rather than boiling it uncovered for a long time.
Chicken and Pork
Chicken thighs, chicken breast, whole chicken, pork ribs, and pork shoulder can cook quickly under pressure. Use pieces of similar size so they finish together. After opening the cooker, check the thickest part with a food thermometer. The USDA safe-temperature chart calls for 165°F for poultry, 160°F for ground meats, and 145°F with a three-minute rest for whole cuts of beef, pork, veal, and lamb.
Rice and Whole Grains
Rice, quinoa, barley, millet, and steel-cut oats are convenient in a pressure cooker because the sealed environment limits evaporation. Measure carefully rather than using the same liquid ratio as an open saucepan. Different grains need different ratios, pressure levels, and release times.
Use a natural release for rice, porridge, and most grains unless the manufacturer’s tested recipe says otherwise. A rushed release can push starchy foam toward the valve and may leave grains underhydrated.
Potatoes and Firm Vegetables
Whole potatoes, sweet potatoes, beets, carrots, winter squash, and artichokes tolerate pressure better than leafy greens or thin-cut vegetables. Keep pieces similar in size and use a rack or steamer basket when you want the food above the cooking liquid.
Firm vegetables usually need only a few minutes at pressure. Release promptly when the recipe permits because the food continues cooking while the pot remains pressurized.
Soups, Stews, and Stock
Pressure cooking is well suited to broth, stock, chili, split-pea soup, lentil soup, and meat stews. Add dairy, cream, cheese, flour, or cornstarch after pressure cooking unless a tested recipe gives another method. Thick sauces can scorch before enough steam forms.
For layered dishes, place thin liquid at the bottom. Add dense foods next and keep tomato paste or other thick ingredients on top without stirring when the recipe uses that method. After pressure release, use the sauté setting to reduce or thicken the liquid.
Eggs and Steamed Desserts
Eggs cook well on a rack above water, and a quick cooling bath helps stop carryover cooking. Pressure cookers can also steam cheesecake, custards, bread puddings, and small cakes in a covered pan. The texture is moist rather than browned, so this method is better for steamed desserts than for crusty bread or crisp pastries.
Pro Tip: Keep a simple cooking log. Record the food, size, amount, pressure level, cook time, release method, and result. Two or three notes will help you dial in your specific cooker faster than relying on generic charts.
Foods That Need Extra Care
A pressure cooker can handle many foods, but it is not the best tool for every dish. Use extra care with the following:
- Delicate seafood and leafy vegetables: They can overcook during pressure buildup alone. Use low pressure, a very short cycle, or another cooking method.
- Pasta and porridge: They foam, expand, and release starch. Stay below the half-full line and follow a model-specific recipe.
- Thick tomato, cream, or cheese sauces: They can scorch before enough steam forms. Add thin liquid first and finish thickening after pressure release.
- Fried or crisp foods: Pressure cooking uses moist heat, so it cannot create a crisp crust. Crisp food afterward with an oven, broiler, skillet, or compatible air-fry function.
- Large frozen blocks: Frozen pieces may be pressure cooked when a tested recipe and the appliance manual allow it, but a solid mass can cook unevenly. Separate pieces when possible and verify doneness with a thermometer.
- Foods that froth heavily: Applesauce, cranberries, split peas, noodles, and some grains can foam or sputter. Never exceed the manual’s fill limit or block the vent.
How to Pressure Cook Food Successfully
- Read the manual. Confirm the approved inner pot, sealing ring, lid position, minimum liquid, fill lines, and pressure-release controls for your exact model.
- Prepare evenly sized food. Similar pieces cook at a similar rate. Keep quick-cooking vegetables larger when they share the pot with meat.
- Add thin cooking liquid. Water, broth, or another recipe-approved liquid must be able to create steam. The manufacturer’s minimum amount controls.
- Keep the sealing surface clean. Check that the ring, valve, lid, and rim are clean, correctly installed, and undamaged before cooking.
- Select pressure and time. Use a tested recipe as the starting point. Remember that the countdown normally begins only after the cooker reaches pressure.
- Use the correct release. Natural release suits many meats, beans, grains, and thick dishes. Quick release helps stop delicate vegetables from overcooking when the recipe and manual permit it.
- Verify the result. Check meat with a thermometer, test beans for tenderness, and add a short second cycle if needed.
- Finish after pressure cooking. Reduce excess liquid, add dairy, thicken sauces, or crisp meat after the lid is safely removed.
Warning: Never force the lid open, put your face or hand over the steam outlet, cover the vent with a towel, or quick-release a foamy, oily, thick, or expanding food unless the manufacturer specifically directs you to do so. Wait until the pressure indicator shows that the cooker is fully depressurized.
Liquid, Fill, and Release Rules
Use Enough Thin Liquid
Pressure cookers need liquid that can boil and make steam. The correct minimum is model-specific. As one example, Instant Pot’s current cooking table lists minimums of 1 cup for a 3-quart pot, 1½ cups for a 6-quart pot, and 2 cups for an 8-quart pot. Do not copy those amounts to a different brand without checking its manual.
Respect the Fill Lines
Leave room for steam and expansion. Instant Pot instructs users not to fill past the half-full mark for foods such as legumes, pasta, porridge, rice, and soup, and not past the pressure-cooking maximum line for other foods. Your cooker may use different markings, so follow the label inside your pot and the manual.
Choose Natural or Quick Release
A natural release lets the pressure fall as the cooker cools. It adds gentle cooking time and allows foam to settle. A quick release vents steam through the release control and stops cooking faster, but it can eject hot liquid or foam if used with the wrong food.
- Natural release: Beans, grains, porridge, thick soups, fatty foods, large meat cuts, and recipes prone to foaming.
- Quick release: Tender vegetables and other foods that overcook easily, but only when the recipe and manual allow it.
- Timed natural release: Leave the pot untouched for a stated period, such as 10 minutes, then vent the remaining pressure if safe.
The timer is only one part of pressure cooking. Food keeps cooking while the cooker reaches pressure and while pressure falls, so the release method can change the final texture as much as the programmed minutes.
How to Prevent Common Pressure-Cooking Problems
Burn Warning or Scorched Bottom
Turn off the cooker and follow its instructions. Common causes include too little thin liquid, flour or starch on the bottom, a sauce that is too thick, or browned bits left after sautéing. Deglaze thoroughly before sealing. Do not scrape scorched food into the meal because it can spread a bitter flavor.
Food Is Mushy
Shorten the pressure time, cut the food into larger pieces, or use a faster release when safe. Put delicate vegetables on a rack or add them after the main pressure cycle. Remember that a full pot takes longer to pressurize and may soften food before the countdown starts.
Meat Is Tough
Tough meat often needs more time for connective tissue to soften. Add a small amount of liquid if needed, reseal, and cook for another 5–10 minutes. Use a natural release for large or fatty cuts.
Beans Are Still Hard
Old beans, hard water, acid, and short cooking time can all slow softening. Continue cooking in a short second cycle. Add tomatoes, vinegar, citrus, and other acidic ingredients after the beans are tender.
Steam Leaks Around the Lid
Stop and consult the manual. The sealing ring may be missing, damaged, dirty, stretched, or incorrectly seated. The lid rim may also have food debris. Use only parts approved for your exact model and replace worn parts as directed by the manufacturer.
The Lid Will Not Open
Do not force it. The cooker may still be pressurized even when the cooking cycle has ended. Wait for the pressure indicator to drop and follow the manual’s depressurization procedure. If the indicator remains raised or the lid stays locked, contact the manufacturer rather than prying it open.
Note: Check your brand and model against current safety notices before use. The U.S. Consumer Product Safety Commission has issued pressure-cooker warnings and recalls involving lids opening under pressure, incorrect fill markings, and expelled hot contents. Stop using any model covered by a warning or recall.
Does Pressure Cooking Preserve Nutrients?
Pressure cooking can reduce cooking time and water contact, which may help retain some water-soluble nutrients compared with prolonged boiling. However, there is no reliable universal percentage for all foods. Nutrient retention changes with the ingredient, cut size, water amount, pressure, temperature, and cooking time. Some compounds decrease with heat, while the digestibility or availability of others may improve.
For practical nutrition, avoid overcooking, use only the liquid the recipe needs, and serve the cooking liquid in soups or sauces when appropriate. A varied diet matters more than claiming that one cooking method always preserves a fixed percentage of nutrients.
Pressure Cooking Is Not Pressure Canning
A pressure cooker prepares food for immediate eating. Pressure canning is a tested preservation process designed to make low-acid foods shelf-stable. The National Center for Home Food Preservation states that USDA processes are not recommended for small pressure cookers and cannot simply be converted from standard pressure-canner instructions.
Do not use an electric multi-cooker or small pressure saucepan for shelf-stable canning based on an ordinary cooking recipe. Use proper canning equipment and a current, research-tested process from USDA or a university extension source.
Frequently Asked Questions
Can I pressure cook frozen foods directly?
Sometimes. Use a tested recipe approved for your cooker, add the required liquid, and allow extra time for the pot to reach pressure. Separate frozen pieces when possible. Do not rely on time alone for meat or poultry; verify the thickest part with a food thermometer.
How do I prevent food from sticking or burning?
Use enough thin liquid, deglaze the pot after browning, and keep flour, cornstarch, cheese, cream, and thick sauces away from the bottom during the pressure cycle. Add thickeners after pressure release unless a tested recipe directs otherwise.
What are the best liquids for pressure cooking?
Water and broth are the most dependable choices. A recipe may also use tomato juice, coconut milk diluted with water, beer, or wine, but the pot still needs enough thin, water-based liquid to generate steam. Avoid pressure cooking with mostly oil or an undiluted thick sauce.
How long does it take to pressure cook beans?
Dried beans commonly need about 20–45 minutes at high pressure plus a natural release, but the range changes by variety, age, soaking, and preferred texture. Lentils are faster. Use a chart or recipe written for your cooker and bean type.
Can I use a pressure cooker for baking?
Yes, for moist, steamed-style desserts such as cheesecake, custard, bread pudding, and some small cakes. Use a covered, pressure-safe pan on a rack. Pressure cooking will not brown or crisp the surface like an oven.
How much liquid does a pressure cooker need?
Use the minimum listed in your model’s manual or tested recipe. The amount varies by size and design, so there is no safe universal number. Count only thin liquid that can boil freely and create steam.
When should I use natural release instead of quick release?
Natural release is usually safer for beans, grains, porridge, thick soups, fatty foods, and large meat cuts because it lets foam settle and adds gentle cooking time. Quick release is better for delicate vegetables only when your manual and recipe permit it.
Can I use my pressure cooker for home canning?
Do not assume so. Ordinary pressure cookers and electric multi-cookers are not automatically pressure canners. For shelf-stable low-acid foods, use equipment and a research-tested process specifically approved for pressure canning.
Conclusion
The best foods to pressure cook are beans, tougher meat cuts, soups, stock, grains, potatoes, firm vegetables, and eggs. Start with a tested recipe, use the liquid and fill limits required by your model, and treat the release method as part of the cooking time. With careful sizing, safe venting, and temperature checks, pressure cooking can turn inexpensive staples into reliable meals without guesswork.
Sources
- Instant Pot Frequently Asked Questions — fill limits, natural release, quick release, and safe operation.
- Instant Pot Multi-Cooker Cooking Time Table — manufacturer starting times, pressure levels, liquid minimums, and release methods.
- USDA Safe Minimum Internal Temperature Chart — safe temperatures for meat, poultry, eggs, and leftovers.
- National Center for Home Food Preservation: Canning in Pressure Cookers — why small pressure cookers are not substitutes for tested pressure-canner processes.
- U.S. Consumer Product Safety Commission Pressure-Cooker Warning — current examples of lid, fill-marking, and burn hazards.
- Effect of Household Cooking Methods on Nutritional and Antinutritional Factors — evidence that nutrient effects vary with food, method, and cooking duration.