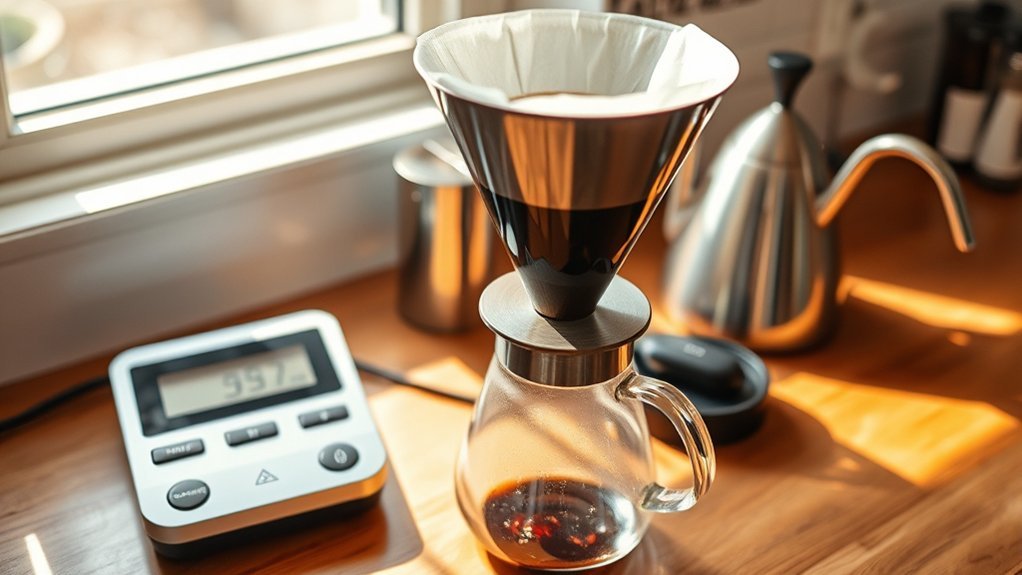
A pour-over coffee maker is a manual dripper that lets you control how hot water moves through ground coffee. That control can make it easier to highlight clarity, aroma, and differences between beans, but the method does not require a complicated recipe. A reliable starting point is a measured coffee-to-water ratio, an even bloom, a consistent pour, and small grind adjustments based on taste.
Quick Answer
A pour-over coffee maker is a manual dripper that holds ground coffee and a filter above a mug or server. Because you add hot water by hand, you control the ratio, flow, agitation, and brew time. For a reliable start, use 20 g of coffee, 320 g of water, a 30–45-second bloom, and adjust your grind size by taste.
Key Takeaways
- Pour-over is a manual form of drip brewing that gives you direct control over water flow, ratio, agitation, and brew time.
- Start around a 1:16 coffee-to-water ratio, then adjust the strength to your personal preference.
- Always rinse a paper filter before adding coffee; the “bloom” happens afterward, once hot water contacts the grounds.
- Grind size depends heavily on the brewer: V60-style cones often start around medium-fine, while CHEMEX recommends medium-coarse.
- Taste is your final guide. Change one variable at a time, focusing on grind size, instead of chasing a single “perfect” brew time.
At a Glance
| Time Required | About 5–10 minutes including setup; a typical single-cup drawdown takes roughly 3–4 minutes. |
| Difficulty | Beginner-friendly; achieving repeatable, consistent results takes a little practice. |
| Tools Needed | Dripper, compatible filter, kettle, digital scale, timer, mug/server; a burr grinder and gooseneck kettle are strongly recommended. |
| Cost | Varies widely. A basic plastic dripper and filters are inexpensive; a quality burr grinder is usually the largest investment. |
What Is Pour-Over Coffee?

Pour-over coffee is a manual drip-brewing method. Hot water passes through a bed of ground coffee and a filter, then drains into a mug or server below. The main difference from an automatic drip machine is that you manually control the pouring pattern, temperature, and pace yourself.
Modern paper-filter brewing is closely tied to Melitta Bentz’s 1908 coffee-filter invention. Today, brewers such as the Hario V60, CHEMEX, Kalita Wave, and flat-bottom drippers use different shapes and filters to change flow resistance, body, and flavor clarity.
Pour-over does not guarantee a better cup than an automatic brewer. Its advantage is direct control: you can change ratio, grind, temperature, pour rate, and agitation to shape the result exactly to your liking.

Power your essentials anywhere with a 999Wh pure sine wave power station delivering up to 1000W continuous with 2000W surge. It supports fast charging via USB-C PD 60W and USB-A QC 18W, plus simultaneous output for multiple devices through AC, USB, wireless, and car/DC ports. Recharge using AC, car, or solar with a built-in MPPT controller and dual cooling fans, while the upgraded battery management system protects against surges, short circuits, and overheating.
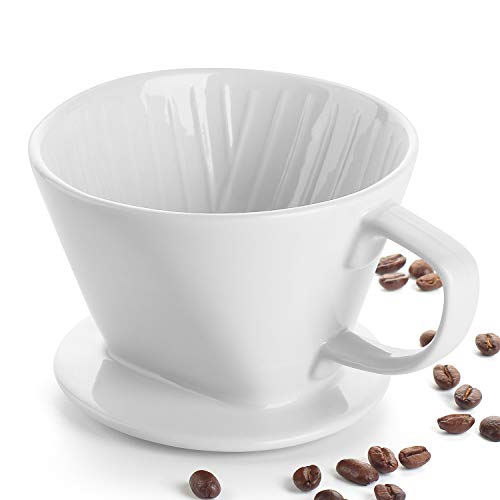
Portable Handmade Brew - DOWAN ceramic pour-over coffee dripper lets you have a traditional, hands-on brewing experience. You can have a cup or two of coffee whenever and wherever you want, without the help of a machine.

Portable Handmade Brew - DOWAN ceramic pour-over coffee dripper lets you have a traditional, hands-on brewing experience. You can have a cup or two of coffee whenever and wherever you want, without the help of a machine.
Pour-Over vs. Automatic Drip Coffee
| Factor | Pour-Over | Automatic Drip |
|---|---|---|
| Water delivery | Controlled entirely by you | Controlled by the machine’s showerhead |
| Consistency | Depends on your pouring technique | Highly repeatable on an SCA-certified brewer |
| Convenience | Hands-on, requires focus | Automated, set-and-forget |
| Best fit | Enthusiasts who enjoy dialing in each brew | People who value morning convenience |
Get the Right Gear for Your Pour-Over Coffee
You do not need a café-sized setup. Start with a dripper, a compatible filter, a kettle, a scale, and fresh coffee. A burr grinder is strongly recommended because a consistent particle size makes it much easier to repeat a recipe. A gooseneck kettle is incredibly helpful for controlled, targeted pouring, but it is not mandatory if you can pour slowly with a standard kettle.
Choose a Dripper and Filter
Dripper shape and filter material matter because they fundamentally alter how water travels through the coffee bed.
- Hario V60 (Cone): The V60’s 60-degree cone shape and large open outlet give the brewer substantial control over flow rate. Hario-hosted recipes commonly start around a medium-fine grind. See Hario USA’s V60 recipe guidance.
- CHEMEX (Cone/Hybrid): CHEMEX recommends a medium-coarse grind because its proprietary bonded paper filters are thick, which slows flow and creates a highly clarified, tea-like body. See their brewing FAQ.
- Flat-Bottom Drippers (e.g., Kalita Wave): These restrict flow via small holes at the bottom and create a shallower, wider coffee bed. This design encourages an even extraction and is often more forgiving for beginners.
- Paper vs. Reusable Filters: Paper produces a clean cup by trapping heavy oils and fines. Metal or cloth filters allow more oils and micro-grounds through, yielding a heavier, richer body similar to a French press.
Note: A recipe is a starting point, not a strict rule. Hario, CHEMEX, and flat-bottom brewers require different grind sizes, pour patterns, and brew times due to their unique geometry.
Step-by-Step Guide to Brewing Pour-Over Coffee

This baseline recipe uses 20 grams of coffee and 320 grams of brewing water, which is an exact 1:16 ratio. It works perfectly as a starting point for most single-cup cone brewers. Larger batches may require a coarser grind.
Simple Pour-Over Ratio Chart
| Coffee | Water at 1:16 | Approximate Use |
|---|---|---|
| 15 g | 240 g | Small cup (8 oz) |
| 20 g | 320 g | Typical single cup (11 oz) |
| 25 g | 400 g | Large cup or two small servings |
| 30 g | 480 g | Two servings, brewer capacity permitting |
Why the “Bloom” Matters
When you roast coffee, gases (primarily carbon dioxide) get trapped inside the beans. When hot water hits fresh coffee grounds, these gases rapidly escape, causing the coffee bed to bubble and swell—this is the “bloom.” If you try to pour all your water at once without blooming, the escaping CO2 pushes the water away, causing uneven extraction (channeling) and weak, sour coffee. Allowing it to bloom for 30 to 45 seconds creates an even path for the rest of your water.
Brewing Instructions
- Heat the water. A practical starting range is 195°F to 205°F (91°C to 96°C). The SCA pour-over guidance uses 200°F (93.5°C). Current research from the UC Davis Coffee Center shows temperature is only one variable—do not assume hotter water automatically means over-extraction.
- Weigh and grind the coffee. For a V60-style cone, start around medium-fine. For CHEMEX, start medium-coarse.
- Rinse the paper filter. Place the filter in the dripper and pour hot water through it before adding coffee. This seats the filter against the walls, preheats the brewer, and washes away paper flavors. Discard the rinse water from your mug.
- Add coffee and tare the scale. Pour your 20 grams of coffee into the filter. Gently shake the dripper to level the coffee bed so the water hits an even surface. Tare (zero out) your scale.
- Bloom the coffee. Start your timer and quickly pour about 40–60 grams of water in a spiral, ensuring all grounds are wet. Gently swirl the brewer if dry pockets remain. Wait 30–45 seconds.
- Continue the pour. Add the remaining water in one steady spiral pour (or a few smaller pulses) until the scale reaches 320 grams. Pour steadily over the coffee bed rather than blasting one deep spot. Avoid pouring directly down the edges of the filter.
- Let it drain. For this 320g brew, roughly 3–4 minutes total is a typical starting window. Filter type, grinder quality, and dripper design will change this drawdown time.
- Serve and taste. Remove the dripper and gently swirl the server to mix the brew. Let it cool slightly; flavor complexity becomes much easier to taste as the coffee cools.
Warning: Pour-over brewing utilizes near-boiling water and fragile glass. Keep the brewer on a flat, stable surface, pour away from your body, and always inspect glassware for chips or hairline cracks before brewing.
Pro Tip: Only change one variable at a time when diagnosing a bad cup. Keep your dose and water ratio steady, and adjust only your grind size first. Once it tastes balanced, adjust the ratio if you want it stronger or weaker.
Troubleshooting: Common Mistakes in Pour-Over Brewing
A stopwatch is useful, but your palate is far more important than hitting a specific brew time. Use flavor and drawdown speed together to diagnose issues.
| What You Notice | Likely Cause | What to Try |
|---|---|---|
| Sour, sharp, thin; brew drains very fast | Under-extraction (water moved too quickly) | Grind a little finer and ensure your bloom wets all grounds evenly. |
| Dry, harsh, astringent; brew drains very slowly | Over-extraction (grind too fine or excessive agitation) | Grind slightly coarser or pour more gently. Note: Bitterness can also come from dark roasts. |
| Weak but balanced flavor | Brew ratio is too light for your preference | Use more coffee (e.g., 22g instead of 20g) or less water, keeping grind similar. |
| Overpoweringly strong but balanced | Brew ratio is too heavy for your preference | Use slightly less coffee or add more water. |
| Filter stalls completely | Too many fines from a dull grinder, or poor filter seating | Grind coarser. On a CHEMEX, ensure the thick three-layer side faces the pouring spout to keep the air channel open. |
| Cardboard or papery taste | Unrinsed filter | Rinse the paper filter thoroughly with hot water and discard before adding grounds. |
Savor the Unique Flavors of Pour-Over Coffee
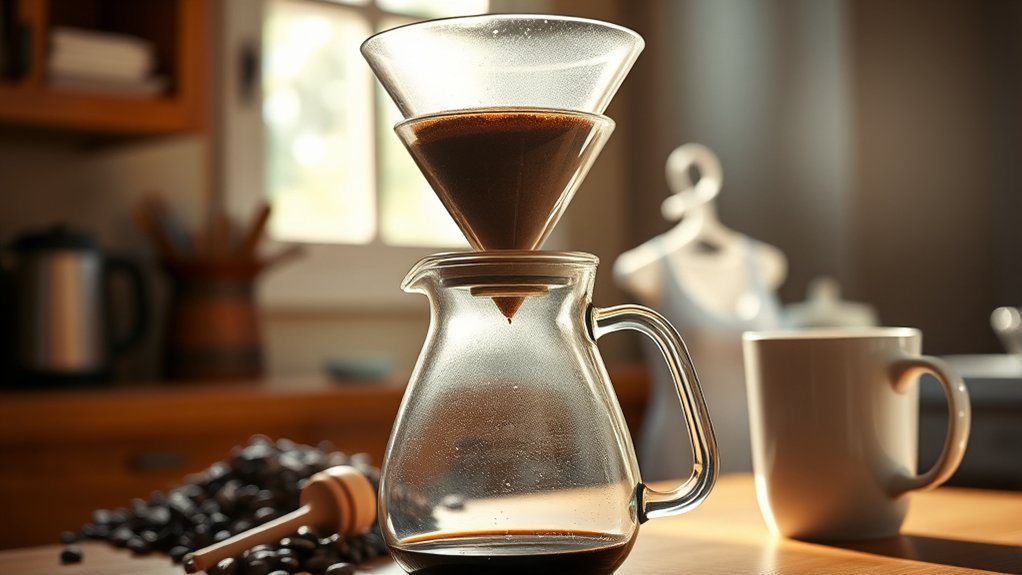
Pour-over is wildly popular in specialty coffee because a paper-filtered cup emphasizes aroma, bright acidity, sweetness, and distinct single-origin characteristics. The resulting brew is not automatically “stronger” than a French press; rather, it is highly valued for its clarity and lack of muddy sediment.
Every element—from the dripper and paper thickness to the water chemistry and pouring technique—influences the final extraction. UC Davis coffee research has demonstrated that brew strength and extraction yield are major drivers of sensory differences, meaning precision directly translates to taste.
How to Dial In Your Pour-Over
- Start with a fixed ratio. Stick to 1:16 for several brews to establish a stable baseline.
- Adjust grind size first. Grind finer if the cup tastes sour/thin with a fast drawdown; grind coarser if it tastes dry/harsh and stalls.
- Adjust strength second. Once extraction tastes balanced (neither sour nor bitter), alter the ratio only if you want a heavier or lighter body.
- Fine-tune temperature. Darker roasts often taste better with slightly cooler water (~195°F) to avoid harshness, while lighter roasts tolerate hotter water (~205°F) to extract stubborn bright notes.
- Keep notes. Track your coffee dose, water weight, grind setting, brew time, and tasting notes. A repeatable process eliminates guesswork.
Frequently Asked Questions
How long does pour-over coffee take to brew?
A typical single-cup pour-over usually finishes draining in about 3 to 4 minutes, but there is no universal perfect time. The brewer geometry, filter paper thickness, dose, roast level, and pouring pattern all alter the drawdown speed. Focus on taste rather than the clock.
Can I use pre-ground coffee for pour-over?
Yes. Pre-ground coffee works fine if the grind size suits your specific dripper. However, grinding fresh immediately before brewing gives you precise control over extraction and preserves volatile aromatics that quickly fade in pre-ground coffee.
What coffee-to-water ratio is best for pour-over?
A 1:16 ratio is a highly reliable starting point (e.g., 20 grams of coffee to 320 grams of water). Ratios between 1:15 (stronger) and 1:17 (lighter) are also incredibly common. Adjust the ratio based on your personal strength preference.
Is pour-over coffee stronger than other brewing methods?
Not inherently. Brew strength (TDS, or Total Dissolved Solids) depends on how much soluble coffee material makes it into the beverage. You can brew a weak pour-over or a remarkably strong one entirely by changing your coffee-to-water ratio and grind size.
What grind size should I use for pour-over coffee?
It relies entirely on the brewer you own. Medium-fine is a common starting point for V60 recipes, while flat-bottom drippers may require medium, and CHEMEX recommends medium-coarse. Let taste dictate your adjustments from there.
Do I need a gooseneck kettle for pour-over?
While not strictly mandatory, a gooseneck kettle is highly recommended. The specialized spout makes water flow rate and placement effortless to control, reducing messy agitation and helping prevent the filter from flooding.
Can I make iced coffee with a pour-over maker?
Yes. This is called “flash brewing” or Japanese-style iced coffee. You brew directly over a known weight of ice (e.g., swapping 30% of your hot brewing water weight for ice in the server) using a slightly finer grind to extract flavor quickly before the ice dilutes it.
How do I clean my pour-over coffee maker?
Discard the grounds and paper filter, then rinse the dripper thoroughly with hot water after each use. Wash with mild dish soap as needed to remove oil buildup. Always follow manufacturer guidelines regarding dishwasher safety, particularly for glass, wood collars, or metal components.
Sources
- Specialty Coffee Association — Guidelines for Brewing with a Two-Cup Pour-Over — baseline temperature, bloom, equipment, and brew-time guidance.
- UC Davis Coffee Center — Publications — research on brew strength, extraction, temperature, and sensory outcomes.
- Hario USA — Alpha Series V60-01 Dripper — manufacturer-hosted 1:16 ratio and 30–45-second bloom guidance.
- Hario USA — V60 Brewing Recipe — V60 grind, bloom, pouring, and drawdown example.
- CHEMEX — Brewing FAQ — medium-coarse grind, bloom, filter placement, and cleaning guidance.
- Melitta Group — 1908: An Ingenious Invention — history of Melitta Bentz’s original paper coffee filter invention.
Conclusion
Pour-over coffee is best approached as a highly controllable brewing method, rather than a rigid formula that produces one single correct cup. Start with a baseline 1:16 ratio, remember to rinse your filter and allow the coffee to bloom, use a grind suited to your specific dripper geometry, and make only one adjustment at a time. Establishing a repeatable process gives you a much better chance of highlighting the natural sweetness, clarity, and aroma your coffee beans have to offer.