Testing your coffee maker’s water temperature can show whether it is heating consistently, but the measurement has to be taken in the right place and interpreted correctly. Finished coffee in the carafe is normally cooler than the water contacting the grounds, so the most useful home diagnostic test measures the coffee-bed temperature during a normal brew cycle.
Quick Answer
Use a thin thermocouple or leave-in probe rated for continuous use near boiling temperatures. Position it near the top-center of the coffee bed without touching the basket or sprayhead, then run a normal brew. For comparison, current SCA-310 home-brewer specifications use a 194°F to 204.8°F slurry range once the brewer reaches its required warm-up point.
Key Takeaways
- Measure near the coffee bed where hot water contacts the grounds, not only in the finished carafe.
- Use a thin thermocouple or probe rated for continuous exposure to near-boiling water; an ordinary instant-read thermometer is not automatically suitable for leaving in the brewer.
- Test from a normal cold start with the usual filter, coffee dose, water volume, and basket setup.
- Current SCA-310 specifications use a slurry range of 90°C to 96°C, or 194°F to 204.8°F, reached by the time 33% of the water mass has been sprayed onto the coffee and maintained afterward.
- A single-probe home test is a diagnostic approximation. It cannot establish that a brewer passes SCA certification testing.
- Verify unexpected readings, clean or descale according to the manual, and contact the manufacturer when abnormal heating persists.
At a Glance
| Time Required | About 10–15 minutes for one normal test cycle, plus cooling time before a repeat cold-start test |
| Difficulty | Easy to moderate, but only if the probe can be installed without interfering with the lid, basket, interlock, or normal operation |
| Tools Needed | Continuous-use thermocouple or thin digital probe, filter, coffee grounds, water, timer, and a way to record readings |
| Cost | No added cost if you already own a suitable probe; otherwise the thermometer or thermocouple cost varies |
Why Is Brewing Temperature Crucial for Coffee Quality?
Water temperature affects how quickly soluble material moves from ground coffee into the brew. Hotter water generally changes extraction kinetics and compound solubility, while cooler water changes them in the opposite direction. Temperature is only one part of the process, however. Grind size, coffee dose, water volume, contact time, agitation, filter geometry, and water distribution also influence the final beverage.
The Specialty Coffee Association currently lists SCA-310 Home Coffee Brewers: Specifications and Test Methods as its certification standard for filter coffee electrical brewers designed for home use. Under SCA-310, slurry temperature is specified at 90°C to 96°C, or 194°F to 204.8°F. The brewer must reach that range by the time 33% of the water mass has been sprayed onto the coffee and stay within the range for the remainder of the brew cycle.
This differs from the older SCA home-brewer requirement that called for reaching 92°C, or 197.6°F, within the first minute. That older document is useful historically but should not be treated as the current SCA-310 test method.
Temperature is still only one performance variable. Researchers brewing drip coffee at 87°C, 90°C, and 93°C found little sensory difference when beverage strength and extraction yield were deliberately held constant. Their results show why you should evaluate temperature together with the rest of the brewing recipe rather than treating one thermometer reading as the sole measure of coffee quality.
A useful home temperature test measures the coffee bed during brewing. A carafe reading measures the cooler finished beverage, and a single home probe cannot reproduce the full SCA certification procedure.

Power your essentials anywhere with a 999Wh pure sine wave power station delivering up to 1000W continuous with 2000W surge. It supports fast charging via USB-C PD 60W and USB-A QC 18W, plus simultaneous output for multiple devices through AC, USB, wireless, and car/DC ports. Recharge using AC, car, or solar with a built-in MPPT controller and dual cooling fans, while the upgraded battery management system protects against surges, short circuits, and overheating.
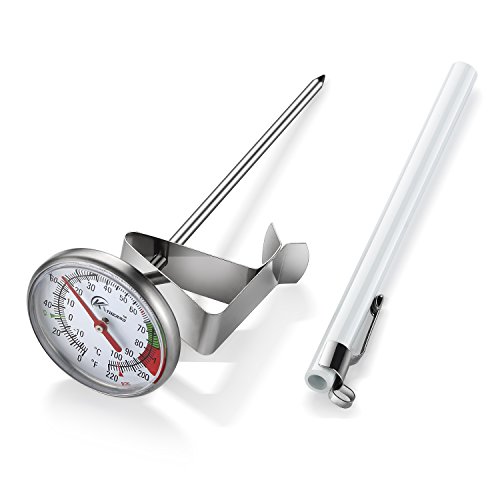
DESIGN:Multi-stage design of the fixed clip, adjust the thermometer read the location of the disk surface to facilitate observation of the temperature of the bubble.

Instant Read Food Thermometer | Our instant read thermometer features a temperature probe and advanced, highly accurate technology with 1-2 seconds response time; Instructions, meat temperature chart, comes pre-calibrated for your convenience, and recalibrating feature if needed.
What’s the Best Temperature for Brewing Coffee?
For hot filter brewing, temperatures around the mid-190s to low-200s Fahrenheit are a useful starting area. For automatic home-brewer performance, the current SCA-310 specification is more precise: 90°C to 96°C, or 194°F to 204.8°F, in the slurry after the brewer reaches the standard’s required warm-up point.
That equipment specification is not the same thing as a universal “best tasting” temperature. Coffee, roast development, grind, extraction time, water chemistry, and personal preference can all change which recipe tastes best.
The target also refers to brewing temperature rather than drinking temperature. Coffee in a carafe or mug will be cooler because heat transfers to the coffee grounds, filter, basket, brewer, carafe, mug, and surrounding air.
Optimal Brewing Temperature Range
Use these points when interpreting a home diagnostic test:
- Consistently below about 194°F after the brewer has warmed: Recheck the thermometer, probe location, batch size, and manufacturer instructions before assuming the heater is faulty.
- About 194°F to 204.8°F during the established part of the brew: This is consistent with the temperature band used by current SCA-310, but a one-probe home test does not prove SCA certification compliance.
- Slightly above 204.8°F: Verify probe accuracy and make sure it is not touching the sprayhead, metal basket, lid, or another hot solid surface. The SCA upper specification is a performance benchmark, not a universal safety cutoff.
- Large repeated swings: Secure the sensor, repeat the test, and check for scale or uneven water delivery according to the brewer manual.
- Normal temperature but poor-tasting coffee: Investigate grind, dose, water ratio, contact time, coffee freshness, and water quality before blaming the heater.
Note: Water boils at a lower temperature as elevation increases. USDA guidance gives about 198°F at 7,500 feet, so the upper end of a sea-level brewing range may be impossible to reach at high elevation. Compare your result with your altitude and the brewer manufacturer’s guidance.
Impact of Roast Type
Roast level can guide small taste experiments, but it does not create a universal temperature rule. Roasting changes coffee structure and chemistry, and research shows that extraction behavior depends on roast development, grind, brewing method, contact time, and the compounds being measured.
As a practical tasting experiment, you can try a light roast toward the warmer portion of your brewer’s normal range and a developed dark roast toward the cooler portion. Treat this as a starting hypothesis rather than a scientific requirement. Keep the rest of the recipe fixed so you can tell whether the temperature change actually helped.
Pro Tip: If a brew runs unusually fast or slow, correct the grind and flow behavior before making large temperature changes. Temperature is often a fine-tuning variable, while grind and contact time can have much larger effects on extraction.
How to Measure Water Temperature in Your Coffee Maker
For a useful home test, use a thin sensor designed to remain in a hot, wet environment throughout the measurement. A thermocouple, resistance temperature probe, or leave-in digital probe is usually easier to position than a thick dial thermometer.
Warning: Brewing water, steam, the sprayhead, and the basket can cause burns. Never hold your hand inside the brew area during operation, force the lid closed on a probe or cable, bypass a lid switch, defeat an interlock, open the machine’s housing, or route a connection where water can reach electrical parts. If the brewer cannot close and operate normally with the sensor installed, do not perform an in-basket probe test.
Tools and Preparation
- A thin thermocouple, resistance temperature probe, or digital sensor rated for continuous use near boiling temperatures
- A meter or display capable of reading at least the expected brewing range
- The coffee maker’s normal basket and filter
- Your usual coffee dose and water volume
- A timer or phone
- Paper or a notes app for recording readings
- An optional heat-safe clip that can secure the probe without touching the sprayhead, basket, or lid
Check the sensor manufacturer’s temperature range, accuracy specification, immersion requirements, and whether the probe can be left in place during heating. An instant-read food thermometer should not be left in the brewer unless its manufacturer specifically permits continuous use.
An infrared thermometer is not suitable for measuring the moving water within a coffee bed. It measures surface infrared radiation rather than the internal slurry temperature needed for this test.
Home Test vs. SCA Certification
A home test can show whether your own brewer heats consistently, but it is not the same procedure used for SCA certification. Current SCA-310 testing uses controlled coffee, water, batch conditions, timed water delivery, and multiple temperature sensors. Its slurry must enter the 90°C to 96°C range by the point when 33% of the water mass has been sprayed and remain there for the rest of the brew.
With one probe at home, you can compare your temperature curve with that general performance band, but you should not label the brewer “SCA compliant,” “SCA certified,” or “failed SCA testing” based on your measurement alone. Check the SCA Certified Home Equipment list if you want to know whether a specific model has completed the official certification process.
Step-by-Step Coffee Maker Temperature Test
- Check the thermometer. Follow the sensor manufacturer’s calibration or accuracy-check procedure first. For a basic low-point check, the USDA ice-water method uses a well-stirred ice-water mixture and expects a reading near 32°F. Because your coffee test occurs near 200°F, a manufacturer-approved boiling-water check can provide a useful second reference. Account for elevation because water does not boil at 212°F everywhere.
- Start with the brewer in its normal condition. Use a normal cold start if you want to know how it performs during everyday use. Do not preheat it unless preheating is part of your routine and you label the result as a warm-start test.
- Prepare a normal brew. Install the correct filter, add your normal coffee dose, and use a normal batch size. Coffee, the filter, and the basket all absorb heat, so a water-only cycle is not an exact substitute.
- Position the probe while the machine is off. Place the sensing area near the top-center portion of the dry coffee bed without pressing it against the basket, sprayhead, lid, or another solid component. Secure the cable so the brewer closes and operates exactly as designed.
- Abandon the test if the probe interferes with the machine. Do not defeat an interlock, leave a safety lid open, pinch the cable, or improvise around electrical components. Use manufacturer support or a qualified service technician if safe access is impossible.
- Start the brew and timer. Do not reach into the basket once hot-water delivery begins. Watch the meter or logger from a safe position.
- Record the temperature curve. Note when water first reaches the coffee, then record readings at regular intervals such as every 15–30 seconds. If your logger can record automatically, a faster interval provides a clearer curve.
- Interpret the warm-up period carefully. Current SCA-310 uses the point when 33% of the water mass has been sprayed rather than a fixed one-minute rule. A normal kitchen test usually cannot measure sprayed-water mass with laboratory precision, so use your readings as a diagnostic comparison rather than a certification pass/fail test.
- Let the cycle finish. Do not remove the sensor until hot-water delivery has stopped and you can avoid steam and hot components.
- Repeat the test. Allow the brewer to return to the same starting condition before repeating a cold-start test. Two or more similar curves are more informative than one isolated reading.
How to Read the Results
| Result | What It May Mean | Next Step |
|---|---|---|
| Approximately 194°F–204.8°F after the brewer has warmed | The home reading is consistent with the temperature band used by current SCA-310 | Do not call this certification; address taste through grind, ratio, time, freshness, or water if needed |
| Slightly low on one test | Probe position, sensor error, cold components, batch size, or normal variation may explain it | Verify the sensor and repeat under the same conditions |
| Consistently below about 194°F during the established brew | Test-method error, scale or flow problems, batch-size effects, or insufficient heating may be involved | Check the manual, descale if instructed, retest, and contact the manufacturer if the problem persists |
| Repeatedly above about 204.8°F | The reading is outside the current SCA-310 performance band, but may also reflect probe contact or measurement error | Verify placement, accuracy, altitude, and the brewer manufacturer’s specification before diagnosing a fault |
| Large repeated fluctuations | The sensor may be moving, water distribution may be uneven, or scale, heater control, and batch size may be contributing | Secure the probe, clean or descale as the manual directs, and repeat the test |
| Violent boiling, uncontrolled steam, leaking, burning odor, or electrical abnormality | This is a safety or equipment-fault concern rather than simply an SCA temperature comparison | Stop using the brewer, unplug it when safe to do so, and contact the manufacturer or an authorized service provider |
A carafe reading can still tell you how hot the finished coffee is or how well a thermal carafe retains heat. It simply answers a different question and should not be compared directly with a coffee-bed temperature specification.
Brewing Methods and Temperature Needs
The same general hot-brewing temperatures appear across several coffee methods, but the measurement point and variables under your control differ. SCA-310 specifically covers filter coffee electrical brewers for home use; it does not establish certification procedures for French presses or manual pour-over devices.
Optimal Temperature for Drip Coffee
For an automatic drip machine, measure in the coffee bed because the machine controls the heater and water delivery. Use the normal filter, dose, and batch size recommended by the manufacturer. A very small batch may heat and flow differently from a medium or full batch.
Do not assume that every household brewer automatically operates within the SCA-310 temperature band. Some models have completed independent SCA certification, while others have not. Certification status and your own temperature measurement are separate questions.
French Press Temperature Guidelines
A French press does not contain an automatic heater, so measure the kettle water immediately before pouring or measure the slurry just after mixing the grounds and water. A four-minute steep is a common starting point, but it is not mandatory, and grind, dose, agitation, and steep time can all be adjusted to taste.
| Roast or Goal | Temperature Starting Point | Steeping Starting Point |
|---|---|---|
| Light roast | Try the warmer part of a normal hot-brew range | About 4 minutes, then adjust to taste |
| Medium roast | Try the middle of the range | About 4 minutes, then adjust to taste |
| Dark roast | Try a modestly cooler starting point | About 4 minutes, then adjust to taste |
| Weak or sour cup | Keep temperature stable first | Try a finer grind or longer steep before making a large temperature change |
| Harsh or overly bitter cup | Try a modestly cooler brew if other variables are controlled | Also consider a coarser grind or shorter steep |
These are tasting starting points rather than formal roast-specific standards.
Pour-Over Temperature Variations
For pour-over coffee, measure the kettle water immediately before pouring. You can also measure the slurry with a thin, leave-in-rated probe if it can be positioned safely without blocking the pour or touching the dripper.
- Preheat the dripper and carafe if that is part of your recipe, then discard the rinse water.
- Keep kettle temperature, dose, water weight, grind, and pour pattern consistent when comparing brews.
- Expect slurry temperature to be lower than kettle temperature because the brewer, grounds, filter, and air absorb heat.
- You can experiment with a somewhat warmer starting point for light roasts and a cooler one for developed dark roasts, but these are taste choices rather than formal standards.
- Correct an unusually fast or slow drawdown with grind size before making large temperature changes.
How to Adjust Coffee Brewing Temperature for Different Roast Levels
Temperature adjustments for roast level should be controlled tasting experiments rather than rigid rules. Start within your brewer’s normal operating range and change only one variable at a time.
| Roast Level | Optional Tasting Start | What to Watch For | Possible Adjustment |
|---|---|---|---|
| Light | Around 200°F–205°F if your brewer allows adjustment | Thin body, sharp sourness, muted sweetness, or an overly long drawdown | Try grind first; then test a small temperature increase if appropriate |
| Medium | Around 198°F–203°F as an experiment | Balance among sweetness, acidity, body, and roast character | Make small changes based on taste while keeping the recipe stable |
| Dark | Around 195°F–200°F as an experiment | Ashy, drying, smoky, or strongly bitter notes | Try a cooler setting, a grind adjustment, or shorter contact time |
These numbers are practical tasting experiments, not scientific roast standards. Bean origin, processing, roast development, age, grind distribution, water chemistry, and brewing method can justify a different setting.
Common Temperature-Related Brewing Issues and Fixes
Use repeated measurements before deciding that a machine is defective. A probe touching the wrong surface can produce a misleadingly high or low reading, and a small batch may behave differently from the brewer’s normal or rated capacity.
The Coffee Maker Temperature Is Too Low
- Confirm that the sensing area is within the upper coffee slurry rather than pressed against a cooler basket wall.
- Check the thermometer’s accuracy and repeat the test with the same batch size.
- Compare the result with your brewer manual and any manufacturer-published temperature specification.
- Use a normal recommended batch size; unusually small batches can behave differently.
- Descale the coffee maker only with the method and product approved for your model. Mineral deposits can alter water flow and heating behavior.
- Clean the sprayhead and basket when the manual permits it.
- Retest from the same starting condition after cleaning.
- Contact the manufacturer if repeated measurements remain abnormally low. Do not modify the thermostat, heater, wiring, thermal fuse, or temperature-control system yourself.
The Coffee Maker Temperature Is Too High
- Make sure the sensor is not touching metal, the sprayhead, lid, or another heated component.
- Verify the thermometer at an appropriate reference temperature and repeat the test.
- Compare the reading with the brewer manufacturer’s specifications and account for sensor accuracy.
- A reading modestly above 204.8°F is outside the current SCA-310 temperature specification but is not, by itself, proof that the machine is unsafe.
- Stop using the brewer if it boils violently, vents uncontrolled steam, leaks near electrical components, smells as though something is burning, trips electrical protection, or otherwise behaves abnormally.
- For persistent abnormal operation, contact the manufacturer or an authorized service provider rather than opening the appliance.
The Temperature Changes Throughout the Brew
Some movement is expected while a cold brewer warms, water pulses through the sprayhead, and the coffee bed becomes saturated. The useful questions are whether the brewer reaches a stable hot-brewing range promptly, remains reasonably controlled during the established portion of the cycle, and produces similar temperature curves in repeated tests.
Large repeatable swings can result from a moving sensor, uneven spray distribution, scale buildup, intermittent heater control, or a batch size outside the brewer’s intended range.
The Carafe Temperature Is Lower Than Expected
A lower carafe temperature does not prove that the brew water was too cool. Measure the coffee bed first. If the brewing temperature appears normal, heat may instead be lost to a cold glass carafe, open lid, cold mug, or poorly insulated thermal carafe.
Prewarming a carafe can reduce heat loss during everyday use if the manufacturer allows it. Do not prewarm the brewer before a diagnostic cold-start test unless you are intentionally comparing cold- and warm-start performance.
Which Flavors Are Affected by Brewing Temperature?
When the rest of the recipe is unchanged, changing water temperature changes extraction kinetics and can therefore alter beverage strength or extraction during a fixed brewing time. A cooler brew may extract differently from a hotter brew, but taste changes cannot always be assigned directly to temperature itself.
In a controlled drip-coffee study published in Scientific Reports, trained sensory panelists found no appreciable temperature-driven sensory difference among brews made at 87°C, 90°C, and 93°C when beverage strength, extraction yield, and serving temperature were matched.
This does not mean brewing temperature is irrelevant. It means temperature often changes flavor indirectly through extraction rate, brew strength, extraction yield, volatility, and the rest of the brewing process. The temperature at which you drink the coffee also affects how aroma, bitterness, sweetness, acidity, and other sensations are perceived.
Maintain a Consistent Brewing Temperature
Consistency makes a diagnostic reading useful. Keep the following conditions the same whenever you compare tests:
- Use the same starting water temperature and water source.
- Use the same filter, coffee dose, grind, and batch size.
- Place the probe at the same depth and position.
- Use the same sensor and meter.
- Test from the same starting condition, such as a fully cooled machine.
- Record readings at the same time intervals.
- Clean and descale the brewer according to its manual.
- Repeat unexpected results before diagnosing a fault.
If a second brew made soon after the first is consistently hotter, record both results. That difference can show that the brewer’s thermal behavior changes after the machine has already warmed.
Experimenting With Coffee Brewing Temperature: Finding Your Preferred Brew
Once you know that your brewer operates consistently, you can use temperature as a taste-adjustment variable. Manual brewers and machines with user-adjustable temperature settings make controlled testing easier than fixed-temperature drip machines.
- Choose one coffee and keep the dose, water amount, grind, filter, and brewing technique unchanged.
- Start around 200°F if your equipment allows direct temperature control.
- Brew and record the water temperature, total brew time, and what you taste.
- Change the temperature by only 2°F or 3°F for the next comparison.
- Let the cups cool to similar drinking temperatures before judging them.
- Return to the setting you preferred and repeat it to see whether the result is reproducible.
If the coffee tastes weak, sharp, or underdeveloped, inspect grind and contact time before moving far outside the brewer’s normal temperature range. If it tastes harsh, drying, or overly intense, a grind or contact-time adjustment may also be more effective than a large temperature change.
Frequently Asked Questions
Can I use a regular thermometer to measure coffee water temperature?
Only if its manufacturer says it can remain in a near-boiling environment for the full measurement. A thin leave-in probe, thermocouple, or similar sensor is preferable. A normal instant-read thermometer is not automatically designed for continuous use, and an infrared thermometer cannot accurately measure the internal temperature of moving water in the coffee slurry.
How often should I test my coffee maker’s water temperature?
Routine weekly testing is usually unnecessary. Test a new brewer if you want a baseline, then retest if brew performance changes unexpectedly, the machine has been descaled or repaired, or you suspect a heating problem.
Can I test the coffee in the carafe instead?
You can measure the carafe if you want to know the finished beverage or holding temperature. It cannot tell you exactly how hot the water was where it contacted the coffee because heat is lost before the beverage reaches the carafe.
Can I run the test without coffee grounds?
A water-only cycle can provide a basic diagnostic comparison, but it does not reproduce the heat absorbed by coffee grounds, the filter, and the wet coffee bed. Use a normal filter and coffee dose when you want a result that better represents everyday brewing, unless the manufacturer instructs otherwise.
Does a home temperature test prove that my brewer meets SCA certification?
No. A home test is useful for diagnosis, but SCA-310 certification uses controlled test conditions, multiple sensors, defined coffee and water parameters, water-delivery measurements, repeated cycles, and additional extraction and consistency requirements. Check the official SCA certified-equipment list for a model’s certification status.
Does water temperature affect caffeine extraction?
Temperature can change extraction kinetics, including the rate at which caffeine and other soluble compounds enter the brew. Final caffeine content also depends on coffee dose, coffee variety, roast, grind, contact time, brewing method, water amount, and beverage yield, so temperature alone cannot predict the caffeine in a cup.
What should I do if my coffee maker exceeds 205°F?
First confirm that the sensor is not touching the sprayhead, basket, lid, or another hot solid component, then verify the thermometer and repeat the test. A temperature above the SCA-310 upper specification is not automatically a safety emergency. Compare it with your manufacturer’s specifications. Stop using the brewer if it also boils violently, produces uncontrolled steam, leaks, smells burnt, or shows another abnormal condition.
Can water temperature affect coffee’s acidity?
Temperature can change extraction behavior and therefore the balance of compounds in a cup, but perceived acidity also depends on the coffee itself, roast, grind, water chemistry, strength, extraction yield, brew time, and drinking temperature. A sour cup alone does not prove that a coffee maker is too cool.
Why does my coffee maker read below 194°F?
Possible causes include probe position, sensor accuracy, a small batch, the normal cold-start warm-up period, scale or restricted flow, or insufficient heating. Verify the test method and compare the result with the manufacturer’s instructions before diagnosing a fault.
Does high altitude change the target temperature?
Altitude changes what temperatures liquid water can reach at atmospheric pressure because the boiling point falls as elevation increases. USDA guidance gives a boiling point of about 198°F at 7,500 feet. At high elevation, compare your brewer with its manufacturer’s high-altitude guidance rather than expecting a sea-level temperature curve.
Conclusion
To test your coffee maker meaningfully, measure the coffee-bed temperature during a normal brew rather than treating the finished carafe temperature as the brew-water temperature. Use a continuous-use sensor that can be installed without defeating a lid, switch, interlock, or other safety feature.
For a modern reference point, current SCA-310 home-brewer specifications use a slurry range of 90°C to 96°C, or 194°F to 204.8°F, reached by the time 33% of the water mass has been sprayed and maintained afterward. A one-probe kitchen test can help you compare your brewer with that range, but it is not an SCA certification test.
Repeat unexpected results, verify the thermometer and sensor position, check the brewer manual, and descale only as the manufacturer directs before assuming that a heater has failed. Once temperature consistency is confirmed, use grind size, dose, water ratio, contact time, water quality, and small temperature changes to refine the cup.
Sources
- Specialty Coffee Association — Coffee Standards — current standards catalog identifying SCA-310 Home Coffee Brewers: Specifications and Test Methods
- Specialty Coffee Association — Certified Home Equipment — current home-brewer certification program and certified-equipment information
- Scientific Reports — Brew Temperature, at Fixed Brew Strength and Extraction, Has Little Impact on the Sensory Profile of Drip Brew Coffee — relationship among brew temperature, strength, extraction yield, and sensory results
- National Coffee Association — Drip Coffee Guide — drip-brewing technique, grind, equipment use, and cleaning guidance
- USDA Food Safety and Inspection Service — Food Thermometers — thermometer calibration, ice-water checking, boiling-water checking, and continuous-use precautions
- USDA Food Safety and Inspection Service — High Altitude Cooking — effect of elevation on water’s boiling point