Weak coffee from a coffee maker usually comes from one of two problems: the drink is too diluted for the amount of coffee used, or the grounds are not being extracted well. Common causes include too much water, too little coffee, a grind that is too coarse, stale coffee, low brewing heat, uneven water distribution, or a machine that needs cleaning. Work through the checks below in order and change one variable at a time.
Quick Answer
To fix weak coffee, first measure the coffee and water instead of relying on scoops or cup markings. Use a medium drip grind, make sure the filter and basket are seated correctly, and check that all grounds get wet. If the brewer has become slower, cooler, or inconsistent, clean and descale it according to its manual.
Key Takeaways
- Separate a diluted cup from an under-extracted cup before changing the recipe.
- For troubleshooting, a measured 1:16 coffee-to-water ratio is a practical control recipe; adjust from there to taste.
- For automatic drip coffee, start with a medium grind and move slightly finer if the brew is fast, thin, or watery.
- Use fresh coffee stored in an airtight, opaque container away from heat, moisture, and light.
- Confirm the filter fits properly and the showerhead wets the coffee bed evenly.
- Use the correct small-batch, bold, or strong setting when your brewer provides one.
- Persistent lukewarm brewing, leaks, early shutoff, or changing output volume can indicate an appliance problem rather than a recipe problem.
At a Glance
| Time Required | 10–30 minutes for diagnosis; a full descale cycle may take longer |
| Difficulty | Easy |
| Tools Needed | Digital scale, fresh coffee, correct filter, measuring cup, and optional food thermometer |
| Cost | Often $0 if you already have the needed tools; approved descaler, filters, or replacement parts vary by model |
Common Causes of Weak Coffee
Weak coffee is not always caused by the beans. The recipe, grind, filter, water delivery, brewing heat, machine settings, and condition of the brewer all affect the result.

Power your essentials anywhere with a 999Wh pure sine wave power station delivering up to 1000W continuous with 2000W surge. It supports fast charging via USB-C PD 60W and USB-A QC 18W, plus simultaneous output for multiple devices through AC, USB, wireless, and car/DC ports. Recharge using AC, car, or solar with a built-in MPPT controller and dual cooling fans, while the upgraded battery management system protects against surges, short circuits, and overheating.

FLAVOR EXPERIENCE: Bright Ethiopian Yirgacheffe coffee with vibrant berry, rich chocolate, and delicate floral notes. This smooth medium roast delivers a balanced, aromatic cup crafted for specialty coffee lovers.

SINGLE ORIGIN PERUVIAN COFFEE BEANS: Twiga Coffee’s organic Peruvian coffee beans come from select single-origin Peru coffee farms. These freshly roasted whole beans deliver a rich, full-bodied medium roast experience for lovers of Peruvian coffee.
First Decide: Is It Diluted or Under-Extracted?
A cup can taste weak for two different reasons. If it tastes fairly balanced but simply light or thin, the coffee-to-water ratio may be too dilute. If it tastes thin, sharply sour, hollow, or undeveloped, the water may not be extracting enough flavor from the grounds. That can happen when the grind is too coarse, contact time is too short, or brewing water is too cool.
- Too little coffee: Using too few grounds for the amount of water reduces drink strength.
- Too much water: Coffee-maker cup markings are not standardized to an 8-fluid-ounce household cup. Check the manual or measure the reservoir water yourself.
- Grounds that are too coarse: Water can pass through quickly without extracting enough flavor.
- Stale coffee: Coffee gradually loses aroma and flavor after roasting, especially after the package is opened or the beans are ground.
- Wrong brew mode: On brewers with small-batch, bold, strong, or cup-size controls, the selected mode can change contact time, flow, or dilution.
- Uneven water flow: A folded filter, blocked showerhead, misplaced basket, or mound of grounds can let water bypass part of the coffee.
- Low brewing temperature: Scale buildup or a heating problem can reduce effective brewing heat.
- An incomplete brew cycle: Early shutoff, a blocked valve, or poor water flow can reduce contact time or final output.
Note: Roast level changes flavor and body. A light roast may taste brighter or less heavy than a dark roast without being incorrectly brewed. Diagnose the cup by its balance, concentration, flow, and extraction symptoms rather than color alone.
How to Fix Weak Coffee: Coffee-to-Water Ratio
Begin with a repeatable recipe before changing the machine or grind. The National Coffee Association’s drip-coffee guide gives a starting measure of 1 to 2 tablespoons of ground coffee for every 6 fluid ounces of water. A digital scale is more repeatable because tablespoons vary with grind size and how tightly the coffee is packed.
For troubleshooting, a practical control recipe is 1 gram of coffee for every 16 grams of water. Brew that recipe once, record the result, and then adjust one variable at a time.
The 1:16 ratio is a troubleshooting baseline, not a universal rule. The Specialty Coffee Association’s home-brewer certification requirements use a Gold Cup coffee dose of about 55 grams per liter, which is roughly 1:18 by mass. Your preferred strength may be higher or lower, and your brewer may have its own recommended dose range.
Coffee Ratio Examples
| Water | Coffee at 1:16 | Approximate Yield |
|---|---|---|
| 288 g | 18 g | About one large mug |
| 480 g | 30 g | About two mugs |
| 720 g | 45 g | About three mugs |
| 960 g | 60 g | About four mugs |
If the 1:16 recipe tastes balanced but lighter than you prefer, try 1:15 on the next brew. For example, use 32 grams of coffee with 480 grams of water. Do not exceed the maximum coffee dose or basket capacity listed for your machine. Too much coffee can cause slow drainage or overflow.
Check the Machine’s Actual Water Output
- Make sure the machine is cool and empty.
- Measure a known amount of water with a kitchen measuring cup and pour it into the reservoir.
- Run a water-only cycle with no coffee.
- After the water has cooled enough to handle safely, measure what reached the carafe.
A small amount of water may remain inside some machines by design, so compare your result with the manual when possible. A large unexplained difference can point to scale, a blockage, a leak, a reservoir problem, or a valve or pump issue. Consult the manual before removing any parts.
Pro Tip: Record the coffee dose, water weight, grind setting, bean, brew mode, and result. Change only one item on the next brew. This makes it much easier to identify what actually fixed the weak taste.
Adjust Grind Size to Fix Weak Coffee
Grind size affects flow rate, contact with water, extraction, and flavor balance. The National Coffee Association recommends starting with a medium grind for automatic drip coffee. Espresso normally uses a fine grind, while French press generally uses a coarse grind.
How to Adjust the Grind
- Watery coffee and a fast brew: Move one small step finer.
- Thin, sharply sour, or hollow coffee: Try one small step finer if the basket is draining normally.
- Bitter coffee or a slow-draining basket: Move slightly coarser.
- Grounds overflowing the filter: Use a coarser drip grind, reduce the dose if it exceeds the machine’s capacity, and confirm the filter is the correct size.
Small changes matter. As Baratza explains, grind size changes flow rate, extraction, and flavor balance. For a more consistent grind, the National Coffee Association recommends a burr grinder over a blade grinder, which can make extraction easier to repeat.
When using pre-ground coffee, choose a package intended for automatic drip machines. Do not assume espresso-fine coffee will make drip coffee stronger; it can slow or clog the filter and may produce harsh flavors. If the cup is balanced but simply light, increase the coffee dose within the brewer’s capacity before making a large grind change.
Check Coffee Freshness, Water, and Brew Time
Use Fresh, Properly Stored Coffee
Coffee does not suddenly become unusable one month after roasting, but aroma and flavor fade over time. The National Coffee Association recommends protecting coffee from air, moisture, heat, and light and buying quantities you can use while they remain fresh.
- Store beans or grounds in an airtight, opaque container.
- Keep the container in a cool cabinet away from the oven, dishwasher, and direct sunlight.
- Buy smaller amounts rather than keeping an opened supply for a long period.
- Grind only the amount needed immediately before brewing when possible.
The NCA’s current storage guide says opened roasted beans kept at room temperature in an airtight container generally retain freshness for about 1–3 weeks, while ground coffee is generally listed at about 1–2 weeks. These are freshness guides, not food-safety expiration dates. Packaging, storage conditions, and your own aroma and flavor judgment still matter.
Use Suitable Brewing Water
Use fresh, cold water that tastes clean on its own. The National Coffee Association recommends cold water, filtered if possible, and advises avoiding distilled or softened water for drip coffee. Water minerals influence extraction and taste, and some coffee makers also have model-specific water requirements, so follow the manual if it gives different instructions.
Check the Brewing Time
Automatic drip machines control most of the contact time, but an unusually quick cycle can leave coffee weak. The NCA lists approximately five minutes of coffee-water contact as a general drip-coffee reference. The Specialty Coffee Association’s home-brewer certification requirements use a broader full-capacity contact-time window of more than four minutes and less than eight minutes, depending on the brewer and grind.
- If the machine finishes much faster than it once did, inspect the grind, filter position, and selected brew mode.
- If it stops before using the expected reservoir water, check for an error light, blocked valve, scale, or sensor problem.
- If water sits above the grounds and drains very slowly, the grind may be too fine, the dose may be too high, or the filter may be clogged.
- If your brewer has a half-batch or small-batch mode, use it for small brews so the machine can adjust its cycle as designed.
Check Brewing Temperature
Brewing water must be hot enough to extract flavor efficiently. The Specialty Coffee Association’s minimum certification requirements for home coffee brewers specify that water at the coffee bed should reach 92°C within the first minute, remain at least 92°C, and never exceed 96°C during the rest of the brew cycle. That is about 198°F to 205°F at the grounds.
Temperature is only one part of extraction. A hotter brew is not automatically stronger, and you should not try to modify an appliance’s internal thermostat or heater. Consider dose, grind, flow, and contact time together.
Signs the Coffee Maker May Be Brewing Too Cool
- The finished coffee is consistently lukewarm immediately after brewing.
- The machine takes much longer to heat than it once did.
- The brew cycle pauses repeatedly without a programmed pre-infusion or bloom feature.
- Descaling improves the flow but the coffee remains unusually cool and weak.
If you choose to check temperature, take a cautious reading from the hot liquid as it enters a preheated carafe. That reading can be lower than the temperature at the grounds because heat is lost during travel. Do not place your hand beneath the showerhead or reach into a running machine.
Warning: Brewing water, the basket, hot plate, carafe, and steam can cause burns. Unplug the coffee maker and let it cool before cleaning or repositioning parts. Never immerse the machine base or open its housing to inspect the heater, wiring, pump, or control board.
Inspect the Filter Basket and Water Flow
Even with the correct ratio and grind, coffee can taste weak when water avoids part of the grounds or the basket cannot drain as intended.
Check the Filter and Basket
- Use the filter shape and size listed in the machine’s manual.
- Open a paper filter fully so it sits against the basket walls.
- Make sure the filter is not folded, collapsed, torn, or blocking the basket outlet.
- Seat the basket completely so the machine’s drip-stop valve can work correctly.
- Level the dry grounds with a gentle shake instead of leaving them in a tall mound.
- Do not combine paper and permanent filters unless the manufacturer specifically allows it.
- Do not exceed the brewer’s maximum grounds dose or basket capacity.
After brewing, inspect the coffee bed once it is cool. Most of the grounds should be wet. Large dry patches suggest that the showerhead or spray arm is not distributing water evenly, or that the basket or filter is directing water around part of the coffee.
Check the Showerhead or Spray Arm
Unplug the cooled machine and inspect accessible water openings for visible coffee residue or mineral deposits. Clean only as directed in the manual. Do not insert metal objects into valves, tubing, needles, or electrical areas unless the manufacturer’s instructions specifically tell you to use a supplied cleaning tool.
Check Strength and Batch Settings
If the brewer includes controls such as Strong, Bold, Rich, Small Batch, or a selectable cup size, confirm that the setting matches the amount you are brewing. These controls are model-specific: some change flow or contact time, while others change water volume. Use the manual rather than assuming every “strong” mode works the same way.
For Weak Single-Serve or Pod Coffee
- Select a smaller cup size so the fixed coffee dose is diluted with less water.
- Use the “strong” or “bold” option when your model provides one.
- Confirm the pod is seated correctly and is compatible with the brewer.
- Clean the entrance and exit needles only according to the manufacturer’s instructions.
- Descale the brewer if flow has slowed, become irregular, or changed volume.
Do not run brewed coffee through the same used grounds or pod again. The first cycle has already removed much of the desirable soluble material, so a second pass usually adds thin, stale, or bitter flavors rather than useful strength.
Maintenance Tips for Consistent Brewing Quality
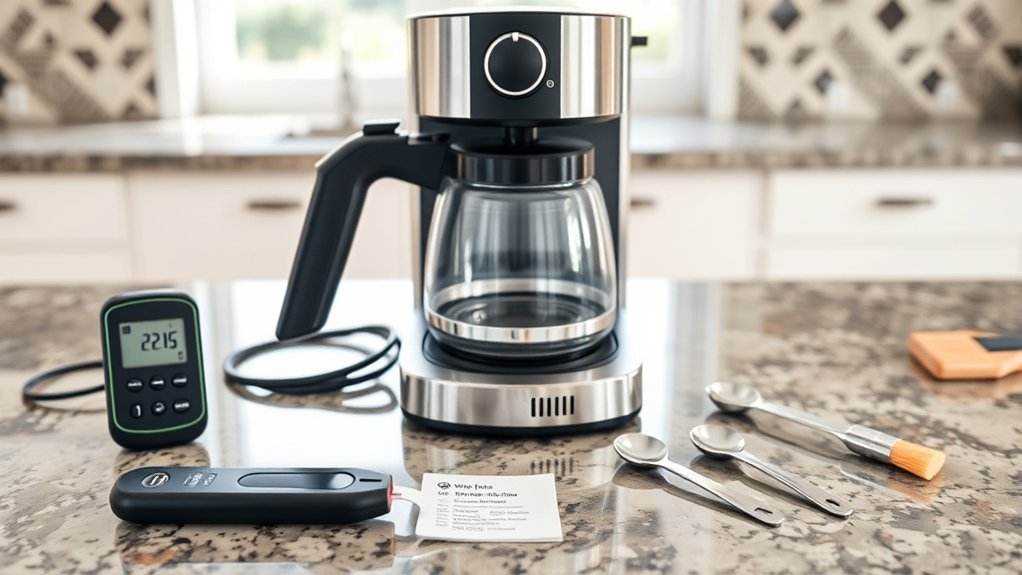
Coffee oils, fine grounds, and mineral deposits can change water flow and flavor. Maintenance frequency depends on the machine, water hardness, and number of brews, so use the manual as the final authority.
| Maintenance Task | Practical Frequency |
|---|---|
| Discard grounds and rinse removable coffee-contact parts | After each use |
| Wash the carafe, basket, lid, and permanent filter | After each use or as directed in the manual |
| Wipe accessible showerhead and exterior surfaces | Weekly or when residue is visible |
| Descale the internal water path | Follow the manual; many manufacturers use an interval around every 3–6 months, with earlier descaling in hard-water conditions |
| Replace the brewer’s water filter | Follow the filter instructions or replacement indicator |
| Clean the grinder and inspect grind consistency | Follow the grinder manual and clean sooner if grounds become noticeably uneven or stale residue builds up |
The NCA says major manufacturers commonly recommend descaling a drip coffee maker at least every three to six months, while the exact procedure differs by brewer. Keurig also gives a typical interval of every three to six months for its brewers. Follow your own manual and use only the descaling product or vinegar procedure approved for your exact model.
Note: Do not mix vinegar, commercial descaler, bleach, ammonia, or other cleaners. Rinse the brewer for the number of cycles required by its manual before making coffee again.
Weak Coffee Troubleshooting Chart
| Symptom | Likely Cause | What to Try |
|---|---|---|
| Balanced but too light | Too much water or too little coffee | Use a measured control recipe and increase the dose or reduce water within the brewer’s limits |
| Thin and sharply sour or hollow | Under-extraction, low heat, coarse grind, or short contact time | Move slightly finer, confirm heat and brew mode, and inspect water distribution |
| Weak only on large cup settings | A fixed coffee dose is being diluted with more water | Select a smaller cup, use a stronger mode, or increase the dose within capacity |
| Weak only on small drip batches | Brewer cycle may be optimized for a larger batch | Use the small-batch or half-carafe mode if the machine provides one |
| Dry patches in used grounds | Uneven spray pattern, folded filter, or grounds bypass | Reseat the filter and basket; clean accessible spray openings as directed |
| Weak coffee after changing beans | Different roast, freshness, density, or grind behavior | Return to a measured recipe and adjust dose or grind gradually |
| Lukewarm coffee and slow heating | Scale buildup or heating-system problem | Descale as directed; seek service if the problem continues |
| Less coffee than expected | Retained water, blockage, leak, reservoir, valve, pump, or sensor issue | Measure output, inspect accessible parts, and consult model support |
When the Coffee Maker May Need Service
Stop adjusting the recipe and consult the manufacturer when the machine shows one or more of these problems after proper cleaning and descaling:
- It repeatedly stops before the reservoir empties or before the programmed brew finishes.
- Water leaks from the base or near the power cord.
- The coffee remains lukewarm immediately after brewing.
- The pump becomes unusually loud, weak, or intermittent.
- The machine produces a burning smell, sparks, smoke, or repeated electrical trips.
- Its output volume changes significantly despite using the same measured water and settings.
Unplug a leaking, smoking, sparking, or burning-smelling appliance immediately if it is safe to do so. Do not operate it again until it has been inspected or replaced.
Frequently Asked Questions
Can old coffee beans cause weak coffee?
Yes. Coffee gradually loses aroma and flavor after roasting and opening, especially when exposed to air, moisture, heat, or light. Store it in an airtight, opaque container, buy manageable quantities, and use aroma and taste as freshness checks.
How often should I clean my coffee maker?
Discard grounds and rinse or wash removable coffee-contact parts after each use. Descale according to the manufacturer’s instructions. A three-to-six-month interval is common, but hard water, a descale alert, slow flow, or a change in brewing performance may require earlier service.
Does the type of water affect coffee strength?
Yes. Water affects extraction and flavor. Use fresh, cold water that tastes clean. The NCA recommends filtered water when possible and advises avoiding distilled or softened water for drip coffee. Follow your coffee maker’s manual if it gives model-specific water requirements.
Can I use pre-ground coffee for a stronger flavor?
Yes, but use coffee ground for your brewing method. For automatic drip, begin with a medium drip grind. If the coffee is balanced but too light, increase the dose within the brewer’s capacity before choosing a much finer grind.
What is the best brewing time for strong drip coffee?
There is no single time for every automatic brewer. The NCA gives about five minutes of coffee-water contact as a general drip reference, while SCA home-brewer certification uses a full-capacity contact-time window of more than four and less than eight minutes. An unusually fast, watery brew may improve with a slightly finer grind or the correct batch setting.
Why is coffee from my pod machine weak?
A large cup setting can dilute the fixed amount of coffee inside the pod. Try a smaller serving, select a strong mode if available, confirm the pod is compatible and seated correctly, clean the needles as directed, and descale the machine if its flow or output has changed.
Why is my coffee weak only when I brew a small batch?
Some drip brewers change flow, contact time, or hot-plate behavior for smaller batches. If your machine has a small-batch or half-carafe setting, use it. Also confirm that you are measuring both coffee and water rather than relying only on cup markings.
Can I brew the same coffee grounds twice?
It is not recommended. The first cycle removes much of the desirable soluble material. Brewing the used grounds again generally produces a thin cup with stale or bitter flavors instead of stronger coffee.
Conclusion
Start with measured coffee and water, a medium drip grind, fresh coffee, clean water, and the correct brew mode. If the cup is still weak, check the filter position, used coffee bed, water output, brewing heat, and cycle length. Clean or descale the brewer according to its own manual. If weak coffee continues alongside low heat, leaks, early shutoff, unusual pump behavior, or changing water volume, the machine may need professional service or replacement.
Sources
- National Coffee Association: Drip Coffee — ratio guidance, medium grind, water choice, general brew time, cleaning, and descaling
- National Coffee Association: Storage and Shelf Life — freshness windows and storage recommendations
- Specialty Coffee Association: Minimum Certification Requirements for Coffee Brewers — Gold Cup dose, basket capacity, contact time, and brewing temperature
- National Coffee Association: Pour-Over Coffee — burr-versus-blade grinder guidance and grind consistency
- Baratza: Switching Grind Settings With Confidence — how grind adjustments affect flow, extraction, and flavor balance
- Keurig: Descaling Guidance — manufacturer example of descaling purpose and frequency