Making baby food at home gives you control over ingredients, texture, and portion size. It can be a practical way to introduce a variety of foods once your baby is developmentally ready for solids, usually around 6 months. Safe preparation matters, however, because infants are more vulnerable to choking, allergic reactions, and foodborne illness.
Quick Answer
To make baby food at home, wash your hands and ingredients, cook foods until soft and safely done, then mash or blend them to a texture your baby can manage. Serve a small portion immediately or refrigerate it within two hours. Use refrigerated homemade baby food within 1–2 days or freeze it for 1–2 months.
Key Takeaways
- Start complementary foods at about 6 months when your baby can control the head and neck, sit with support, and swallow food rather than push it out.
- Offer more than fruit and vegetables. Include iron-rich foods such as meat, eggs, beans, lentils, tofu, and iron-fortified infant cereal.
- Prepare food to match your baby’s current eating skills, and always supervise your baby while they sit upright to eat.
- Introduce common allergens in safe, age-appropriate forms instead of delaying them without a medical reason.
- Refrigerate homemade baby food promptly and use it within 1–2 days, or freeze labeled portions for 1–2 months.
- Homemade baby food is not a substitute for breast milk or infant formula and should never be confused with homemade infant formula.
At a Glance
| Time Required | About 25–45 minutes, depending on the ingredient and cooking method |
| Difficulty | Easy |
| Tools Needed | Knife, cutting board, saucepan or steamer, fork or blender, food thermometer for meat, spoon, and airtight containers |
| Cost | Varies by ingredient; no special baby-food appliance is required |
Warning: Homemade baby food is not homemade infant formula. Breast milk or commercially prepared infant formula remains an important source of nutrition during the first year. The FDA advises against homemade formula because it may contain unsafe amounts of nutrients or harmful contaminants.
The Benefits of Making Homemade Baby Food
When you make baby food at home, you decide which ingredients to use, how much to prepare, and how smooth or textured the food should be. That flexibility can be helpful when your baby is learning to manage new tastes and textures.
Homemade food may also make it easier to adapt part of a family meal for a baby. For example, you can set aside unsalted vegetables, beans, meat, or grains before adding sauces or extra seasoning to the rest of the meal.
The main advantage of homemade baby food is flexibility—not a guarantee that it is safer, cheaper, or more nutritious than every commercial option.
Commercial baby food can also be nutritious and convenient. Homemade and store-bought foods may be used together. Whichever option you choose, focus on nutrient density, safe texture, hygiene, and variety rather than relying on labels such as “homemade,” “natural,” or “organic.”

Power your essentials anywhere with a 999Wh pure sine wave power station delivering up to 1000W continuous with 2000W surge. It supports fast charging via USB-C PD 60W and USB-A QC 18W, plus simultaneous output for multiple devices through AC, USB, wireless, and car/DC ports. Recharge using AC, car, or solar with a built-in MPPT controller and dual cooling fans, while the upgraded battery management system protects against surges, short circuits, and overheating.

Make fresh, delicious food with wholesome ingredients. You control exactly what goes in - no hidden stabilizers, preservatives, or flavor enhancers necessary.
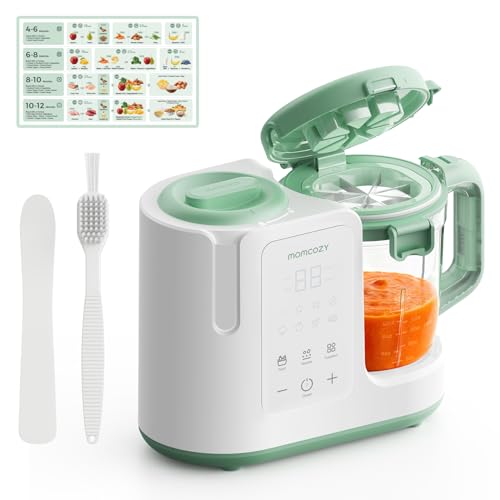
𝟑-𝐌𝐢𝐧𝐮𝐭𝐞 𝐏𝐫𝐞𝐩, 𝐈𝐭 𝐇𝐚𝐧𝐝𝐥𝐞𝐬 𝐭𝐡𝐞 𝐑𝐞𝐬𝐭 - Spend just 3 minutes prepping — the Momcozy Baby Food Maker automatically steams and blends in 18–25 minutes. No food transferring needed. For frozen ingredients, extend the duration in Auto Mode. Making fresh, healthy baby puree has never been easier.
When Is a Baby Ready for Solid Food?
The Centers for Disease Control and Prevention recommends introducing complementary foods at about 6 months, when a baby is developmentally ready. Starting before 4 months is generally too early.
Common signs of readiness include:
- Controlling the head and neck.
- Sitting upright alone or with support.
- Opening the mouth when food is offered.
- Swallowing food instead of pushing it back out with the tongue.
- Bringing objects toward the mouth.
- Showing interest in food.
Age alone does not determine readiness. Premature babies and babies with developmental, swallowing, or growth concerns may need an individualized feeding plan from a pediatrician or feeding specialist.
Note: Complementary food adds to breast milk or infant formula; it does not immediately replace it. During the first year, milk feeds continue while the amount and variety of solid food gradually increase.
Choosing Ingredients for Homemade Baby Food
A balanced homemade baby-food plan includes fruits, vegetables, protein foods, grains, and healthy fats. There is no required order for first foods, and a baby does not need to begin with fruit or cereal.
Seasonal Produce Selection
Seasonal produce can offer good flavor and value, but it is not required. Fresh, frozen, organic, and conventionally grown fruits and vegetables can all be used.
Useful options include:
- Soft fruits: Banana, ripe pear, peach, mango, avocado, and cooked apple.
- Cooked vegetables: Sweet potato, squash, peas, broccoli, cauliflower, carrots, and green beans.
- Frozen produce: Plain frozen fruit or vegetables without added sugar, salt, sauces, or seasoning.
- Family ingredients: Unsalted beans, lentils, meat, fish, grains, or vegetables set aside before the family meal is heavily seasoned.
Wash fresh produce under running tap water before peeling, cutting, or cooking it. The FDA advises against washing produce with soap, detergent, bleach, or commercial produce wash.
Nutrient-Rich Options
Fruit and vegetables supply valuable nutrients, but babies also need foods that provide iron, zinc, protein, and fat. At about 6 months, iron-rich complementary foods become especially important.
- Heme iron: Beef, lamb, pork, chicken, turkey, fish, and fully cooked egg.
- Plant iron: Lentils, beans, peas, tofu, and iron-fortified infant cereal.
- Healthy fats: Avocado, plain full-fat pasteurized yogurt, olive oil mixed into a meal, and safely prepared nut or seed butter after introduction.
- Whole grains: Oat, barley, multigrain infant cereal, quinoa, soft pasta, and well-cooked grains.
The CDC lists meat, poultry, seafood, eggs, legumes, and iron-fortified products as useful iron sources. Pairing plant sources of iron with foods containing vitamin C, such as broccoli, strawberries, tomato, or sweet potato, may support iron absorption.
If you use infant cereal, rotate oat, barley, multigrain, and other fortified cereals instead of serving only rice cereal. The CDC notes that relying only on infant rice cereal can increase arsenic exposure.
Allergen Awareness
Potentially allergenic foods include peanut, egg, cow’s-milk products, wheat, soy, sesame, fish, shellfish, and tree nuts. Current guidance does not recommend delaying these foods solely to prevent allergy once a baby is ready for complementary foods.
Introduce allergens one at a time in a safe form and when your baby is healthy. Offer the food earlier in the day so you have time to watch for a reaction.
- Peanut: Thin smooth peanut butter with warm water, breast milk, formula, or a familiar puree. Never offer whole peanuts or a thick spoonful of peanut butter.
- Egg: Serve fully cooked egg mashed with water or a familiar food.
- Dairy: Use plain, pasteurized yogurt or soft pasteurized cheese. Cow’s milk should not replace breast milk or formula as a drink before 12 months.
- Wheat: Offer smooth wheat cereal or very soft wheat-based food.
- Fish: Cook thoroughly, remove all bones, and mash finely.
- Tree nuts or sesame: Use a smooth, thinned nut or seed butter rather than whole nuts or seeds.
If your baby has severe eczema, an existing egg allergy, or a previous food reaction, talk with your child’s clinician before introducing peanut. The NIAID peanut-allergy prevention guidelines discuss supervised or clinician-guided introduction as early as 4–6 months for some high-risk babies.
Step-by-Step Guide to Preparing Baby Food
1. Start With Clean Hands and Equipment
Wash your hands with soap and water for at least 20 seconds. Wash the countertop, cutting board, knife, bowls, blender parts, utensils, and storage containers with hot, soapy water.
Keep raw meat, poultry, fish, and eggs separate from produce and ready-to-eat food. Use separate cutting boards when possible.
2. Wash and Prepare the Ingredients
Rinse fresh produce under running water, even when you plan to peel it. Cut away bruised or damaged areas. Remove pits, seeds, tough skins, bones, gristle, and excess fat as appropriate.
Do not wash raw poultry or meat, because splashing water can spread bacteria around the sink and kitchen.
3. Cook Until Soft and Safely Done
Steam, bake, roast, simmer, or boil fruit and vegetables until they are soft enough to mash easily with a fork. Use as little cooking water as practical and avoid adding salt or sugar.
Cook meat, poultry, fish, and eggs thoroughly. Use a food thermometer rather than judging doneness by color alone. Poultry and leftovers should reach 165°F. Ground meats should reach 160°F. Fish should reach 145°F or cook until opaque and easy to separate with a fork.
4. Mash or Blend to the Right Texture
Transfer the cooked food to a clean bowl, food processor, blender, or food mill. Add a small amount of water, breast milk, or prepared infant formula if needed.
Begin with a smooth, soft texture for a baby who is just learning to swallow food. As eating skills improve, move toward thicker mashed foods, soft lumps, finely minced food, and safe finger foods. Staying with completely smooth puree for too long may limit opportunities to practice new oral skills.
5. Check the Temperature
Let hot food cool before serving. Stir well and test a small amount on the inside of your wrist or with a clean spoon. It should feel lukewarm, not hot.
6. Serve a Small Portion
Spoon only the amount you expect your baby to eat into a separate bowl. Begin with one or two spoonfuls and offer more based on hunger cues.
Do not feed directly from the storage container and then refrigerate the remainder. Saliva transferred from the spoon can contaminate the food.
7. Cool and Store Extra Food Promptly
Divide unused food into shallow, clean containers and refrigerate or freeze it promptly. Do not leave perishable baby food at room temperature for more than two hours, or more than one hour when the temperature is above 90°F.
8. Label Each Container
Write the food name and preparation date on every container or freezer bag. Place older portions toward the front so they are used first.
Pro Tip: Freeze small portions rather than one large container. You can thaw only what your baby needs, reducing waste and avoiding the need to refreeze leftovers.
Essential Tools for Preparing Baby Food

You do not need a dedicated baby-food maker. Basic kitchen equipment is enough for most recipes.
Essential Kitchen Equipment
- Knife and cutting board: For trimming and cutting ingredients into evenly sized pieces.
- Saucepan, steamer basket, or baking sheet: For cooking food until tender.
- Fork or potato masher: Useful for banana, avocado, soft vegetables, beans, egg, and other easy-to-mash foods.
- Blender, immersion blender, or food processor: Helpful when a very smooth texture is needed.
- Fine-mesh strainer or food mill: Optional for removing tough fibers or achieving an extra-smooth texture.
- Food thermometer: Important when cooking meat, poultry, fish, eggs, and combination meals.
- Clean spoon and serving bowl: Keep the serving portion separate from stored food.
Food Storage Solutions
Choose containers that are clean, food-safe, freezer-safe when needed, and easy to seal. Useful options include:
- Small glass or BPA-free plastic containers with tight lids.
- Covered silicone portion trays.
- Clean ice cube trays that can be tightly covered.
- Freezer bags for storing fully frozen portions.
Leave space at the top of rigid freezer containers because food expands as it freezes. Do not use cracked glass, damaged lids, or containers that are not intended for freezing.
Best Practices for Storing and Freezing Homemade Baby Food
Keep the refrigerator at 40°F or below and the freezer at 0°F or below. The following conservative limits work well for general homemade baby food and mixed recipes.
| Food or Situation | Safe Handling |
|---|---|
| Freshly made baby food | Refrigerate for 1–2 days. |
| Frozen homemade baby food | Use within 1–2 months for a conservative general limit. |
| Food left at room temperature | Discard after 2 hours, or after 1 hour above 90°F. |
| Food touched by the baby’s spoon or mouth | Discard after the feeding; do not return it to storage. |
| Thawed food | Use promptly. Do not refreeze food that has been warmed, served, or exposed to saliva. |
Labeling every portion with the food and preparation date is one of the simplest ways to prevent forgotten or over-aged baby food.
How to Freeze Baby Food
- Cool the cooked food promptly.
- Spoon it into small freezer-safe portions.
- Cover the tray or seal the container.
- Freeze until solid.
- Transfer cubes to a labeled freezer bag if desired.
- Remove only the amount needed for one meal.
How to Thaw and Reheat Baby Food
Thaw frozen baby food in the refrigerator, under cold running water in a sealed container, or in the microwave when it will be served immediately. Do not thaw perishable food on the counter.
When using a microwave:
- Transfer the food to a microwave-safe dish rather than heating it in a storage jar.
- Heat in short intervals.
- Stir thoroughly to distribute hot spots.
- Let the food stand briefly.
- Test the temperature before feeding.
Discard any food remaining in the serving bowl after the meal.
Ensuring Baby Food Safety and Nutrition

Children younger than 5 have a higher risk of serious foodborne illness. Follow the four basic food-safety steps: clean, separate, cook, and chill. Detailed storage and preparation guidance is available from FoodSafety.gov’s guidance for children under five.
Foods and Drinks to Avoid or Limit
- Honey before 12 months: Honey can cause infant botulism, including when it is cooked or added to another food.
- Unpasteurized foods and drinks: Avoid raw milk, unpasteurized yogurt or cheese, and unpasteurized juice.
- Added sugars: Babies and young children do not need foods or drinks with added sugar.
- High-sodium foods: Avoid heavily salted food, processed meat, salty snacks, and many packaged adult meals.
- Cow’s milk as a drink before 12 months: It should not replace breast milk or infant formula. Pasteurized yogurt and cheese can be introduced earlier in suitable forms.
- Fruit or vegetable juice before 12 months: Whole fruit is preferred.
- High-mercury fish: Avoid shark, swordfish, king mackerel, marlin, orange roughy, bigeye tuna, and Gulf of Mexico tilefish.
- Raw or undercooked animal foods: Avoid runny egg, undercooked meat, raw seafood, and unpasteurized dairy.
See the CDC’s current list of foods and drinks to avoid or limit for additional examples.
Choking Prevention
Prepare food for your baby’s current developmental abilities. A smooth puree can reduce the difficulty of swallowing for a new eater, but it does not eliminate choking risk.
Warning: Always have your baby sit upright in a secure high chair and watch continuously while they eat. Do not allow eating while lying down, crawling, walking, riding in a car, or sitting unattended in a stroller.
Common choking hazards include:
- Whole nuts and seeds.
- Thick spoonfuls or chunks of nut butter.
- Whole grapes, cherries, berries, and cherry tomatoes.
- Hard raw apple or carrot pieces.
- Popcorn, chips, pretzels, hard candy, and chewy candy.
- Hot-dog rounds and large pieces of sausage.
- Large chunks of meat or cheese.
- Fish or meat containing bones.
- Whole beans and tough whole-grain kernels.
Cook hard foods until soft, remove bones and pits, mash beans, thin sticky nut butters, finely shred meat, and cut round foods lengthwise and then into small pieces. Review the CDC’s choking-hazard guidance for a fuller list.
Responsive Feeding
Let your baby decide whether and how much to eat. Offer food without pressure and watch for hunger and fullness cues.
Possible hunger cues include leaning toward food, opening the mouth, reaching, or becoming excited when food appears. Fullness cues may include closing the mouth, turning away, pushing the spoon, slowing down, or losing interest.
Appetite can change from day to day. Do not force a baby to finish a measured portion.
Introducing New Foods: Allergy Considerations
At first, offering one new single-ingredient food at a time can make it easier to identify a reaction. Current CDC guidance suggests waiting 3–5 days between new foods during this early stage.
Do not use that waiting period as a reason to delay allergenic foods for weeks or months. Once an allergen is introduced safely and tolerated, continue offering it regularly in an age-appropriate form as part of the baby’s normal diet.
Signs of a Possible Food Allergy
Symptoms may include:
- Hives or an itchy rash.
- Swelling of the lips, face, tongue, or throat.
- Repeated vomiting.
- Coughing, wheezing, hoarseness, or trouble breathing.
- Sudden sleepiness, weakness, paleness, or collapse.
- Symptoms affecting more than one part of the body.
Warning: Call 911 immediately for trouble breathing, swelling of the tongue or throat, collapse, severe weakness, or a rapidly worsening reaction. Do not wait to see whether the symptoms resolve on their own.
For a mild or uncertain reaction, stop serving the suspected food and contact your child’s healthcare professional for advice. Do not attempt a home re-challenge after a concerning reaction unless a clinician tells you how to proceed.
Using a Food Diary
A simple food diary can help you record:
- The food and ingredients offered.
- The form and amount served.
- The date and time.
- Whether the food was previously tolerated.
- Any symptoms and when they began.
A diary cannot diagnose an allergy, but it gives a healthcare professional clearer information if a reaction occurs.
Flavor Variations for Homemade Baby Food
After your baby tolerates individual foods, combine familiar ingredients and gradually introduce mild herbs and spices. Added sugar and salt are unnecessary.
| Ingredient | Flavor Variation |
|---|---|
| Kiwi | Mix with previously tolerated banana to soften the tart flavor. |
| Sweet potato | Blend with lentils, chicken, or a small amount of breast milk or prepared formula. |
| Avocado | Combine with plain pasteurized yogurt after dairy has been introduced. |
| Apple or pear | Add a small pinch of cinnamon. |
| Peas | Blend with potato, mint, or fully cooked chicken. |
| Beans | Mash with avocado, tomato, cumin, or unsalted cooked vegetables. |
| Egg | Mash fully cooked egg with sweet potato or avocado. |
| Oat cereal | Mix with pear, berries, plain yogurt, or safely thinned peanut butter after introduction. |
Introduce herbs and spices in small amounts so the flavor is not overwhelming. Suitable examples include cinnamon, cumin, basil, mint, dill, garlic, ginger, turmeric, and mild paprika.
Troubleshooting Common Baby Food Preparation Issues
The Puree Is Too Thick
Add water, breast milk, or correctly prepared infant formula one teaspoon at a time. Stir or blend after each addition so the food does not become watery.
The Puree Is Too Thin
Mix in more of the cooked ingredient, mashed avocado, iron-fortified infant cereal, mashed beans, or another familiar thick food. Do not add dry cereal to a bottle.
The Texture Is Grainy or Stringy
Cook the ingredient longer, add a small amount of liquid, and blend again. For fibrous foods, use a food mill or fine-mesh strainer if a smoother texture is developmentally appropriate.
The Food Turned Brown
Avocado, banana, pear, and apple may brown after exposure to air. Browning is usually a quality issue rather than proof that the food is unsafe. Store the food in an airtight container and minimize air exposure.
A small amount of lemon juice may slow browning after citrus has been introduced, but it does not extend the food’s safe storage period.
The Baby Refuses the Food
Do not force the feeding. Offer the food again on another day, either alone or with a familiar ingredient. Babies may need repeated, pressure-free exposure before accepting a new taste or texture.
The Baby Gags
Gagging can happen while babies learn to manage food and is not the same as choking. A gagging baby may cough or make sounds. A choking baby may be unable to breathe, cry, or make noise.
Learn infant choking first aid from a qualified instructor before an emergency occurs. Contact your pediatrician if gagging is frequent, severe, accompanied by poor growth, or happens with liquids as well as solids.
Texture problems are often solved by changing cooking time, adding liquid gradually, or choosing a different tool—not by adding sugar or salt.
Frequently Asked Questions
Can I use frozen fruits and vegetables for baby food?
Yes. Plain frozen fruits and vegetables can be convenient and nutritious. Choose products without added salt, sugar, sauces, or seasoning. Cook hard vegetables until soft, and heat frozen fruit when needed for safe preparation and a manageable texture.
How long can homemade baby food be stored in the freezer?
For a simple, conservative rule, use frozen homemade baby food within 1–2 months. Label each portion with the food and preparation date, keep the freezer at 0°F or below, and discard food that was warmed, served, or exposed to saliva.
What are the best first foods for babies?
There is no required first food. Good choices include iron-fortified oat cereal, pureed meat, mashed beans or lentils, fully cooked egg, avocado, plain pasteurized yogurt, banana, sweet potato, peas, and other soft foods. Include iron-rich foods regularly rather than offering only fruit and vegetables.
Can I add spices or herbs to baby food?
Yes. Small amounts of mild herbs and spices can add flavor without sugar or salt. Try cinnamon, basil, cumin, dill, mint, garlic, ginger, or turmeric. Introduce blends carefully because they may contain several ingredients, salt, or hidden allergens.
How do I know if my baby is allergic to a food?
Possible symptoms include hives, facial swelling, repeated vomiting, coughing, wheezing, or unusual weakness. Stop serving the suspected food and contact your child’s healthcare professional. Call 911 for breathing difficulty, tongue or throat swelling, collapse, or a rapidly worsening reaction.
When can a baby start eating homemade baby food?
Most babies can begin complementary foods at about 6 months when they can control the head and neck, sit upright with support, open for food, and swallow instead of pushing food out. Ask your pediatrician for individualized advice if your baby was premature or has swallowing, developmental, or growth concerns.
Do I need to use organic produce?
No. Organic produce is optional. Fresh, frozen, organic, and conventionally grown produce can all be used. Wash fresh produce under running water before preparing it, and do not use soap, bleach, detergent, or commercial produce wash.
Can I make baby food with meat, fish, or eggs?
Yes. These foods provide protein, iron, zinc, and other nutrients. Cook them thoroughly, remove bones, skin, gristle, or shells, and mash or mince them to a safe texture. Use a food thermometer when cooking meat, poultry, fish, and combination meals.
Conclusion
Making baby food at home can be a flexible and practical part of introducing solids. Begin when your baby is developmentally ready, include iron-rich foods alongside fruit and vegetables, and move through textures as eating skills develop.
Safe preparation is more important than achieving a perfect puree. Wash hands and equipment, cook foods thoroughly, prevent cross-contamination, supervise every meal, and store extra portions promptly. Introduce allergens in safe forms, watch for reactions, and ask your baby’s healthcare professional for individualized guidance when medical or feeding concerns are present.
Sources
- CDC: When, What, and How to Introduce Solid Foods — readiness signs, first foods, textures, allergen timing, and cereal variety.
- CDC: Choking Hazards — supervision, seating, food preparation, and common choking hazards.
- CDC: Foods and Drinks to Avoid or Limit — honey, added sugar, sodium, unpasteurized foods, milk, juice, and high-mercury fish.
- FoodSafety.gov: Children Under Five — food handling, storage periods, refrigeration, freezing, and microwave precautions.
- FDA: Selecting and Serving Produce Safely — washing and preparing fresh produce.
- NIAID: Peanut Allergy Prevention Guidelines — early peanut introduction for infants at different allergy-risk levels.