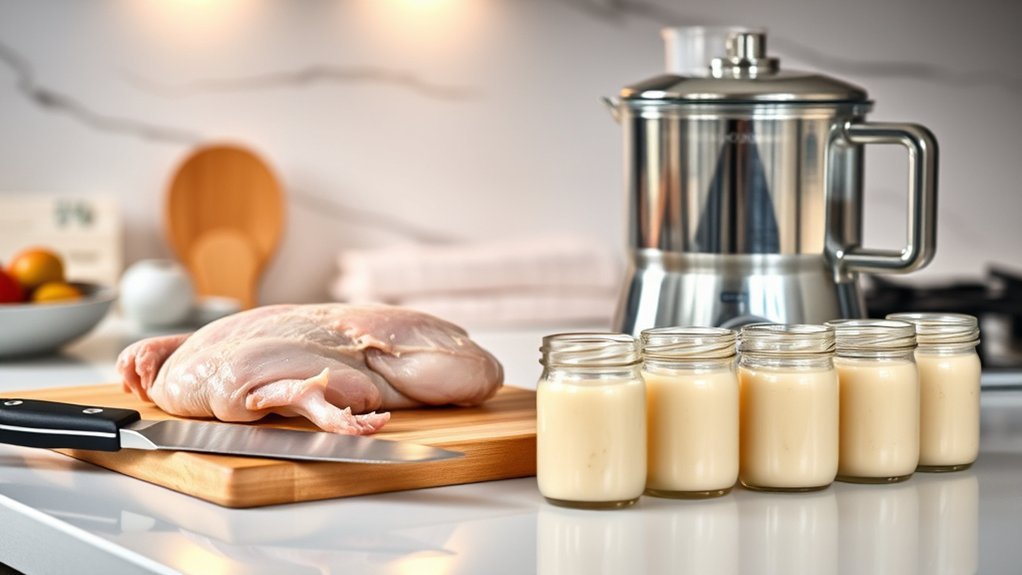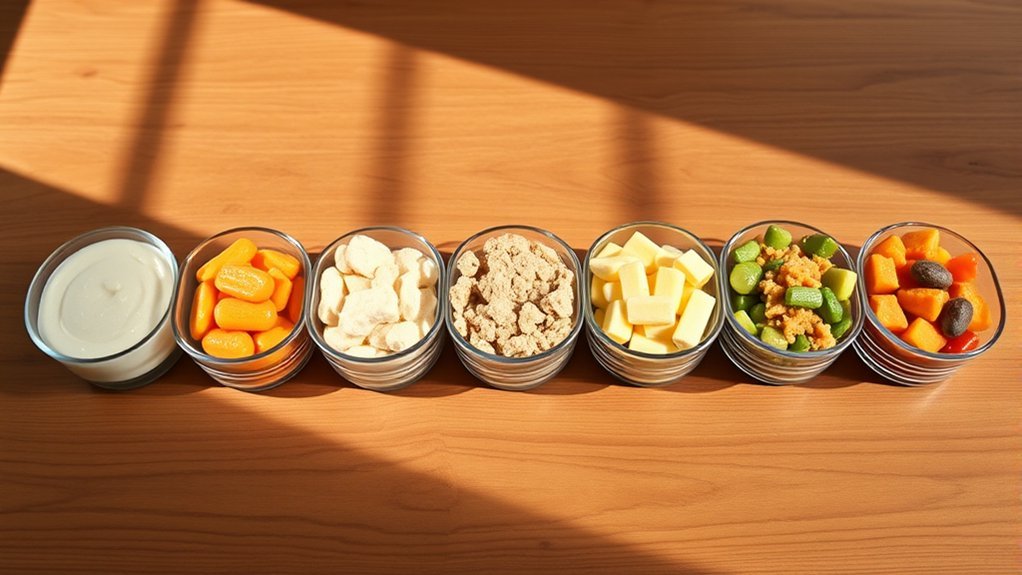
Baby food textures usually progress from smooth or mashed foods to soft lumps, finger foods, and chopped family meals during the second half of the first year. Age ranges are only a guide. Start complementary foods at about 6 months when your baby shows readiness, then increase texture as their head control, swallowing, chewing, grasp, and self-feeding skills develop.
Quick Answer
Most babies begin smooth, mashed, or very soft foods at about 6 months. Move toward thicker mash, soft lumps, finger foods, and chopped family foods as your baby manages each texture safely. Readiness matters more than an exact age, and every food must be soft, appropriately shaped, and closely supervised.
Key Takeaways
- Begin complementary foods at about 6 months when your baby can sit upright with good head control and swallow food rather than consistently pushing it out.
- Purees are optional, not mandatory. A ready baby may also begin with mashed foods or very soft finger-shaped foods.
- Increase thickness and lumpiness gradually instead of keeping every meal completely smooth.
- Include iron- and zinc-rich foods such as meat, eggs, beans, lentils, tofu, and iron-fortified infant cereal.
- Prevent choking by changing the food’s texture, shape, and size, seating your baby upright, and supervising the entire meal.
- Ask your pediatrician for individualized advice if your baby was born prematurely or has a feeding, swallowing, growth, developmental, or allergy concern.
Medical note: This guide provides general education, not a diagnosis or individual feeding plan. A pediatrician or pediatric feeding specialist may recommend a different timeline for a baby who was born prematurely or has low muscle tone, reflux, poor growth, oral-motor delay, cleft palate, neurologic conditions, or swallowing problems.
Baby Food Textures by Age at a Glance
The ranges below describe a common progression, but they are not deadlines. Stay with a texture until your baby handles it comfortably, then make small changes in thickness, lumpiness, shape, and size.
At a Glance
| Around 6 Months | Smooth puree, thick puree, fork-mashed food, or very soft finger-shaped food, depending on readiness |
| About 6–8 Months | Thicker mash, soft lumps, minced food, and soft finger foods that can be grasped in the fist |
| About 8–10 Months | Lumpy mash, finely chopped foods, shredded meat, soft pasta, and small soft pieces as the pincer grasp develops |
| About 10–12 Months | Mixed textures and softened, chopped versions of family foods, with continued choking modifications |
According to the Centers for Disease Control and Prevention, babies can try smooth, mashed, lumpy, finely chopped, and ground foods as their eating skills develop.

Power your essentials anywhere with a 999Wh pure sine wave power station delivering up to 1000W continuous with 2000W surge. It supports fast charging via USB-C PD 60W and USB-A QC 18W, plus simultaneous output for multiple devices through AC, USB, wireless, and car/DC ports. Recharge using AC, car, or solar with a built-in MPPT controller and dual cooling fans, while the upgraded battery management system protects against surges, short circuits, and overheating.

MADE WITH SIMPLE ORGANIC INGREDIENTS: Beech-Nut Organics baby food is made with real organic banana cooked over indirect heat to preserve color, flavor and nutrients.

CONVENIENT BABY FOOD: Our Gerber Mango Guava Baby Food Jar is designed for ease and convenience. These jars of baby food are made in a portable and easy-to-store format for busy parents
Why Baby Food Textures Matter
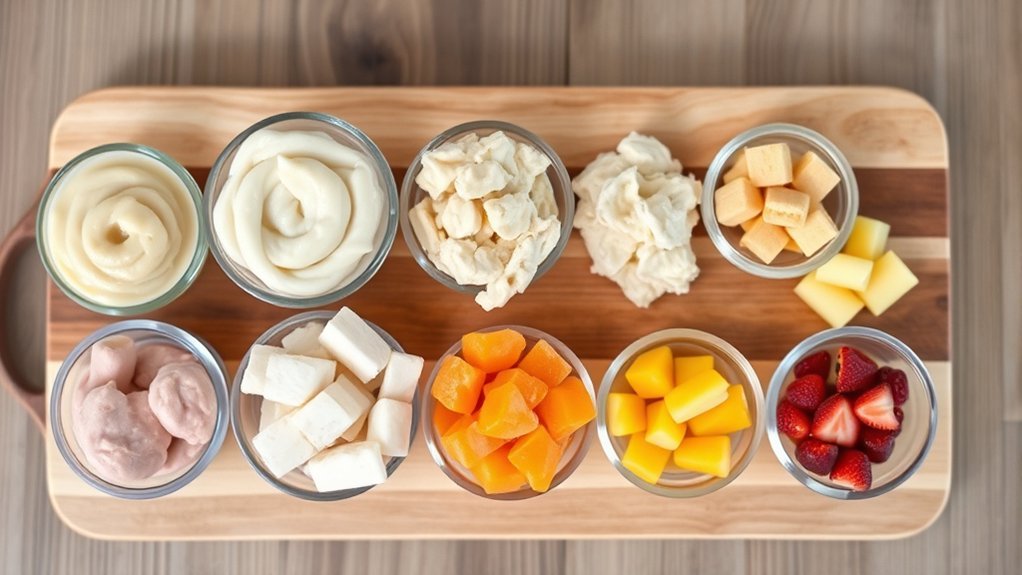
Texture is part of learning to eat. Smooth, mashed, lumpy, chopped, and finger foods give your baby different opportunities to move food around the mouth, practice chewing, pick food up, and coordinate the hands, eyes, and mouth.
A baby does not need teeth to manage many soft foods. The gums can mash foods that are tender enough to flatten easily. What matters is whether the food is soft, appropriately shaped, and manageable for the baby’s current skills.
Keeping every meal completely smooth for too long may limit opportunities to practice more complex mouth movements. Progress should still be gradual: make a puree slightly thicker, leave a few soft lumps in a mash, shred food instead of blending it, or offer a soft finger food alongside spoon-fed food.
Age gives you a rough starting point. Your baby’s posture, swallowing, chewing, grasp, and comfort with the current texture tell you when to move forward.
How to Tell When Your Baby Is Ready for Solid Food
Most babies become ready for complementary foods at about 6 months. Look for several readiness signs together rather than relying on age alone.
- Stable head and neck control: Your baby can keep the head centered and steady during feeding.
- Upright posture: Your baby can sit upright alone or with suitable support in a high chair.
- Interest in food: Your baby watches others eat, reaches toward food, or opens the mouth when food is offered.
- Hand-to-mouth coordination: Your baby can bring hands, toys, or food toward the mouth.
- Improved swallowing: Food is swallowed rather than consistently pushed back out with the tongue.
The CDC’s solid-food guidance recommends beginning at about 6 months and preparing foods for the child’s developmental ability.
Note: Waking more often, chewing on fists, or wanting extra milk does not by itself prove that a baby is ready for solid food. Look for the feeding skills above.
Stage 1: First Textures Around 6 Months

At about 6 months, many babies manage smooth puree, thick puree, or fork-mashed food. A developmentally ready baby may also begin with very soft finger foods. Purees are one option, not a required stage that every baby must complete.
Good First Foods
Choose nutrient-dense foods from several food groups. There is no required order for fruits, vegetables, grains, or proteins.
- Iron and zinc: Pureed or finely mashed beef, chicken, turkey, beans, lentils, tofu, egg, or iron-fortified infant cereal
- Vegetables: Sweet potato, peas, squash, broccoli, carrots, or beans cooked until very soft
- Fruit: Banana, avocado, pear, peach, apple, mango, or berries prepared without hard seeds or skins
- Dairy: Plain pasteurized full-fat yogurt or soft pasteurized cheese in an age-appropriate form
- Grains: Oat, barley, multigrain, or other fortified infant cereal instead of relying only on rice cereal
Breast milk or infant formula remains the main source of nutrition from 6 through 12 months. Solid food gradually adds nutrients, flavors, and eating practice.
How to Prepare Smooth or Mashed Food
- Wash your hands, utensils, preparation surfaces, and produce.
- Cook firm produce, meat, fish, poultry, and eggs thoroughly.
- Remove bones, pits, hard seeds, tough skins, and excess fat.
- Blend or mash the food to the texture your baby can manage.
- Add a small amount of water, breast milk, prepared formula, or unsalted cooking liquid if the food needs thinning.
- Serve a small amount in a separate bowl so saliva from the feeding spoon does not contaminate the stored batch.
Begin with a small serving and respond to hunger and fullness cues. Your baby may eat only a few tastes at first. Do not pressure them to finish a set amount.
Pro Tip: Test a soft food by pressing it between your thumb and forefinger or against the roof of your mouth with your tongue. It should flatten easily without requiring strong chewing.
Stage 2: Thicker Mash and Soft Lumps at About 6–8 Months

Once your baby manages the first foods comfortably, make purees thicker and begin leaving soft lumps. You can mash banana, avocado, potato, beans, lentils, cooked vegetables, fish without bones, or tender meat instead of blending everything completely smooth.
You can also combine familiar ingredients, such as:
- Mashed sweet potato with shredded chicken
- Mashed beans with avocado
- Plain yogurt with mashed fruit
- Iron-fortified oat cereal with smooth nut butter that has been thinned
- Soft scrambled egg with mashed vegetables
- Flaked low-mercury fish with mashed potato
Offer a spoon, a preloaded baby spoon, soft finger food, or a combination. There is no need to choose exclusively between spoon-feeding and self-feeding.
Early Finger-Food Shapes
Before the pincer grasp develops, babies usually pick food up with the whole hand. Soft finger foods are often easiest to hold when they are shaped like a thick adult finger and long enough to extend beyond the baby’s fist.
Examples include:
- Very soft broccoli or cauliflower florets with a handle-shaped stalk
- Soft-cooked sweet potato, squash, or carrot batons
- Ripe banana or avocado spears
- Soft toast strips with a thin topping
- Omelet strips
- Soft pancake strips without added honey
- Tender strips of meat that can be sucked and shredded, with gristle, skin, and bones removed
Finger-shaped does not mean hard. Every piece should pass the softness test and should not break into hard, round chunks.
Stage 3: Lumpy Foods and Finger Foods at About 8–10 Months
During this period, many babies become better at chewing, moving food from side to side, and picking up smaller pieces. Continue offering lumpy mash while adding minced, shredded, finely chopped, or soft bite-sized foods.
Finger-Food Ideas
- Soft pasta shapes cut as needed
- Finely shredded chicken, turkey, beef, pork, or boneless fish
- Small pieces of ripe pear, peach, melon, banana, or avocado
- Soft-cooked peas lightly flattened with a fork
- Soft beans lightly mashed or flattened
- Small cubes of pasteurized soft cheese
- Pieces of omelet, tofu, or soft vegetable fritter
- Soft bread or toast pieces with a thin spread
As the pincer grasp develops, your baby may be able to pick up small, soft pieces between the thumb and forefinger. Continue to avoid round, hard, rubbery, or sticky pieces even when fine-motor skills improve.
Encouraging Self-Feeding
- Seat your baby upright in a stable high chair and fasten the harness.
- Place one or two pieces on the tray at a time if a full tray leads to stuffing.
- Let your baby touch, squeeze, smell, lick, and taste food.
- Offer a preloaded spoon while keeping a second spoon available.
- Eat together and model slow chewing.
- Allow normal mess without wiping the face after every bite.
- Stop when your baby turns away, closes the mouth, pushes food aside, or loses interest.
Never place food into a baby’s mouth by force. The baby should control when the food enters the mouth during self-feeding.
Stage 4: Mixed Textures at About 10–12 Months
By 10–12 months, many babies can manage mixed textures and softened versions of family meals. Examples include tender pasta with vegetables, thick soup with soft pieces, shredded meat with rice, soft tacos served in pieces, oatmeal with mashed fruit, or a mild lentil dish.
“Family food” does not mean the baby can eat every adult meal without changes. Continue to:
- Remove bones, pits, hard seeds, tough skins, and gristle.
- Cook firm foods until soft.
- Cut round foods into safer shapes.
- Avoid excessive salt, added sugar, and very spicy sauces.
- Serve meat, fish, eggs, and other perishable foods fully cooked.
- Modify each piece for the baby’s chewing and grasping ability.
Continue offering variety even when your baby rejects a food. A refusal may mean the texture, temperature, shape, smell, or timing was unfamiliar. It does not always mean the baby permanently dislikes the food.
How to Prepare Finger Foods Safely
The safest shape depends on the food and the baby’s current grasp. Use these principles instead of relying on one universal measurement:
- Make it soft: Cook or choose food that flattens easily between your fingers.
- Avoid round shapes: Round or coin-shaped foods can seal the airway.
- Remove hard parts: Take out bones, pits, hard seeds, tough peels, gristle, and shells.
- Match the grasp: Use graspable finger-shaped pieces early and smaller soft pieces once the pincer grasp develops.
- Seat your baby upright: Do not feed a baby who is lying down, crawling, walking, riding in a moving car, or reclining in a stroller.
- Supervise continuously: Stay close enough to respond immediately throughout the meal.
The CDC choking-prevention guide emphasizes developmentally appropriate preparation, upright seating, calm meals, and constant supervision.
Common Choking Hazards and Safer Modifications
| Higher-Risk Food | Safer Preparation |
|---|---|
| Whole grapes or cherry tomatoes | Cut lengthwise into quarters or smaller pieces appropriate for the child |
| Hot dogs, sausages, or string cheese | Avoid coin shapes; cut lengthwise into narrow strips and then into manageable pieces |
| Raw apple or hard carrot | Cook until soft, grate finely, or prepare in another developmentally appropriate soft form |
| Whole nuts | Do not serve whole; use finely ground nuts or smooth nut butter thinned into another food |
| Thick spoonful of nut butter | Thin with water, breast milk, prepared formula, yogurt, or puree, or spread a very thin layer |
| Chunks of meat or cheese | Cook until tender and shred, mince, grate, or cut into soft manageable pieces |
| Popcorn, hard candy, chewing gum, marshmallows, or hard chips | Do not offer to babies |
Gagging vs. Choking
Gagging is a protective reflex that often happens while a baby learns to manage a new texture. The baby may cough, make noise, push the tongue forward, retch, become red in the face, or bring food back toward the front of the mouth.
Choking happens when food blocks the airway. A severely choking baby may be unable to cry, cough effectively, make normal sounds, or breathe. Choking can be quiet.
Warning: If your baby cannot breathe, cry, or cough effectively, treat it as a choking emergency. Remove the baby from the high chair, call for emergency help, and begin age-appropriate infant choking first aid. Do not perform a blind finger sweep. Review the American Red Cross infant choking instructions and consider an infant CPR and first-aid course before starting finger foods.
The NHS guide to gagging and choking provides additional descriptions of the signs caregivers may see.
Introducing Allergenic Foods Safely
Once your baby is developmentally ready for solids, common allergenic foods can be introduced in infant-safe forms rather than being delayed without a medical reason. Examples include well-cooked egg, smooth peanut or tree-nut butter, dairy, wheat, soy, sesame, fish, and shellfish.
- Introduce one new allergenic food at a time so a reaction is easier to identify.
- Begin with a small amount in a texture your baby already manages.
- Offer it when you can watch your baby afterward.
- If tolerated, continue including the food regularly as part of the baby’s diet.
- Never serve whole nuts or a thick spoonful of nut butter.
Talk with your pediatrician before introducing peanut if your baby has severe eczema, egg allergy, or a previous immediate food reaction. The American Academy of Pediatrics’ HealthyChildren guidance explains early allergen introduction and high-risk situations.
Warning: Stop serving the food and seek medical advice for hives, facial swelling, repeated vomiting, persistent coughing, or unusual sleepiness after eating. Call 911 for trouble breathing, swelling of the tongue or throat, widespread symptoms, collapse, or another suspected severe allergic reaction.
Foods and Drinks to Avoid or Limit Before 12 Months
- Honey: Do not give honey before 12 months because of the risk of infant botulism.
- Whole cow’s milk as a drink: Breast milk or infant formula should remain the main milk drink until 12 months. Pasteurized yogurt and cheese may be offered earlier in suitable forms.
- Juice: Babies younger than 12 months do not need fruit or vegetable juice.
- Unpasteurized foods and drinks: Avoid raw milk, unpasteurized juice, and foods made from unpasteurized milk.
- Added sugar: Choose unsweetened foods and do not add sugar or syrup to baby food.
- High-sodium food: Limit processed meats, salty snacks, high-sodium sauces, and heavily salted family meals.
- High-mercury fish: Choose lower-mercury fish and avoid varieties identified as high in mercury.
- Undercooked food: Fully cook meat, poultry, fish, shellfish, and eggs.
See the CDC list of foods and drinks to avoid or limit for current guidance.
How to Store Homemade Baby Food
- Cool cooked food promptly and place it in clean, covered containers.
- Label each container with the food and preparation date.
- Refrigerate homemade baby food for no more than 1–2 days.
- Freeze portions that will not be used within that period. FoodSafety.gov lists 1–2 months as a general freezer-storage period for homemade baby food.
- Thaw frozen food in the refrigerator, under cold running water, or as part of reheating. Do not thaw it on the counter.
- Reheat food until thoroughly hot, then stir and cool it to a safe serving temperature.
- When using a microwave, transfer food to a dish, stir well, allow it to stand, and check for hot spots.
- Discard food left in the baby’s bowl after the meal instead of returning it to the stored batch.
For federal storage and reheating recommendations, see FoodSafety.gov’s guidance for children under five.
When to Ask for Feeding or Swallowing Help
Occasional gagging, coughing, or food refusal can occur while a baby learns. Contact your pediatrician if you notice any of the following:
- Frequent coughing, choking, or distress during meals
- Wet, gurgly, or unusual breathing during or after eating
- Repeated vomiting or apparent pain with feeding
- Food or liquid regularly coming through the nose
- Very long or exhausting meals
- Poor weight gain or fewer wet diapers
- Difficulty moving beyond smooth puree despite repeated gradual attempts
- A persistent inability to chew, move food, or swallow safely
- Sudden loss of feeding skills
- Signs of an allergic reaction
Your pediatrician may recommend an evaluation by a registered dietitian, occupational therapist, or speech-language pathologist who specializes in pediatric feeding and swallowing.
Frequently Asked Questions
Can I mix different textures in baby food?
Yes. Once your baby handles each ingredient and texture safely, you can combine smooth, mashed, lumpy, shredded, or finely chopped components. Begin with small changes, such as adding soft lumps to a familiar mash, rather than suddenly moving from a thin puree to a difficult mixed texture.
What are the best first foods for my baby?
There is no required first food. Good choices include iron-rich meat, beans, lentils, egg, tofu, and iron-fortified infant cereal, along with vegetables, fruit, grains, plain yogurt, and other nutrient-dense foods prepared in a safe texture.
Does my baby need teeth before eating finger foods?
No. Babies can mash many tender foods with their gums. The food should be soft enough to flatten easily, free of hard parts, and shaped for the baby’s current grasp and chewing ability.
How do I store homemade baby food?
Place homemade baby food in clean, covered containers and refrigerate it for no more than 1–2 days. Freeze portions that will not be used in time. Thaw safely, reheat thoroughly, stir well, test the temperature, and discard food left in the feeding bowl.
When can I introduce allergens to my baby’s diet?
Common allergenic foods can generally be introduced in developmentally appropriate forms after your baby is ready for complementary foods. Introduce one at a time in a small amount. Ask your pediatrician first if your baby has severe eczema, egg allergy, or a previous immediate food reaction.
What should I do if my baby refuses a new texture?
Return to a familiar texture and make the next change smaller. You might thicken the puree slightly, add one or two soft lumps, serve a soft finger food beside the mash, or change the shape. Keep meals calm and avoid pressure. Seek help if your baby repeatedly gags, vomits, becomes distressed, or cannot progress.
How can I tell gagging from choking?
Gagging is usually noisy and may include coughing, retching, watery eyes, or pushing the tongue forward. A severely choking baby may be quiet and unable to breathe, cry, or cough effectively. Choking requires immediate age-appropriate first aid and emergency help.
When should my baby eat the same food as the family?
Many babies can eat modified family foods by about 10–12 months, and some can begin earlier. The meal may still need to be softened, shredded, mashed, or cut differently. Remove choking hazards and avoid honey, unpasteurized foods, excess salt, and undercooked ingredients.
Conclusion
Baby food textures should progress with your baby’s skills rather than follow a rigid calendar. Begin complementary foods at about 6 months when readiness signs are present, then move from smooth or mashed food toward soft lumps, finger foods, chopped foods, and modified family meals. Keep food soft, prepare each shape carefully, include iron-rich choices, and supervise every bite.
Some gagging and hesitation can be part of learning, but frequent choking, distress, breathing changes, poor growth, or an inability to progress deserves professional evaluation. With patient exposure and careful preparation, your baby can build the chewing, swallowing, coordination, and self-feeding skills needed for a wider range of family foods.
Sources
- CDC: When, What, and How to Introduce Solid Foods — readiness, starting age, food preparation, and allergen guidance
- CDC: Tastes and Textures — texture progression and developmental benefits
- CDC: Choking Hazards — food preparation, seating, supervision, and choking prevention
- CDC: Foods and Drinks to Avoid or Limit — honey, cow’s milk, juice, sodium, sugar, mercury, and unpasteurized foods
- American Academy of Pediatrics: Introducing Common Food Allergens — early allergen introduction and high-risk infants
- FoodSafety.gov: Children Under Five — homemade baby-food storage, reheating, and food-safety practices