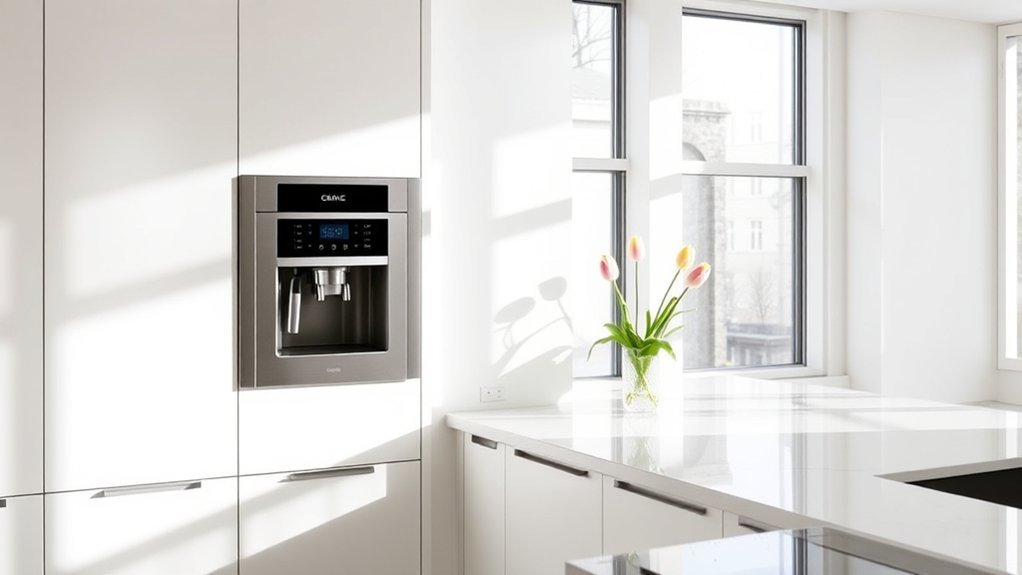
A built-in coffee maker can free up counter space and create a dedicated place for espresso, coffee, milk drinks, and hot water. The best results come from choosing the exact machine before finalizing the cabinetry. Its niche dimensions, water system, electrical requirements, ventilation, door clearance, and service access should guide the entire coffee-station design.
Quick Answer
Plan a built-in coffee maker around the exact appliance, not a generic cabinet size. Compare plumbed and refillable-tank models, place the controls at a comfortable height, preserve ventilation and service access, and provide storage for beans, cups, milk supplies, cleaning products, and waste.
Key Takeaways
- Select the coffee machine before ordering cabinetry because niche dimensions and utility requirements vary by model.
- Choose between a direct-water connection and a removable reservoir based on convenience, installation cost, and access to plumbing.
- Keep the machine’s front, door, water tank, bean containers, drip tray, and service path easy to reach.
- Use pull-out trays and drawers for accessories or approved countertop equipment, not as a substitute for the built-in machine’s specified supports.
- Follow the appliance display and owner’s manual for cleaning, descaling, filter replacement, and milk-system care.
At a Glance
| Time Required | Planning, cabinet work, and installation time vary with the model and whether new plumbing or electrical work is needed. |
| Difficulty | Advanced. Cabinet fitting and utility connections should follow the model instructions and local code. |
| Tools Needed | Tape measure, level, appliance installation guide, cabinet drawings, and the trade-specific tools used by the installer, electrician, or plumber. |
| Cost | Current official machine examples range from about $3,999 for a Bosch reservoir model to $6,999 for a Miele DirectWater model, before cabinetry, utilities, installation, and finish work. Prices can change. |
Why Is a Built-In Coffee Maker a Game Changer for Your Kitchen?
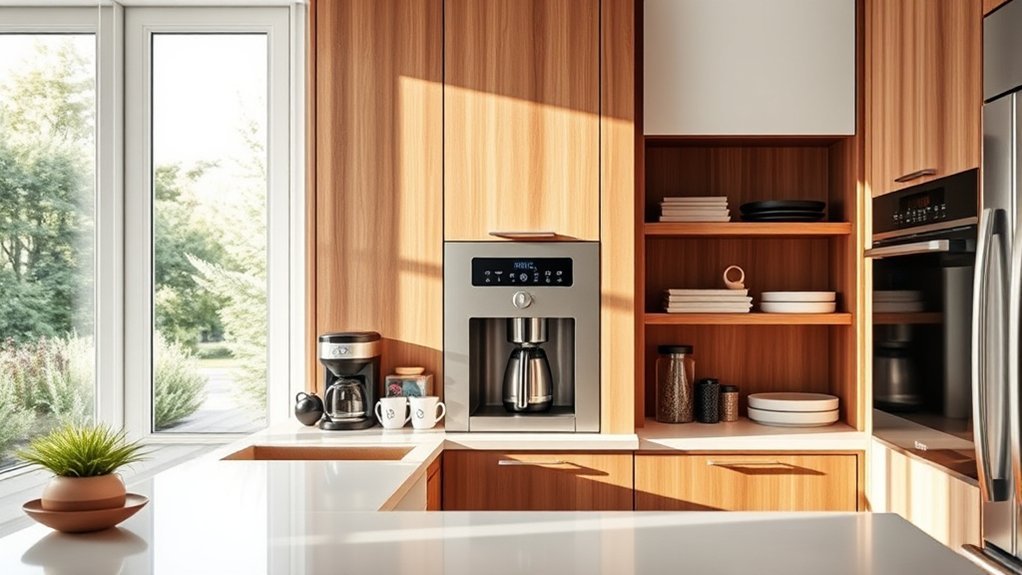
A built-in coffee maker places the grinder, brewing system, dispenser, and controls inside a fitted cabinet opening. This keeps a large appliance off the main worktop and can give the kitchen a cleaner, more consistent appliance wall.
Many models prepare espresso, coffee, cappuccino, latte, milk foam, or hot water from one front control panel. Depending on the machine, you may be able to adjust beverage volume, strength, temperature, milk quantity, grind settings, or personal profiles.
The main benefit is convenience, but it comes with a tradeoff. A built-in machine costs more and requires more planning than a basic countertop coffee maker. It also needs regular cleaning and enough front access for filling, emptying, and servicing.
The most important design decision happens before the cabinets are built: choose the exact coffee-machine model and plan the niche around its installation guide.

Power your essentials anywhere with a 999Wh pure sine wave power station delivering up to 1000W continuous with 2000W surge. It supports fast charging via USB-C PD 60W and USB-A QC 18W, plus simultaneous output for multiple devices through AC, USB, wireless, and car/DC ports. Recharge using AC, car, or solar with a built-in MPPT controller and dual cooling fans, while the upgraded battery management system protects against surges, short circuits, and overheating.
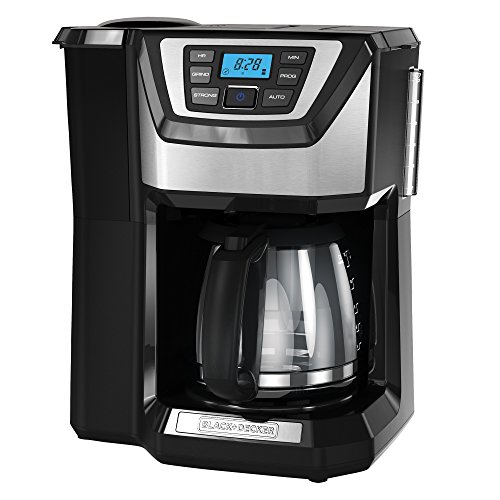
Note: 1)Too coarse a grind, too little coffee, or insufficiently tamping the grounds before brewing can all lead to inadequate pressure for a proper brew. 2)It is important to note that the amount of espresso extracted will vary depending on the grind size and amount and reprogramming may be needed when the size and amount are adjusted.Please refer to user guide or user manual or user guide (provided below in PDF) before first use

【𝟐-𝟏𝟎 𝐂𝐮𝐩 𝐕𝐞𝐫𝐬𝐚𝐭𝐢𝐥𝐢𝐭𝐲】Enjoy the perfect amount of coffee every time with this drip coffee maker and built-in grinder. Whether you're brewing a full 10-cup carafe or a quick 2-cup serving, the "POWDER 2-10" button automatically adjusts water-to-coffee ratio for optimal flavor.
Built-In Machine or Hidden Countertop Coffee Station?
These two designs are often grouped together, but they work differently:
| Feature | True Built-In Coffee Machine | Countertop Machine in a Coffee Cabinet |
|---|---|---|
| Installation | Mounted in a model-specific niche with approved supports and utility locations. | Sits on a countertop or load-rated pull-out shelf. |
| Appearance | Front aligns with an appliance wall or surrounding cabinetry. | Can be concealed behind lift-up, tambour, bifold, or pocket doors. |
| Water | May use direct plumbing or an internal removable reservoir. | Usually uses a removable tank unless a compatible machine is professionally plumbed. |
| Service | Requires the manufacturer’s front access, slides, clearances, and removal path. | The appliance must be removable without damaging the cabinet or wiring. |
Essential Features to Look for in Built-In Coffee Makers
Not every built-in coffee maker offers the same drinks, water system, grinder, cleaning program, or cabinet requirements. Compare the following features before choosing a model.
Plumbed Water or a Removable Reservoir
A plumbed machine connects to the home’s water supply, which reduces refilling. It may require a nearby approved connection, an accessible shutoff valve, professional plumbing work, and more coordination during cabinet installation.
A reservoir model is easier to place where no water connection exists, but you must remove and refill its tank. Thermador currently offers separate plumbed and removable-tank built-in machines. Bosch’s current 800 Series built-in model uses a removable tank.
Beverage and User Settings
Check which drinks the machine prepares and which settings it stores. Useful options may include coffee strength, cup volume, temperature, milk quantity, double-cup brewing, user profiles, and separate hot-water dispensing.
More recipes do not automatically mean better coffee. Give priority to the drinks your household makes most often and controls that are easy to understand.
Grinder and Bean Storage
Look at the grinder’s adjustment range, access, noise, cleaning instructions, and compatibility with the beans you use. Some machines have one bean container, while others provide multiple containers for switching between regular, decaf, or different roasts.
Avoid treating ceramic or steel burrs as an automatic sign of quality. Consistent grinding, correct adjustment, service support, and the machine’s complete brewing system matter more than material alone.
Milk System
Compare the milk container, hose, cleaning cycle, storage needs, and the number of parts that require hand cleaning. If your household makes several milk drinks daily, easy milk-path cleaning may matter more than app controls or extra drink names.
Cleaning and Service Access
Automated rinsing, cleaning, and descaling programs can reduce work, but they do not make a machine maintenance-free. You may still need to empty the drip tray and grounds container, rinse a removable brew unit, clean milk parts, refill cleaning products, and wipe the interior.
Before buying, confirm whether the brew unit is removable, how the machine comes out for service, and whether local technicians support the brand.
Controls and Connectivity
Touch displays, saved profiles, remote functions, and app controls can be convenient. They should not outweigh basic usability. Make sure everyone who will use the machine can read the display, reach the controls, position a cup, and remove containers without strain.
Note: “Smart,” “automatic,” and “self-cleaning” features vary widely. Read the operating manual, not just the feature list, to see which tasks still require hands-on cleaning.
Measure the Cabinet Before You Order It
The appliance’s installation drawing should control the cabinet design. Do not rely on a standard 24-inch or 30-inch label alone; a product’s marketed width may differ from its required niche dimensions.
| Planning Item | What to Verify | Why It Matters |
|---|---|---|
| Niche dimensions | Exact minimum and maximum width, height, and depth. | A small sizing error can prevent the machine from fitting or aligning with adjacent fronts. |
| Door clearance | Open-door depth, hinge movement, handle clearance, and nearby walls. | The front must open far enough to reach water, beans, grounds, milk parts, and the brew unit. |
| Support system | Required shelf, rails, slide supports, fasteners, and cabinet load capacity. | The unit must remain level and secure during operation and service. |
| Ventilation | Vent openings, rear gaps, adjacent-appliance limits, and any prohibited enclosure. | Heat and moisture must escape as required by the manufacturer. |
| Electrical location | Voltage, circuit, grounding, receptacle position, and access. | A badly placed receptacle can block the appliance or make disconnection difficult. |
| Water connection | Whether the model is plumbed, the approved connection, pressure limits, and shutoff location. | The water line must remain accessible without being pinched or stressed. |
| Service path | How the machine slides out or is removed and how far it projects during service. | Technicians need access without removing surrounding cabinets. |
Smart Storage Ideas for Coffee Gear

A built-in machine removes one appliance from the counter, but cups, beans, syrups, milk supplies, cleaning tablets, filters, spoons, and waste still need a home. Place frequently used items close to the dispenser while keeping cleaning products separated from food.
Pull-Out Brewing Solutions
Keep the built-in machine in the niche and support system approved for that appliance. Use pull-out hardware for accessories, a knock box, serving trays, or a separate countertop grinder when the cabinet and hardware are rated for the load.
Wolf’s installation guidance notes that its built-in coffee system uses dedicated slide supports and that the opening must account for the slides and electrical connection. A generic shelf is not a substitute for the manufacturer’s installation system.
| Storage Feature | Practical Benefit | Planning Note |
|---|---|---|
| Pull-out accessory tray | Creates a temporary serving or preparation surface. | Use load-rated hardware and keep it clear of the machine door. |
| Anti-tip or locking hardware | Helps stabilize a pull-out shelf holding approved countertop equipment. | Confirm cabinet anchoring and hardware capacity with the cabinetmaker. |
| Accessible water shutoff | Allows a plumbed model to be isolated for maintenance. | Use only the connection method approved in the appliance instructions. |
| Matching cabinet fronts | Integrates storage with the surrounding kitchen. | Leave all required vents and service openings unobstructed. |
| Zoned drawers | Separates beans, spoons, filters, cups, and cleaning supplies. | Store chemicals away from coffee, food, and children. |
Coffee Closet Designs
A coffee closet or breakfast cabinet can hold a built-in machine, countertop appliances, cups, beans, and serving supplies in one zone. Its size should be based on the selected equipment and door hardware rather than a generic wall-width rule.
Pocket, bifold, tambour, or lift-up doors can conceal adjacent countertop equipment. Make sure the doors remain fully open while heat-producing appliances are operating, unless the appliance and cabinet system are specifically approved for enclosed use.
Plan receptacles around the actual appliances and current electrical requirements. A qualified electrician should determine circuit capacity, GFCI or AFCI protection, receptacle placement, and whether separate appliances require separate circuits.
Choose moisture-resistant, wipeable interior finishes. Good task lighting helps with filling beans, checking cup levels, and cleaning splashes, but lights and switches must not interfere with the appliance door or ventilation.
Drawer-Only Stations
Deep drawers below the machine can store cups, travel mugs, sealed coffee bags, milk pitchers, and spare filters. Shallow drawers work well for spoons, reusable straws, napkins, and measuring tools.
Use dividers so small items do not slide into each other. A washable liner can reduce rattling and catch dry coffee grounds, but it should be removed and cleaned before moisture collects underneath.
Keep manufacturer-approved cleaners in a labeled child-resistant location away from beans, sugar, and drink ingredients. Do not store leaking milk containers or wet cloths in a closed drawer.
Built-In Coffee Station Layout Ideas
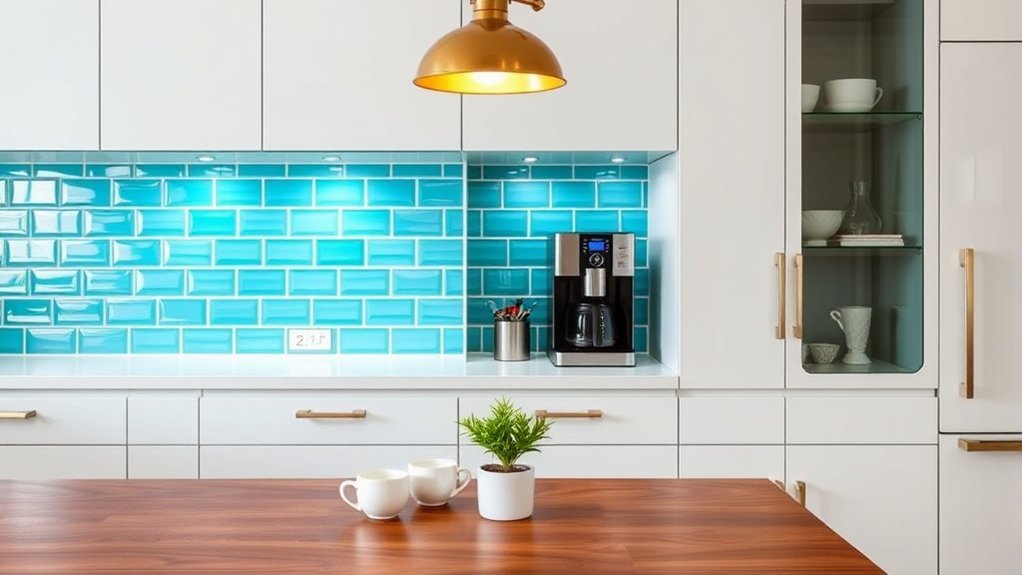
The best layout supports a simple workflow: take a cup, fill or select the drink, add milk or sweetener, serve, and clean up without crossing the main cooking zone.
Tall Cabinet Appliance Bank
Install the coffee machine in a tall cabinet near an oven, warming drawer, or other fitted appliance only when the manufacturer approves the arrangement. Aligning the appliance fronts can create a clean look, but each product still needs its own ventilation, support, and clearance.
Place cups and beans in drawers immediately below or in an adjacent cabinet. Avoid storing heavy items above the machine where they are difficult to reach safely.
Side-by-Side Beverage Zone
Place the built-in machine beside a small counter, undercounter refrigerator, or sink to create a complete beverage station. The counter provides space for milk, syrups, tea, and serving trays while keeping the main food-preparation area clear.
A nearby sink can make cleanup easier, but it does not replace the machine’s required water or electrical installation.
Hidden Coffee Cabinet
Use pocket or folding doors to conceal cups, a grinder, kettle, and countertop accessories around the built-in machine. Keep the machine’s operating front and required ventilation open unless its installation instructions specifically permit another arrangement.
Pocket-door hardware consumes interior cabinet space, so finalize the door system before sizing shelves and appliance openings.
Small-Kitchen Niche
In a compact kitchen, use a narrow vertical zone with the machine at a reachable height, cup storage above or beside it, and drawers below. A removable-reservoir model may avoid the need to route a new water line.
Do not place the controls so high that shorter users cannot read the display, remove the water tank, or handle a hot drink safely. Wolf advises considering eye-level readability when selecting the installation height.
Pantry or Butler’s-Pantry Station
A pantry location can move drink preparation away from the main cooking area and provide more storage. Confirm that the space has the required power, water option, ventilation, lighting, and service access before ordering the cabinet.
Pro Tip: Mock up the machine’s front, dispenser, open door, cup position, and storage drawers with painter’s tape before the cabinet order is finalized. Have every regular user test the reach.
Choosing Stylish Finishes and Decor for Your Coffee Bar
A built-in coffee station should look connected to the rest of the kitchen rather than like an appliance added after the cabinets were designed.
Wood cabinets can soften stainless steel or black-glass appliance fronts. Marble, quartz, porcelain, stainless steel, and other wipeable surfaces are practical around coffee splashes, but follow the surface manufacturer’s cleaning instructions.
Brass, polished nickel, chrome, or matte-black hardware can repeat finishes already used on the sink, lighting, or cabinet pulls. Limit the number of competing finishes so the beverage station does not feel visually crowded.
Under-cabinet lighting can improve visibility, while a pendant or wall light can define the coffee zone. Keep fixtures, switches, and decorative shelves clear of the appliance door, rising steam, and service path.
Use sealed containers for beans and keep them away from direct sun, high heat, and moisture. Place mugs within easy reach without stacking them so tightly that they are likely to fall.
Integrating Plumbing and Electrical Needs for Your Coffee Setup
Warning: Do not improvise a water, electrical, ventilation, or support connection. Follow the exact installation guide and local code. Use qualified trades for new wiring or plumbing. Disconnect the appliance and arrange service if it leaks internally, damages a cord, smells hot, produces smoke, or repeatedly trips protection.
Electrical Planning
Verify the required voltage, frequency, circuit rating, grounding method, receptacle type, and receptacle position in the model’s installation guide. Do not use an extension cord or place a plug where the machine will crush it.
The U.S. Consumer Product Safety Commission recommends GFCI protection for kitchen-counter receptacles because GFCIs reduce electric-shock risk. The exact protection and circuit arrangement for a built-in appliance should be confirmed by a qualified electrician under the code adopted in your area.
Water Planning
For a plumbed machine, use the connection parts and water conditions specified by the manufacturer. Include an accessible shutoff valve and route the supply so it cannot kink, rub against sharp cabinet edges, or become trapped when the machine moves for service.
Check all accessible connections for leaks after installation. A leak sensor or automatic shutoff can provide extra protection, but it does not replace correct plumbing or routine inspection.
For a reservoir model, make sure the door opens far enough to remove and refill the tank. Test the motion before nearby handles, walls, shelves, or pocket doors are installed.
Ventilation and Moisture
Follow the required ventilation openings and clearances in the installation drawing. Do not cover vent slots with trim, insulation, stored items, or a solid backing unless the guide permits it.
Wipe spills promptly and allow damp milk parts, cloths, and trays to dry. Persistent condensation, swelling cabinet panels, or a musty smell may signal poor ventilation or a leak that needs investigation.
Built-In Coffee Maker Installation Checklist
- Select the exact model. Confirm whether it is plumbed or uses a removable reservoir.
- Download the current installation guide. Give the same model-specific document to the cabinetmaker, electrician, plumber, and installer.
- Confirm the niche. Check the opening, support shelf, trim alignment, ventilation, door clearance, and service path.
- Test the user height. Make sure regular users can see the controls, place a cup, and reach all refill and waste containers.
- Plan utilities. Locate power, water, shutoff valves, and connections exactly where the guide allows.
- Coordinate adjacent appliances. Verify whether installation over or beside an oven or warming drawer is permitted.
- Dry-fit before final trim. Confirm that the door opens fully and the machine can slide out for service.
- Complete startup checks. Inspect for leaks, run the initial rinse, set water hardness where required, and test each basic function.
- Keep the documents. Store the model number, manual, warranty details, and service contact where they are easy to find.
Common Built-In Coffee Station Mistakes
- Designing the cabinet before choosing the machine: marketed appliance widths do not replace the installation drawing.
- Assuming every model is plumbed: some built-in machines use removable water tanks.
- Blocking the service path: nearby walls, handles, trim, or shelves can prevent the door from opening or the unit from sliding out.
- Using a generic pull-out shelf for a built-in unit: the machine needs the supports and fasteners specified by its manufacturer.
- Ignoring milk cleanup: milk hoses, containers, and nozzles need frequent care and a practical place to rinse and dry.
- Hiding the machine behind unapproved closed doors: heat and moisture can collect if the enclosure lacks proper ventilation.
- Placing controls too high: users must be able to see the display and handle hot cups safely.
- Using one outlet for too much equipment: a coffee machine, kettle, toaster, and grinder may exceed the planned circuit capacity.
- Using the wrong chemical: a cleaning tablet and a descaling product perform different jobs and may not be interchangeable.
How to Maintain Your Built-In Coffee Maker for Longevity
Maintenance should follow the appliance display and model manual. Water hardness, drink volume, filter use, milk use, and machine design all affect how often each task is needed.
| Task | When to Do It | Important Note |
|---|---|---|
| Empty drip tray and grounds container | When prompted or sooner if heavily used. | Wash and dry the parts before reinstalling them. |
| Clean milk components | After milk use or at the interval stated in the manual. | Do not allow milk residue to remain in hoses, nozzles, or containers. |
| Rinse or clean the brew unit | At the model’s recommended interval. | Some brew units are removable; others require a different care process. |
| Run the cleaning program | When the display or manual instructs you. | Use only a compatible cleaning product in the location specified. |
| Descale | When prompted or at the manual’s interval. | Frequency depends partly on water hardness and filter settings. |
| Replace the water filter | When prompted or as directed by the filter and appliance instructions. | Reset the filter setting if the manual requires it. |
| Wipe exterior surfaces | As needed. | Use a soft cloth and a cleaner approved for the finish; avoid abrasives. |
| Arrange professional service | For unresolved faults, leaks, unusual noise, damaged wiring, or manufacturer-required service. | Do not open or repair internal electrical and water components yourself. |
Bosch’s built-in coffee-machine care guidance directs owners to use the appliance program and model manual for cleaning and descaling. Miele likewise states that descaling frequency depends on local water hardness.
Pro Tip: Keep the correct cleaning tablets, descaler, milk-system cleaner, filter information, and model number together in a labeled bin. Cleaning products and descalers may perform different jobs, so do not substitute one for the other.
Built-In Coffee Maker Troubleshooting
| Problem | Possible Cause | Safe First Step |
|---|---|---|
| Coffee tastes weak | Low strength setting, coarse grind, unsuitable beans, or a dirty brewing system. | Check drink settings and follow the manual before changing the grinder. |
| Coffee flows slowly | Fine grind, clogged outlet, scale buildup, or overdue cleaning. | Follow the displayed cleaning or descaling message; do not force the outlet with a sharp tool. |
| Milk foam is poor or splutters | Milk residue, an incorrectly assembled hose, blocked air intake, or unsuitable milk temperature. | Clean and reassemble the milk components exactly as shown in the manual. |
| Machine says the bean container is empty | Beans may be stuck, the grinder channel may be blocked, or oily beans may not feed well. | Turn off the machine and use only the manufacturer-approved cleaning method. |
| Water appears in the cabinet | Spill, overfilled tray, loose accessible connection, or internal leak. | Stop using the machine, shut off water if safely accessible, disconnect power as directed, and arrange service. |
| Breaker or GFCI trips repeatedly | Electrical fault, moisture, damaged wiring, or an overloaded circuit. | Do not reset it repeatedly. Stop using the appliance and contact a qualified technician or electrician. |
Frequently Asked Questions
Can I install a built-in coffee maker in a small kitchen?
Yes, provided the cabinet can meet the selected model’s niche, ventilation, electrical, door-clearance, and service requirements. A removable-reservoir model may be easier to place when adding a water line would be difficult.
What does a built-in coffee maker cost?
Current major-brand examples are roughly $3,999 to $6,999 for the machine alone. Your total may also include cabinetry, trim, electrical work, plumbing, permits, delivery, installation, cleaning products, filters, and future service. Product prices and local labor rates can change.
How do I choose the right location for my coffee station?
Choose a location where users can read the controls, handle hot cups, open the machine door, refill supplies, empty waste containers, and remove the unit for service. A nearby sink or refrigerator can improve the workflow, but all utilities must still follow the installation guide.
Are built-in coffee makers easy to clean and maintain?
Many models automate rinsing, cleaning, or descaling steps, but owners still need to care for milk parts, trays, grounds containers, water systems, and accessible brewing components. Review the operating manual before buying so you understand the full routine.
Can I customize cabinetry around a built-in coffee maker?
Yes. Custom panels, drawers, lighting, shelves, and nearby pocket doors can make the station more useful. However, cabinetry must preserve the appliance’s specified niche, supports, ventilation, electrical access, door movement, and service path.
Does a built-in coffee maker need a water line?
Not always. Some models connect directly to the water supply, while others use a removable reservoir. A plumbed machine reduces refilling, but a reservoir model offers more placement flexibility and avoids a permanent water connection.
Do built-in coffee makers need ventilation and service clearance?
Yes. The required openings, rear space, door clearance, support system, and removal path differ by model. Do not block vents or assume a generic cabinet opening will work. Use the exact installation drawing for the appliance.
Conclusion
A successful built-in coffee maker installation starts with the appliance, not the cabinet style. Select the exact model, compare plumbed and reservoir options, and give the installation guide to every trade involved. Then design storage, lighting, finishes, and nearby work surfaces around safe access and an efficient daily routine.
Thoughtful planning can create a coffee station that looks integrated without sacrificing cleaning access, ventilation, or serviceability. Measure carefully, avoid unsupported universal clearances, and follow the machine’s prompts and manual so it continues to make consistent drinks.
Sources
- Bosch 800 Series Built-In Coffee Machine — removable-reservoir configuration, current price example, features, and product documentation.
- Thermador Built-In Fully Automatic Coffee Machines — current plumbed and removable-water-tank options.
- Miele CVA 7845 Built-In Coffee Machine — DirectWater, bean-selection, automated-care, and installation information.
- Wolf EC24 Coffee System Installation Information — service slides, cabinet depth, electrical space, and control-height considerations.
- Bosch Coffee Machine Cleaning and Descaling Guide — manufacturer-based cleaning, descaling, and surface-care guidance.
- U.S. Consumer Product Safety Commission Electrical Safety Guidance — kitchen GFCI protection and electrical warning signs.