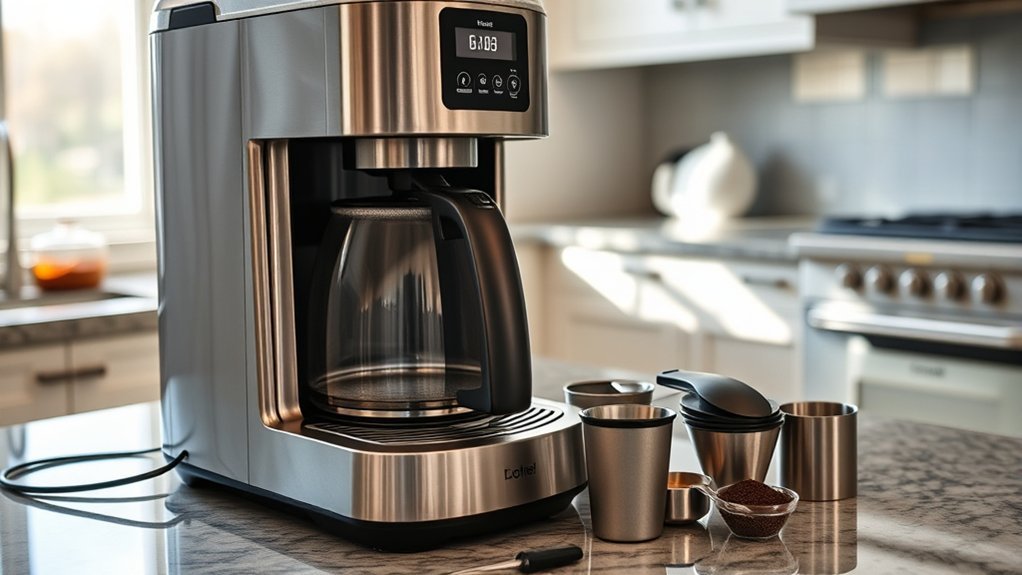
If your coffee maker is not brewing or moving water, start with the simple external checks before assuming an internal valve or heating part has failed. Confirm the machine has power, the reservoir is filled and seated, the brew basket and carafe are positioned correctly, and any drip-stop control is open. Then run a water-only test and descale the machine using the exact method approved for your model.
Quick Answer
A coffee maker that will not brew usually has a power, setup, water-flow, or scale problem. Check the outlet, controls, reservoir, filter basket, carafe lid, and drip-stop first. Clean accessible parts, run a water-only cycle, and descale only as your manual directs. Do not open the electrical base unless the manufacturer specifically authorizes user repair.
Key Takeaways
- Begin with power, water level, reservoir seating, controls, filter placement, and carafe position.
- Use a water-only test to separate a machine-flow problem from a coffee-ground or filter problem.
- Mineral scale can slow or stop water flow, but cleaning frequency and descaling products vary by model.
- A one-way valve is not accessible or user-serviceable on every coffee maker.
- Stop using the machine if it leaks into the base, smells burned, sparks, smokes, or repeatedly trips a breaker.
At a Glance
| Time Required | 10–30 minutes for external checks and cleaning; longer if a full descale cycle is required |
| Difficulty | Easy for user-accessible checks; internal electrical repair should be handled by authorized service |
| Tools Needed | Owner’s manual, soft cloth, mild dish soap, fresh water, and the model-approved descaler or cleaning solution |
| Cost | Usually $0–$20 for basic cleaning supplies; replacement parts and service vary by model |
Warning: Unplug the coffee maker and let it cool before cleaning or handling removable parts. Do not immerse the electrical base, cord, or plug. Many manufacturers state that the bottom cover should not be removed because there are no user-serviceable parts inside. Opening the machine can create shock, burn, fire, leak, and warranty risks.
Diagnose the Symptom First
The fastest repair path depends on what the coffee maker is doing. Note the exact symptom before taking anything apart.
- No lights or display: suspect the outlet, plug, power control, or an internal electrical failure.
- Lights turn on, but brewing never starts: check programmed settings, a closed drip-stop lever, an unseated reservoir, an open lid, or a required brew-size selection.
- The machine starts but moves little or no water: check the water tank, carafe position, basket valve, scale buildup, accessible outlets, or a model-specific priming step.
- Brewing is slow or stops early: check for two filters used together, too much coffee, overly fine grounds, a blocked basket outlet, a mispositioned carafe lid, or mineral scale.
- Gurgling or sputtering: this can happen near the end of a normal drip cycle, so sound alone does not prove a clogged valve. Look for reduced output, repeated stopping, or water remaining in the reservoir.
Power your essentials anywhere with a 999Wh pure sine wave power station delivering up to 1000W continuous with 2000W surge. It supports fast charging via USB-C PD 60W and USB-A QC 18W, plus simultaneous output for multiple devices through AC, USB, wireless, and car/DC ports. Recharge using AC, car, or solar with a built-in MPPT controller and dual cooling fans, while the upgraded battery management system protects against surges, short circuits, and overheating.

Safe & Certified Material for Pure Water:Crafted from high-quality, food-grade POM (Polyoxymethylene) material, this check valve is BPA-free and odorless. It ensures the safety of your drinking water by meeting stringent standards, giving you peace of mind for your home water systems.

Safe & Certified Material for Pure Water:Crafted from high-quality, food-grade POM (Polyoxymethylene) material, this check valve is BPA-free and odorless. It ensures the safety of your drinking water by meeting stringent standards, giving you peace of mind for your home water systems.
Common Reasons Your Coffee Maker Is Not Brewing
Most no-brew problems come from a small group of causes. Start with the items you can inspect without opening the housing.
Power or Control Setting Problem
Make sure the plug is fully inserted into a working outlet and the machine is switched on. Test the outlet with another small appliance. Check whether Delay Brew, Auto Start, sleep mode, or a required brew-size setting is preventing an immediate cycle. Manufacturer troubleshooting for some models also tells users to confirm that the brewer is in the correct mode and that the outlet is active.
Empty or Misaligned Water Reservoir
Fill the reservoir with fresh water without exceeding the maximum line. On removable-tank machines, lift the tank out and reinstall it firmly. A tank that looks seated may not be pressing its inlet valve or sensor correctly.
Filter Basket, Carafe, or Drip-Stop Is Not Positioned Correctly
Close the basket lid fully and confirm the filter holder is locked into place. On many drip machines, the carafe lid presses a spring-loaded basket valve open. If the carafe, lid, tab, or spring is out of position, water may remain in the basket or the machine may appear not to brew. Do not use a paper filter and a permanent filter together unless your manual specifically calls for both.
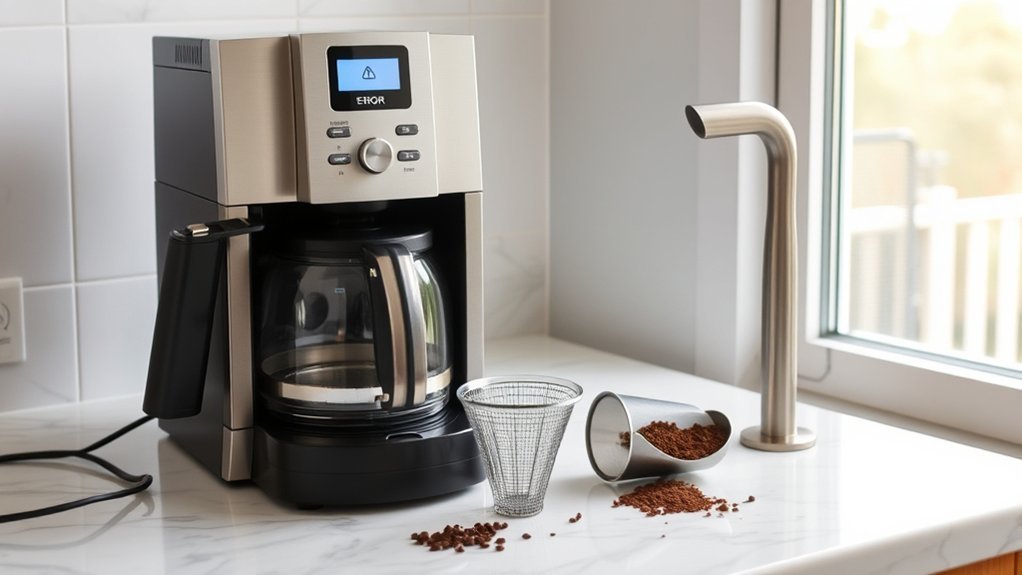
Grounds or Residue Blocking Accessible Parts
Remove the filter and used grounds. Wash the removable basket, reusable filter, carafe lid, and any removable water outlet parts. Coffee grounds can block a basket drain or single-serve needle, but the cleaning method is different for each design. Use the cleaning tool or procedure supplied for your model, especially around sharp pod-piercing needles.
Mineral Scale Restricting Water Flow
Calcium deposits can reduce flow and extend brew time. Keurig states that scale can hinder brewer performance and recommends descaling on a model-specific schedule. Mr. Coffee provides a monthly deep-clean method for certain drip models, while other manufacturers use different intervals and products. Follow your owner’s manual rather than applying one universal vinegar ratio.
Internal Valve, Heater, Pump, or Thermal Failure
If the machine has power but does not heat or move water after external cleaning and descaling, an internal check valve, thermostat, thermal fuse, heater, sensor, or pump may have failed. The exact parts depend on whether the machine is a basic drip brewer, pod brewer, or espresso machine. These faults usually require authorized service.
Step-by-Step Coffee Maker Troubleshooting
- Unplug and cool the machine. Empty hot water and coffee before handling removable parts.
- Find the model number and manual. It is commonly printed on a label on the bottom or back. Use the manufacturer’s instructions because controls, descaling chemicals, and service limits vary.
- Confirm power. Inspect the cord and plug for damage, use a known-working outlet, and press the correct Power or Brew control.
- Check the water system. Fill and firmly seat the reservoir. Make sure a tank float is free to move if your model has one.
- Check the brew path. Reinstall the basket, filter, lid, carafe, and drip-stop parts exactly as shown in the manual.
- Run a water-only test. Remove coffee grounds and brew with fresh water. If water flows normally, the filter, grind, coffee dose, or basket setup caused the problem.
- Clean user-accessible parts. Wash removable pieces with mild dish soap and clear approved needles, spray heads, or outlets according to the manual.
- Descale the machine. Use the approved solution, amount, cycle, soak time, and rinse procedure for your exact model.
- Reset only as directed. Some electronic brewers have a documented unplug or button-reset process. Do not guess at button combinations.
- Stop if the fault remains. Contact the manufacturer or an authorized repair service instead of opening a sealed electrical base.
Pro Tip: The water-only test is the most useful early check. Normal water flow without coffee points to the filter, grind size, dose, basket, or carafe setup. Little or no water flow points to the reservoir, scale, an accessible outlet, or an internal fault.
How to Identify a Clogged One-Way Valve
Some automatic drip coffee makers use a one-way valve in the water path, but this is not a universal user-accessible part. A pod brewer or espresso machine may use a pump, solenoid, flow meter, or different valve system. Do not diagnose every no-flow problem as a jammed check valve.
Signs of a Flow Restriction
Possible signs include a reservoir that stays full during a brew command, much less water reaching the basket, unusually slow flow, repeated stopping, or scale returning quickly after cleaning. A hard spot in an internal hose or a missing rattle is not a safe or reliable home test unless the manufacturer’s service instructions specifically identify that part and procedure.
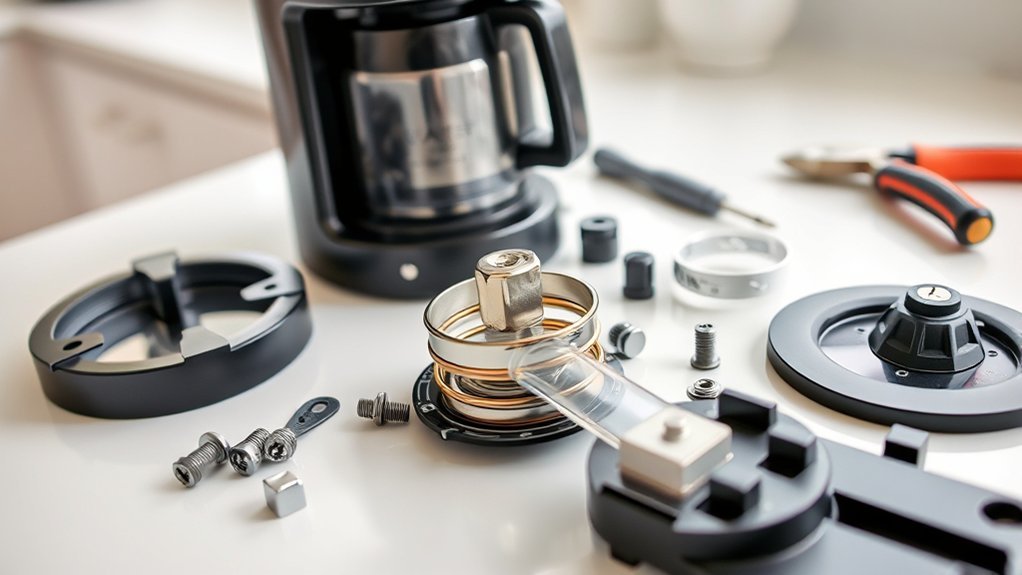
Disassembly for Inspection: Check the Manual First
Do not turn a generic coffee maker upside down and remove rubber plugs or bottom screws based only on a general guide. Many coffee makers contain mains-voltage wiring, hot surfaces, sharp parts, clamps, seals, and model-specific routing. Hamilton Beach, for example, warns users not to remove the bottom cover on certain models because no user-serviceable parts are inside.
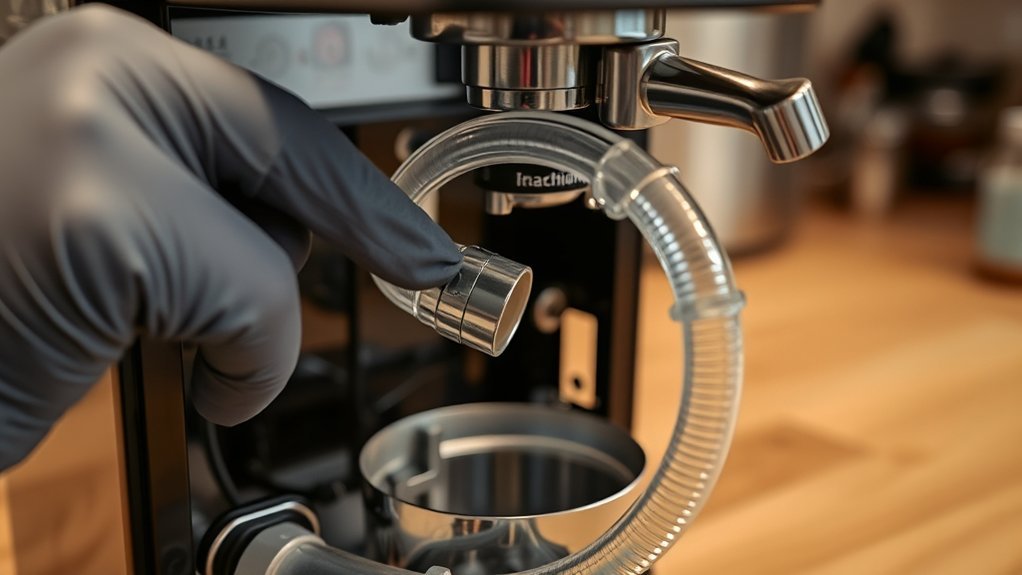
If your manual expressly permits access to a removable water valve or hose, photograph each connection before removal, work only on an unplugged and fully cooled unit, and replace damaged seals or clamps with manufacturer-approved parts. Otherwise, leave internal inspection to authorized service.
Clearing the Valve Safely
Clean only a valve that the manufacturer identifies as removable and user-serviceable. Rinse it with fresh water if the manual allows, verify its correct flow direction, and reinstall it with the specified seals and clamps. Do not force wire, high-pressure compressed air, or unapproved chemicals through a sealed water path because they can damage valves, sensors, tubing, or seals and can drive debris deeper into the machine.
| Action | Safe Method | When to Do It |
|---|---|---|
| Inspect reservoir and basket | Visual check and reseating | At the first no-brew symptom |
| Wash removable parts | Mild dish soap and water, as permitted | After use or as the manual directs |
| Descale | Model-approved solution and cycle | At the stated interval or when flow slows |
| Clean a removable valve | Only by the manual’s procedure | Only if identified as user-serviceable |
| Open the electrical base | Authorized service | When internal diagnosis is required |
Before Disassembling Your Coffee Maker
General instructions cannot safely cover every coffee maker. Screw types, hidden clips, hot plates, thermal fuses, pumps, hoses, and wiring locations vary. Before any disassembly, check all of the following:
- The machine is unplugged, empty, and fully cool.
- The warranty terms do not prohibit unauthorized repair.
- The manufacturer provides a user-service procedure for the exact model.
- You have the correct replacement seals, clamps, and parts.
- No water has entered the electrical base.
If any item is uncertain, do not remove the cover. Contact the manufacturer with the model and serial number, the exact symptom, the lights or error code shown, and the cleaning steps already completed.
Inspect Hoses and Heating Elements for Blockages or Failure
Hoses and heating parts are often inside the electrical base. For most owners, the safe inspection is symptom-based rather than physical.
Check User-Accessible Water Connections
Inspect the removable reservoir outlet, visible seals, basket drain, spray head, and any external tube the manual tells you to remove. Look for mineral crust, coffee residue, a folded seal, a loose removable fitting, or a tank that does not sit flat. Do not reach through openings with metal tools.
Recognize Heating-Element or Thermal-Fault Symptoms
An internal heating or thermal-control fault is possible when the controls work but the water remains cold, the warming plate alone heats, the unit shuts off immediately, a breaker trips, or a burned smell appears. A heating element is not normally cleaned by scraping or blowing into the base. Unplug the unit and arrange service.
Note: A no-flow symptom can come from different systems. Basic drip brewers may use heat-driven water movement and a check valve, while pod and espresso machines may use electric pumps and electronic sensors. Use model-specific instructions.
How to Clean a Jammed One-Way Valve
This procedure applies only when the owner’s manual identifies a removable, user-serviceable one-way valve. If it does not, skip this section and use authorized service.
- Unplug the machine, let it cool, and empty all water.
- Follow the manual’s exact access procedure without removing any prohibited cover.
- Note the valve’s flow direction before removal.
- Rinse the removable valve with fresh water only if the manual permits it.
- Do not puncture the valve, stretch the hose, or use high-pressure air.
- Reinstall the valve in the correct direction with the original or approved seals and clamps.
- Run a water-only test while watching for leaks.
If flow does not return, replace the approved valve or request service. Repeatedly forcing a blocked machine to run can overheat components or worsen a leak.
Reassembling Your Coffee Maker Safely
Reassemble only parts the manual permits you to remove. Confirm that valves face the correct direction, seals sit flat, hoses are not kinked, clamps are secure, and no wire is pinched. Replace every screw and safety cover before plugging the machine in.
Place the coffee maker on a dry, stable surface and run a water-only cycle. Stay beside it during the test. Unplug it immediately if you see water under the base, hear electrical crackling, smell burning insulation, or notice smoke.
Essential Maintenance Tips for Your Coffee Maker
A simple maintenance routine can prevent many brewing and water-flow problems.
- Discard grounds and rinse the basket and carafe after each use.
- Wash removable parts on the schedule and by the method listed in the manual.
- Keep the reservoir, spray head, pod needles, and basket outlet free of visible residue.
- Descale at the manufacturer’s interval or when the descale indicator appears.
- Use only approved cleaning products and rinse cycles.
- Inspect the cord, plug, carafe, lid, seals, and removable tank for damage.
- Do not store water in the reservoir for long periods.
The safest troubleshooting order is external setup, water-only testing, model-approved cleaning, model-approved descaling, and then authorized service.
When to Seek Professional Help for Coffee Maker Repair
Stop troubleshooting and seek manufacturer or authorized repair support when:
- The cord, plug, outlet, or housing is scorched, melted, cracked, or unusually hot.
- The machine sparks, smokes, smells burned, or trips a breaker.
- Water leaks into or from the electrical base.
- The machine still does not heat or move water after correct setup, cleaning, and descaling.
- An internal hose, pump, valve, thermostat, thermal fuse, heater, control board, or sensor is suspected.
- The product is under warranty or the manual says there are no user-serviceable parts.
Before paying for repair, check the manufacturer’s warranty and search the U.S. Consumer Product Safety Commission recall database by brand and model.
DIY Solutions for Common Coffee Maker Issues
- No power: test the outlet, reseat the plug, check the control setting, and stop if the cord or plug is damaged.
- No water movement: reseat the tank, open the drip stop, reinstall the basket and carafe, run a water-only test, and descale as directed.
- Slow brewing: remove duplicate filters, reduce overly fine grounds or excess coffee, clean the basket outlet, and descale.
- Grounds in the cup: use the correct filter, seat it fully, avoid overfilling, and clean sharp pod needles only by the approved method.
- Gurgling: check output volume and scale before assuming an internal valve is blocked.
- Leak near the basket: verify the carafe lid, basket valve, filter size, and coffee dose.
When to Consider Replacing Your Coffee Maker
There is no reliable universal five-to-seven-year replacement rule. Replace the coffee maker when the manufacturer cannot supply a safe repair, the electrical base is damaged, leaks keep returning, a recall remedy requires replacement, or the repair cost is not reasonable compared with a new unit.
Also consider replacement when critical parts are discontinued or the machine repeatedly fails after proper cleaning and authorized repair. Do not continue using a unit with electrical, fire, burn, or uncontrolled-leak symptoms.
Frequently Asked Questions
What are the first things to check when a coffee maker will not brew?
Check the outlet, plug, power or brew control, water level, reservoir seating, basket lid, filter placement, carafe lid, and drip-stop position. Then run a water-only cycle.
Can I use vinegar to descale my coffee maker?
Use vinegar only when the manufacturer approves it for your exact model and follow the stated ratio, cycle, soak, and rinse steps. Some models call for a branded or commercial descaling solution instead.
How often should I clean and descale a coffee maker?
Rinse or wash user-removable coffee-contact parts regularly. Deep-cleaning and descaling intervals vary by brand, model, water hardness, use, and indicator lights. Follow the owner’s manual rather than a universal monthly rule.
Why does my coffee maker turn on but not move water?
The tank may be empty or unseated, a drip-stop may be closed, the basket or carafe may be misaligned, scale may restrict flow, or an internal pump, valve, heater, sensor, or thermal part may have failed.
Does gurgling mean the one-way valve is clogged?
Not by itself. Some gurgling can occur during normal water movement or near the end of a drip cycle. A restriction is more likely when gurgling comes with low output, repeated stopping, or water left in the reservoir.
Is it safe to use a commercial coffee maker cleaner?
Use a cleaner only when its label and the coffee maker manual say it is compatible with your machine. Never mix cleaners, and complete every required fresh-water rinse before brewing coffee.
Can I open the bottom cover to clean hoses or a valve?
Only if the manufacturer’s instructions for your exact model expressly authorize that user repair. Many coffee maker manuals warn that no user-serviceable parts are inside and direct owners to authorized service.
What warranty options are available for coffee makers?
Warranty length and coverage depend on the manufacturer, model, seller, and country. Check the warranty supplied with the machine before arranging repair because unauthorized disassembly or nonapproved parts may affect coverage.
Conclusion
When a coffee maker is not brewing or moving water, work from the outside in. Check power, controls, water, the reservoir, filter basket, carafe, and drip stop. Run a water-only test, clean accessible parts, and descale by the manual. Treat an internal valve, heater, pump, fuse, sensor, or wiring problem as a service issue unless the manufacturer clearly provides a user-repair procedure.
Sources
- Braun Household: MultiServe not brewing troubleshooting — supports power, water-tank, lid, mode, and drip-stop checks.
- De’Longhi: Drip coffee brewing slowly or not at all — supports filter, descaling, carafe-lid, basket-tab, and spring checks.
- Hamilton Beach FlexBrew use and care — supports unplugging, cooling, sharp-needle cautions, cleaning, and the no-user-serviceable-parts warning.
- Mr. Coffee: How to clean a coffee maker — supports routine cleaning and a manufacturer-approved vinegar method for applicable drip models.
- Keurig descaling guidance — supports the effect of scale on performance and model-specific descaling intervals.
- U.S. Consumer Product Safety Commission recalls — provides current recall and product-safety warning information.