Finding coffee grounds in your cup usually means your Keurig’s pod holder or puncture needles need cleaning, a pod was damaged or punctured twice, or a reusable filter was overfilled. The problem is often easy to correct, but the brewer must be unplugged and cool before you work near its sharp needles.
Quick Answer
Unplug and cool the Keurig, inspect the pod for a torn or previously punctured lid, then clean the pod holder, exit needle, and visible entrance-needle holes with a straightened paper clip. Reassemble the brewer and run two water-only cleansing brews. If grounds remain, try a new pod or check your reusable filter.
Key Takeaways
- Grounds in a Keurig cup most often point to debris in the pod holder or entrance and exit needles.
- Never reuse an already-punctured pod, and discard any pod with loose, torn, or badly wrinkled foil.
- Use a straightened paper clip only after the brewer is unplugged and cool, and keep your fingers away from the sharp needles.
- When using a reusable filter, confirm that it fits your model and never fill it above the marked MAX line.
- Descaling can improve slow or partial brewing, but needle and pod-holder cleaning is the more direct fix for loose grounds.
At a Glance
| Time Required | 10–20 minutes |
| Difficulty | Easy |
| Tools Needed | Straightened paper clip, large mug, fresh water, mild dish soap, and a soft cloth |
| Cost | Usually $0; a replacement pod holder or descaling product costs extra if needed |
How to Fix Coffee Grounds in Your Cup

Warning: Unplug the brewer and let it cool before removing the pod holder or cleaning the needles. Keurig brewers contain sharp upper and lower puncture needles. Do not place your fingers inside the pod holder, and never lift the handle during a brew cycle.
- Remove and inspect the used pod. Look for a torn foil lid, loose foil, a crushed rim, or extra puncture holes. Do not reuse a pod that has already been punctured.
- Check whether the problem follows one pod or every pod. If only one pod released grounds, discard it and test a fresh pod from another box. If every cup contains grounds, continue with the cleaning steps.
- Remove the pod holder. Removal methods vary. On many models, you lift the handle, support the pod holder from below, and push upward until it releases. Check your model’s guide before forcing any part.
- Detach and rinse the funnel. On compatible models, the funnel snaps off the bottom of the pod holder. Wash the removable parts with warm water and mild dish soap, then rinse well.
- Clear the exit needle. Locate the opening inside the bottom of the removed pod holder. Carefully insert a straightened paper clip into the opening and move it gently to loosen trapped grounds. Do not enlarge or bend the opening.
- Clear the entrance-needle holes. With the handle raised and the brewer unplugged, locate the needle or needles beneath the lid. Without touching them, guide the paper clip into each visible hole and move it gently. Needle number and hole layout vary by model.
- Reassemble the pod holder. Make sure the funnel and holder snap securely into their original positions.
- Run two cleansing brews. Place a large mug on the drip tray and run two complete water-only cycles without a pod. Empty the mug after each cycle, then test the brewer with a fresh, undamaged pod.
Keurig’s current troubleshooting guidance also directs users to clean both the exit and entrance needles when grounds appear in the cup. See the manufacturer’s grounds-in-cup troubleshooting instructions and needle-cleaning guide for model-specific visuals.
Pro Tip: Place the cleaned parts on a white paper towel before reassembly. Dark coffee particles are easier to see against the white surface, so you can tell whether more rinsing is needed.

Power your essentials anywhere with a 999Wh pure sine wave power station delivering up to 1000W continuous with 2000W surge. It supports fast charging via USB-C PD 60W and USB-A QC 18W, plus simultaneous output for multiple devices through AC, USB, wireless, and car/DC ports. Recharge using AC, car, or solar with a built-in MPPT controller and dual cooling fans, while the upgraded battery management system protects against surges, short circuits, and overheating.
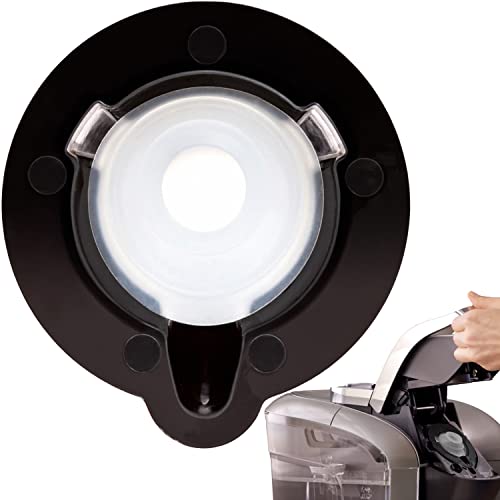
Efficient Brewing Solution: IMPRESA's Brewer Needle Cleaning Tool enhances your coffee maker's performance by eliminating clogs and ensuring a seamless brewing experience. Compatible with Keurig 2.0 brewers, this coffee maker needle cleaner simplifies maintenance
![Quick & Clean [6-Pack] Keurig Cleaning Pods - K Cup Cleaner Pod For Keurig - 2.0 Coffee Machine Compatible, Removes Stains, Non-Toxic and Eco-Friendly](https://m.media-amazon.com/images/I/51lXaI5rgKL._SL500_.jpg)
Get That Fresh Coffee Taste Back - Over time, Keurig (TM) machines build up old grinds and residues, tainting the flavor of your coffee and espresso. Quick and Clean Keurig cleaning pods use a proprietary cleaning formula that cuts through and eliminates these residues, bringing taste back to normal
How to Identify a Blockage in Your Coffee Maker
A few quick checks can show whether the grounds are coming from a clogged brew path, a damaged pod, or a reusable filter.
| What You Notice | Likely Cause | Best First Step |
|---|---|---|
| Grounds appeared after one pod | Torn foil, a crushed pod rim, or a pod punctured more than once | Discard the pod and test a new one |
| Grounds appear with several pod brands | Grounds trapped in the pod holder or needles | Clean the holder, funnel, exit needle, and entrance needle holes |
| Grounds occur only with a reusable filter | Overfilling, incompatible filter, poor lid fit, or coffee that is too fine for that filter | Confirm compatibility and fill no higher than the MAX line |
| Brewing is slow or the cup is only partly filled | Needle blockage, dirty pod holder, or mineral scale | Clean the brew path first, then descale according to the model guide if needed |
| Grounds remain after two complete cleanings | Bent needle, cracked holder, damaged seal, or another mechanical fault | Stop using the brewer and contact Keurig support |
A blocked exit needle can also cause a slow stream, splashing, or a partial cup. However, descaling is not the first fix for visible grounds unless the brewer also has reduced flow or a descale alert.
Top Reasons for Coffee Grounds in Your Brew

Clogged Entrance or Exit Needle
Loose coffee can collect in the small needle openings. The next brew may push those particles into the cup. This is especially likely when the brewer has not been rinsed after a pod spills or when a used pod remains in the holder.
Damaged or Previously Punctured Pod
A pod with torn foil, a bent rim, or extra puncture holes may not hold its coffee securely. Insert each disposable pod only once. Do not peel off its foil lid before brewing.
Dirty Pod Holder or Funnel
Grounds can remain around the holder after a messy brew. Removing and rinsing the holder and funnel clears particles that a water-only cycle may not reach.
Overfilled or Incompatible Reusable Filter
Reusable filters require more care than sealed pods. Use a filter approved for your brewer, install its lid correctly, and keep the coffee at or below the marked MAX line. Keurig’s My K-Cup instructions explain how the filter setup changes for MultiStream models.
Damaged Pod Holder, Needle, or Seal
A cracked holder, bent needle, or visibly torn gasket can prevent the pod from sealing correctly. These parts should not be forced, glued, or reshaped. Replace the model-specific removable part or contact the manufacturer.
When grounds appear with several different pods, clean the brew path before blaming the coffee brand.
Cleaning the Exit Needle: A Step-by-Step Guide
The exit needle sits inside the lower portion of the removable K-Cup pod holder on many Keurig models. It punctures the bottom of the pod and provides the path through which the brewed coffee exits.
- Turn off the brewer, unplug it, and wait for it to cool.
- Lift the handle and remove any used pod.
- Remove the pod-holder assembly according to your model guide.
- Detach the funnel if your holder is designed to separate.
- Locate the exit-needle opening inside the bottom of the holder.
- Insert a straightened paper clip into the opening and move it gently to loosen coffee particles.
- Rinse the holder and funnel thoroughly. Keep your fingers away from the needle.
- Reattach the funnel and reinstall the pod holder securely.
- Run two water-only cleansing brews before making coffee.
Note: Do not force a thick tool, knife, toothpick, or drill bit into a needle opening. It can enlarge the hole, break inside the brewer, or damage the puncture assembly.
Why Routine Maintenance Keeps Your Coffee Maker Running Smoothly

Importance of Regular Cleaning
Routine cleaning keeps loose coffee, oils, and beverage residue from collecting in the brew path. Keurig’s general brewer-cleaning guidance recommends removing cooled used pods, running cleansing brews, rinsing external parts, and cleaning the pod-holder assembly regularly.
- Remove a used pod after it has cooled.
- Run a water-only cleansing brew after a pod leaks or leaves grounds behind.
- Rinse the removable pod-holder assembly about weekly or as directed by the model manual.
- Wash the reservoir, lid, and drip tray with mild soap when needed.
- Do not immerse the brewer body in water.
Effective Descaling Techniques
Descaling removes mineral deposits from internal water passages. It can help when the brewer is slow, noisy, producing a partial cup, or showing a descale alert. It is not a substitute for removing coffee grounds from the pod holder and needles.
Descaling controls and rinse requirements vary by brewer. Follow the current manual for your exact model or Keurig’s model-specific descaling guide. Current instructions commonly call for Keurig Descaling Solution, fresh water, a large ceramic mug, and completion of the brewer’s full descale mode.
Many Keurig materials recommend descaling every three to six months, while some models call for every three months or whenever the descale notification appears. Hard water may require more frequent descaling.
Warning: Do not combine vinegar with commercial descaling solution. Do not interrupt a programmed descale cycle unless the model instructions tell you to do so, and keep the hot liquid away from children and pets.
Inspecting Key Components Regularly
Check the following parts whenever grounds return:
- Pod holder: Look for cracks, warping, or coffee packed around the lower opening.
- Funnel: Confirm that it is clean and snapped firmly into place.
- Exit needle: Clear visible coffee particles without bending the needle.
- Entrance needle holes: Clean every visible opening while keeping your fingers away from the sharp metal.
- Gaskets and seals: Look for obvious tears, looseness, or displacement.
- Reusable filter: Confirm that it is compatible, correctly assembled, and not filled above MAX.
Best Practices for Choosing K-Cup Pods to Avoid Grounds
A pod’s condition and fit matter more than its flavor or brand name. Use these checks before brewing:
| Pod Check | What to Do |
|---|---|
| Compatibility | Use pods or a reusable filter designed for your exact brewer series. |
| Foil lid | Do not use a pod with torn, loose, punctured, or badly wrinkled foil. |
| Pod rim | Discard a pod with a crushed or distorted rim that may not seal evenly. |
| One-time use | Do not brew a disposable pod a second time or reinsert it after the needles have punctured it. |
| Reusable filter | Keep coffee below the MAX line, close the lid fully, and use a grind suitable for the filter. |
| Problem box | If several pods from one box fail but other pods brew cleanly, stop using that box and contact the pod manufacturer. |
When to Contact Keurig Support
Stop using the brewer and seek manufacturer help when:
- The needle is bent, loose, broken, or missing.
- The pod holder is cracked or will not lock into place.
- Hot water or coffee leaks around the handle.
- The brewer continues producing grounds after two complete cleanings and fresh-pod tests.
- The brewer still produces partial cups after needle cleaning and a correctly completed descale cycle.
- You are unsure which pod holder, gasket, or reusable filter fits your model.
Keurig lists current troubleshooting materials and contact options on its official support site. Internal electrical, heating, and pressurized components are not intended for routine home repair.
Frequently Asked Questions
Can using older coffee grounds contribute to grounds in the cup?
Older coffee may taste stale, but age alone should not make grounds escape from an intact factory-sealed K-Cup pod. With a reusable filter, loose grounds are more often caused by overfilling, an unsuitable grind, poor lid fit, or an incompatible filter.
How often should I clean my coffee maker to prevent grounds?
Remove cooled used pods promptly and run a cleansing brew after a pod leaks or leaves residue. Rinse the removable pod-holder assembly about weekly or according to your model manual. Descale on the schedule stated for your model, commonly every three to six months or when the alert appears.
Are certain coffee brands more prone to leaving grounds?
There is no sound reason to condemn an entire brand based on one failed pod. Inspect the individual pod and compare it with a fresh pod from another box. When the problem follows only one box, stop using that box and report its lot information to the pod manufacturer.
Does water temperature affect the amount of grounds in my cup?
Water temperature is not a common cause of loose grounds in a Keurig cup. Grounds are more likely to enter through a damaged pod, overfilled reusable filter, dirty pod holder, or clogged needle opening. Do not modify the brewer’s temperature system to address this symptom.
Can flavored K-Cup pods cause more grounds than regular ones?
Flavoring does not automatically make a pod release grounds. Check the foil, rim, puncture pattern, and pod-holder cleanliness. A cleansing brew after cocoa or milk-ingredient pods can help reduce residue and flavor carryover.
Why does my reusable K-Cup leave grounds in the coffee?
The filter may be overfilled, incorrectly assembled, incompatible with the brewer, or filled with coffee that is too fine for its mesh. Empty and clean it, confirm model compatibility, and refill only to the MAX line without packing the coffee tightly.
Should I descale the brewer when grounds appear?
Clean the pod holder and needles first. Descaling is useful when the brewer also runs slowly, dispenses a partial cup, or shows a descale alert. Complete the exact descale procedure for your model rather than using a universal recipe.
Conclusion
Coffee grounds in a Keurig cup usually come from a dirty pod holder, clogged needle opening, damaged pod, or overfilled reusable filter. Begin with the least invasive fix: inspect the pod, clean the removable brew-path parts, clear the needle openings carefully, and run two water-only cycles. Follow your model’s instructions for descaling, and contact Keurig when a needle, holder, gasket, or other part appears damaged.
Sources
- Keurig: Troubleshooting Tip — I Have Grounds in My Cup — manufacturer guidance for grounds in the cup and exit-needle cleaning.
- Keurig: How to Clean Your Brewer Needles — safe needle-cleaning overview.
- Keurig: Cleaning Tips for Your Brewer — routine cleansing brews, pod-holder care, and maintenance frequency.
- Keurig: How to Descale Your Coffee Maker — model-specific descaling procedures and fresh-water rinsing.
- Keurig: How to Use the My K-Cup Reusable Coffee Filter — compatibility, assembly, and MAX-fill guidance.