
Black specks in coffee can come from escaped coffee grounds, loose carbon from a water filter, residue inside the machine, or a damaged gasket or plastic part. Mold is possible in a neglected, damp reservoir, but you cannot identify mold by color alone. Discard the affected cup and find the source before brewing another drink.
Quick Answer
Black specks in coffee are often escaped grounds or carbon fines from a water filter. They may also come from residue, microbial growth, or a deteriorating seal. Run a water-only cycle, inspect the filter and removable parts, and clean the machine according to its manual before using it again.
Key Takeaways
- Discard the affected coffee until you know whether the specks are grounds, carbon, residue, or damaged material.
- A water-only brew helps show whether the particles come from the coffee and filter or from the machine itself.
- Hard-water scale is generally white or gray, so black flakes should not automatically be blamed on limescale.
- Use only the cleaning solution and descaling method approved for your exact coffee maker.
- Stop using the machine if it releases rubbery flakes, plastic pieces, burnt-smelling debris, or particles that remain after cleaning.
At a Glance
| Time Required | About 20–60 minutes, depending on the cleaning or descaling cycle |
| Difficulty | Easy for routine cleaning; professional service may be needed for damaged internal parts |
| Tools Needed | White cup, dish soap, soft cloth or brush, fresh filter, and the manual-approved descaler |
| Cost | Often $0 with supplies on hand; generally under $20 for a replacement filter or descaler |
Warning: Do not keep drinking coffee that contains unidentified debris. Unplug the machine and let it cool before removing parts. Never mix cleaning products, and do not pour bleach or another disinfectant through the brewing system unless the manufacturer specifically instructs you to do so.
Identifying Causes of Black Specks in Coffee

Start by looking at the particles in a white cup under bright light. Their texture, smell, and behavior can help narrow down the source, although appearance alone cannot confirm mold or another biological contaminant.
| What You Notice | Possible Source | Next Check |
|---|---|---|
| Dark, gritty particles that smell like coffee | Coffee grounds | Inspect the paper filter, basket, reusable filter, pod, and pod needles. |
| Very fine black powder after installing a water filter | Activated-carbon fines | Remove and prepare the cartridge exactly as its instructions require, then run fresh-water cycles. |
| Slimy residue, film, musty odor, or visible growth | Organic buildup or possible microbial growth | Stop using the machine and clean every accessible part according to the manual. |
| Flexible, rubbery, or plastic-like flakes | Damaged gasket, seal, tubing, coating, or plastic component | Inspect visible parts and contact the manufacturer before brewing again. |
| White, gray, or chalky flakes | Mineral scale | Descale with the product and procedure approved for the machine. |
Next, fill the cleaned reservoir with fresh water and run a water-only cycle into a white cup. If the water is clear, the specks probably came from the coffee, filter, reusable pod, or brew basket. If particles appear in the water-only cup, focus on the reservoir, filter cartridge, pod holder, internal water path, and visible seals.
Pro Tip: Pour cold tap water directly into a clean white cup before filling the reservoir. If the same particles appear in the unheated water, investigate the faucet, plumbing, pitcher filter, or water supply rather than the coffee maker.

Power your essentials anywhere with a 999Wh pure sine wave power station delivering up to 1000W continuous with 2000W surge. It supports fast charging via USB-C PD 60W and USB-A QC 18W, plus simultaneous output for multiple devices through AC, USB, wireless, and car/DC ports. Recharge using AC, car, or solar with a built-in MPPT controller and dual cooling fans, while the upgraded battery management system protects against surges, short circuits, and overheating.
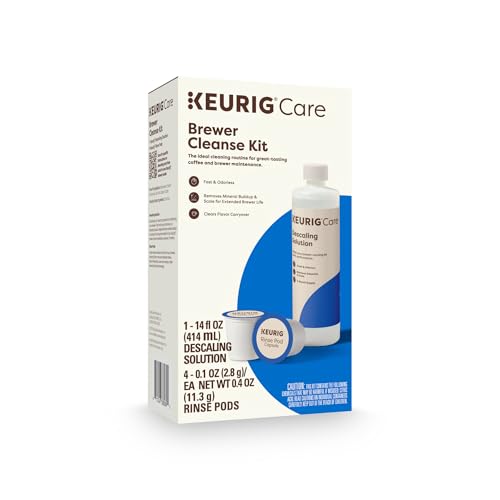
Better tasting beverages: Reduces flavor carry over between brews

INCLUDES: 4 Keurig Rinse Pods, 1 Descale Solution, and 2 Water Filter Cartridge Refills
Common Sources of Black Specks in Coffee Makers
Black specks do not have one universal cause. The most useful clues are whether they appear during a water-only cycle, whether they feel gritty or flexible, and whether the machine has a musty or burnt odor.
Coffee Grounds Passing Through
Escaped grounds are a common explanation when the particles are gritty and smell like coffee. In a drip machine, grounds can enter the carafe when the paper filter folds over, tears, is too small, or allows an overly fine grind to pass through. An overfilled basket can also overflow during brewing.
With a reusable mesh filter, some fine sediment is normal, but a sudden increase may mean the filter is damaged or the grind has become too fine. Check that the basket is seated correctly and that the brewer is not delivering water faster than the basket can drain.
Clogged Pod Needles and Damaged Pods
In pod brewers, grounds can collect around the entrance or exit needles and then wash into the cup. A reused, swollen, incorrectly seated, or already-punctured pod may also release grounds.
Some Keurig models allow the needle openings to be cleared with a straightened paper clip, but this is a model-specific procedure. Follow the instructions for your exact brewer, keep your fingers away from the sharp puncture points, and run the required water-only cleansing cycles afterward. Keurig’s needle-cleaning guidance explains the approved process for supported models.
Carbon and Filter Material Particles
A new or damaged charcoal water-filter cartridge can release tiny carbon particles. This is more likely when the cartridge was not soaked, rinsed, or flushed as its instructions require. Remove the cartridge, inspect it for tears, prepare or replace it according to the manual, and run water-only cycles until the water is clear.
A paper coffee filter normally does not create black material. If black specks appear around a damaged paper filter, they are more likely to be coffee grounds that passed around or through it.
Residue or Possible Mold in the Reservoir
A dark, damp reservoir can support bacteria, yeast, mold, and mildew when water is allowed to stand. An NSF household study involving 22 families placed coffee reservoirs among the five germiest household locations tested. That finding shows why reservoir care matters, but it does not prove that any specific black speck is mold.
A coffee reservoir’s dark, damp environment can support microbial growth, so emptying, cleaning, and drying it is more useful than trying to identify contamination by color.
If you find a slippery film, visible growth, or a persistent musty odor, stop using the coffee maker. Wash removable, food-contact parts with warm water and dish soap if the manual permits, rinse them thoroughly, and let them dry completely. If contamination appears to be inside sealed tubing or inaccessible areas, contact the manufacturer or replace the machine.
Worn Seals or Internal Parts
Rubber gaskets, silicone seals, tubing, nonstick coatings, and plastic parts can deteriorate because of age, heat, chemical exposure, or damage. Suspect a component problem when the flakes bend rather than crumble, have a rubber or plastic smell, or continue appearing during water-only cycles after routine cleaning.
Do not create a generic replacement schedule for these parts. Inspect them as directed in the manual and replace only with a compatible manufacturer-approved component. A metal brew needle does not normally need routine replacement every six to twelve months.
Mineral Scale and Water Sediment
Hard water can create calcium-carbonate deposits inside heated appliances. However, these deposits are generally white, pale gray, or chalky rather than black. The U.S. Geological Survey explains that heating hard water can produce solid calcium-carbonate deposits.
Descaling can restore water flow and heating performance, but it will not repair a deteriorating gasket or remove coffee grounds trapped in a filter assembly. If black particles also appear in unheated tap water, contact your water provider or a qualified plumbing professional.
Troubleshoot Black Specks Step by Step
- Discard the coffee. Do not taste more of it while the material is unidentified.
- Check the source water. Fill a white cup directly from the faucet or water container and look for the same sediment.
- Run a water-only test. Use a clean reservoir and cup without coffee, a pod, or a paper filter.
- Inspect the coffee path. Check the basket, paper filter, reusable filter, pod, pod holder, and visible outlets for escaped grounds.
- Inspect the water path. Check the reservoir, charcoal cartridge, lid, gaskets, and accessible tubing for residue or damage.
- Wash accessible parts. Use warm water and dish soap where the manual allows, then rinse and dry completely.
- Descale only as directed. Use the approved solution, dilution, mode, and rinse procedure for your model.
- Repeat the water-only test. If debris remains, stop using the machine and contact the manufacturer or a qualified repair service.
Note: A clear water-only cycle does not prove that every internal surface is sanitary. It simply helps separate coffee-side problems, such as escaped grounds, from particles entering through the machine’s water path.
Clean Your Coffee Maker Effectively
Cleaning and descaling are different jobs. Washing removes coffee oils, loose grounds, and surface residue. Descaling dissolves mineral deposits. One process does not replace the other.
Wash Removable Parts
Unplug the machine and let it cool. Remove the carafe, brew basket, reusable filter, pod holder, drip tray, and removable reservoir where applicable. Wash only the parts listed as washable in the manual. Warm water, dish soap, and a soft nonabrasive cloth or brush are suitable for many removable parts.
Rinse away all soap and let the parts air-dry completely before reassembly. Do not immerse the brewer base, electrical cord, or any part the manufacturer identifies as non-submersible.
Clean and Dry the Reservoir
Empty standing water instead of repeatedly topping it off. Wash a removable reservoir according to the manual, rinse it thoroughly, and allow it to dry. Wipe a fixed reservoir only with the method approved by its manufacturer.
Filtered water may reduce chlorine, off-tastes, and some mineral buildup, but it does not replace cleaning. Spring water can still be mineral-rich, and neither type of water prevents microbial growth when moisture and residue remain.
Clean Pod-System Needles Only as Directed
Coffee grounds lodged in a pod brewer’s puncture mechanism can enter later cups. Use only the tool and technique specified for your model. Never put your fingers inside a pod holder, and do not force a tool into an opening that the manual does not identify for cleaning.
Descale With the Approved Method
Check the manual before using vinegar. Cuisinart provides vinegar-based instructions for many of its drip machines, including model-specific ratios and rinse cycles. Cuisinart’s cleaning guide also advises readers to consult the manual because models differ.
Other manufacturers prohibit vinegar. Nespresso’s cleaning guidance, for example, warns that vinegar can damage its machines. Never strengthen a vinegar mixture because a machine looks heavily soiled, and never substitute another acid, powder, or tablet unless the manufacturer approves it.
Warning: Do not mix vinegar, bleach, ammonia, descaler, or other cleaning products. Mixing chemicals can create harmful fumes or reactions. Run every required fresh-water rinse cycle before brewing coffee.
Essential Preventative Maintenance for Your Coffee Maker

A practical schedule separates daily care from descaling. The exact timing should always follow the use-and-care guide for your machine.
| Task | Practical Timing | Purpose |
|---|---|---|
| Discard grounds and rinse the basket or pod holder | After use, once parts are cool | Prevents grounds and oils from drying in place |
| Wash the carafe and removable food-contact parts | After each day of use or as the manual directs | Removes coffee oils and residue |
| Empty, clean, and dry the reservoir | Routinely and before extended storage | Limits standing water, film, and odors |
| Replace the water-filter cartridge | At the model-specific interval; many are around 60 days | Maintains filtration performance and reduces loose filter material |
| Descale | When the indicator appears or at the interval in the manual | Removes mineral deposits from the water path |
| Inspect seals, filters, and plastic parts | During routine cleaning | Finds cracks, swelling, tears, and deterioration early |
If the machine will sit unused, empty the reservoir, clean the removable parts, and allow them to dry before storage. Run the manufacturer-recommended rinse or cleansing cycle when returning the machine to service.
When to Replace Components in Your Coffee Maker
Replace a component because it is damaged, no longer seals or filters correctly, or has reached the interval stated in the manual—not because of a generic calendar rule.
Signs of Component Wear
Look for cracked or swollen seals, a leaking reservoir, torn filter material, a damaged reusable basket, brittle plastic, peeling internal surfaces, or flakes that feel rubbery. Persistent leaking, unusual noises, overheating, electrical odors, or burnt-looking debris require immediate attention.
If a visible removable part is damaged, use the exact replacement listed for the model. Do not improvise with a gasket, adhesive, coating, or filter that is not rated for the machine and hot-water contact.
Timing for Replacement Actions
Charcoal water filters often have scheduled replacement intervals, but the interval varies. Cuisinart discusses replacement or rinsing at about 60 days or 60 uses for its applicable filters, while other brands and models may differ. Follow the indicator or manual supplied with your machine.
Brew needles do not have a universal six-to-twelve-month replacement schedule. Clean them only when the manual directs. If a needle assembly, seal, or internal fitting is bent, loose, corroded, or damaged, contact the manufacturer rather than attempting an unsupported repair.
Get Expert Tips for Resolving Black Specks in Coffee

Use a clean white cup for every test so small particles are easy to see. Change only one factor at a time: first the water, then the coffee filter or pod, and then the machine-cleaning step. This approach makes it easier to identify what solved the problem.
If the specks disappear during a water-only cycle but return with coffee, replace the paper filter or pod and adjust the grind or dose. If they remain during water-only cycles, remove any water-filter cartridge and test again after following the cartridge instructions. Persistent debris points to the machine or incoming water rather than the beans.
Contact the manufacturer or stop using the brewer when:
- The particles are rubbery, plastic-like, metallic, or burnt.
- The machine leaks or has a damaged reservoir or seal.
- A musty odor or visible film returns after cleaning.
- Debris continues through several water-only cycles.
- The contaminated area is sealed and cannot be safely accessed.
- The power cord, heating system, or controls show signs of damage.
Frequently Asked Questions
Can black specks affect the taste of my coffee?
Yes. Escaped grounds can add bitterness and grit, while old coffee oils or residue may create stale or unpleasant flavors. Carbon fines may feel powdery without adding a strong flavor. A musty, chemical, rubber, or burnt taste is a reason to discard the drink and stop using the machine.
Are black specks harmful to consume?
You cannot judge their safety without identifying the source. Coffee grounds or a small amount of filter carbon are different from mold, damaged rubber, plastic, plumbing sediment, or burnt material. Discard the affected cup and correct the source before brewing again.
How often should I clean my coffee maker?
Discard grounds and wash removable food-contact parts regularly, often after each day of use. Empty and dry the reservoir routinely. Descale when the machine indicates it or at the interval in the manual, which commonly ranges from monthly to every few months depending on the model, usage, and water hardness.
What type of water is best for a coffee maker?
Use water that meets the coffee maker manufacturer’s instructions. Filtered water may improve taste and reduce some mineral buildup, but it does not eliminate the need to clean the reservoir. Do not assume spring or bottled water is low in minerals, and avoid distilled water when the manual advises against it.
Can old coffee beans cause black specks?
Bean age can affect aroma and flavor, but it does not normally create separate floating black particles. What looks like a bean problem is more often fine coffee grounds escaping through a torn, folded, undersized, or reusable filter.
Why do black specks appear during a water-only brew?
Particles in a water-only cycle point toward the reservoir, charcoal filter, pod holder, internal water path, deteriorating component, or source water. Remove and inspect accessible parts, test the incoming water separately, and clean the machine according to the manual.
Can a charcoal water filter release black dust?
Yes, a new, damaged, or improperly prepared activated-carbon cartridge may release fine black carbon. Soak, rinse, install, and flush the cartridge exactly as its instructions require. Replace it if the housing or filter material is torn.
When should I replace the coffee maker?
Replacement may be safer than continued troubleshooting when inaccessible areas remain contaminated, internal plastic or seals are shedding, the reservoir is cracked, electrical or burnt odors occur, or manufacturer-approved repair is unavailable or costs nearly as much as a new machine.
Conclusion
Black specks in coffee are a warning to investigate, not proof of one specific problem. Begin with a white-cup inspection and a water-only brew. Escaped grounds and carbon fines can often be corrected with a new filter or proper cleaning, while musty residue, rubbery flakes, persistent debris, or damaged components require you to stop using the machine. Follow the manual for every cleaning, descaling, and replacement step.
Sources
- NSF — Clean the Germiest Home Items — Supports reservoir hygiene guidance and provides context for the 2011 household germ study.
- Keurig Support — Needle Cleaning — Supports model-specific removal of grounds from pod-system needles.
- Cuisinart — How to Clean a Coffee Maker — Supports removable-part care, charcoal-filter timing, and model-specific vinegar instructions.
- Nespresso — How to Clean and Descale Your Coffee Machine — Supports the warning that vinegar is not suitable for every machine.
- U.S. Geological Survey — Hardness of Water — Explains calcium-carbonate scale caused by heating hard water.
- CDC — 8 Tips to Clean Mold — Supports moisture control, prompt drying, and the warning not to mix cleaning products.