If your Keurig stopped brewing immediately after descaling, the machine may not be broken. Common causes include an unfinished fresh-water rinse, too little water, a removable reservoir that is not fully seated, coffee grounds in a puncture needle, heavy scale that temporarily restricts flow, or a model-specific Descale Mode that has not finished. Work through the checks below in order instead of immediately adding more descaling solution.
Quick Answer
Remove any K-Cup pod, rinse and refill the reservoir, reseat it firmly, and run a water-only brew. If no water flows, finish your model’s required fresh-water rinse, power-cycle the brewer, and clean the entrance and exit needles while it is unplugged and cool. Use only reset buttons documented for your exact model.
Key Takeaways
- A Descale light is a maintenance notification; it does not by itself prove that a solid blockage is stopping the brewer.
- Complete every fresh-water rinse required by your exact model before trying another descale cycle.
- Check the water level, removable reservoir position, pod holder, and puncture needles when the brewer has little or no flow.
- There is no universal Keurig reset. K-Duo, K-Supreme, K-Express, K-Iced, K-Mini, and other families can use different controls, and controls can change between generations.
- Stop using the brewer and contact Keurig if it leaks internally, smells electrical, repeatedly trips a breaker, or still will not dispense after the official troubleshooting procedure.
At a Glance
| Time Required | About 10–45 minutes, plus any soak or recovery time required by your model’s guide |
| Difficulty | Easy to moderate |
| Tools Needed | Large ceramic mug, fresh water, straightened paper clip, soft cloth, and the correct model guide |
| Cost | No cost for basic checks; replacement descaling solution, a water filter, or replacement parts cost extra if needed |
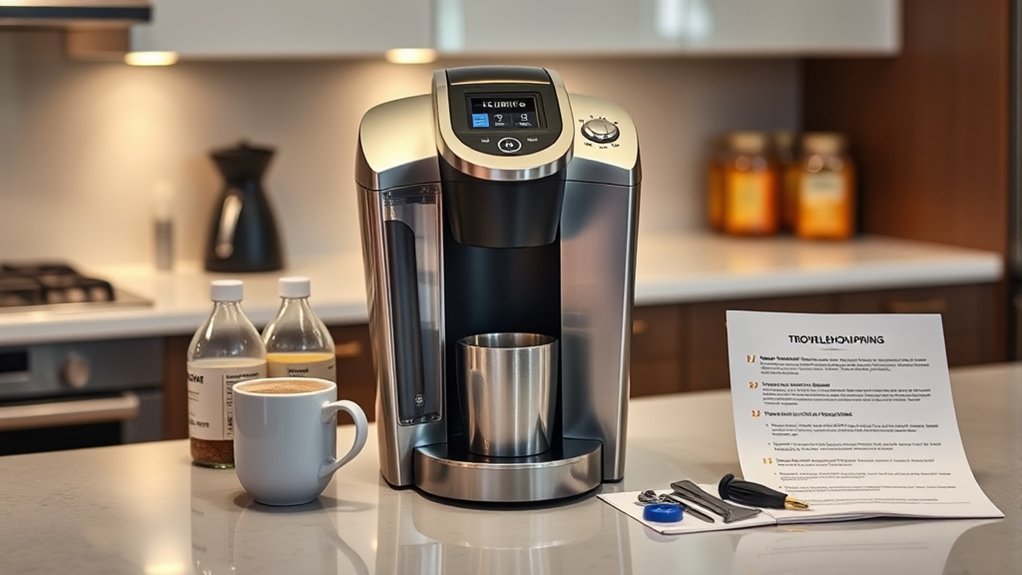
Warning: Descaling liquid and rinse water may be very hot. Let the brewer cool and unplug it before cleaning the pod holder or needles. The entrance and exit needles are sharp, so never place your fingers inside the K-Cup pod holder or under the brewer head.
Identify Your Keurig Model Before Resetting It
Keurig button controls and descale procedures vary between the K-Duo, K-Supreme, K-Slim, K-Express, K-Mini, K-Elite, K-Café, K-Iced, and other brewer families. Controls can also change between generations of the same family. Before pressing any reset or Descale Mode combination, find the model name on the brewer or locate the serial-number label, which is commonly behind or beneath the removable reservoir.
Use Keurig’s official support center or its descaling guide to select the instructions for that exact brewer. Do not assume a button combination shown for a similar-looking machine will work on yours.
| Model Example | Documented Descale Control | How the Light Clears |
|---|---|---|
| K-Duo Essentials Gen 2 | With the brewer plugged in and powered off, hold CUPS + OZ together for 3 seconds to enter Descale Mode. | The brewer exits Descale Mode after its required single-serve and carafe fresh-water rinses are completed. |
| K-Supreme / K-Supreme Plus | Compatible guides use 8 oz + 12 oz for 3 seconds while the brewer is plugged in and powered off. | Continue the fresh-water rinse until the Descale notification turns off. |
| K-Express Essentials Gen 2 | Current guidance uses SIZE + BREW for 5 seconds to enter Descale Mode. | Continue the programmed fresh-water rinse until the notification turns off. |
| Compatible first-generation K-Duo units | Some official K-Duo support guidance uses the 8 oz + 10 oz buttons for the Descale indicator. | Use this only when the support instructions for your exact K-Duo generation specify it. |
| Other Keurig brewers | Controls may use Brew, Strong, cup-size buttons, dedicated controls, or no programmed Descale Mode. | Follow the exact use-and-care guide rather than experimenting with another model’s controls. |
Note: On many current machines, the Descale notification turns off only after the brewer completes its programmed fresh-water rinse. Pressing an unrelated button combination can interrupt troubleshooting rather than fix it.

Power your essentials anywhere with a 999Wh pure sine wave power station delivering up to 1000W continuous with 2000W surge. It supports fast charging via USB-C PD 60W and USB-A QC 18W, plus simultaneous output for multiple devices through AC, USB, wireless, and car/DC ports. Recharge using AC, car, or solar with a built-in MPPT controller and dual cooling fans, while the upgraded battery management system protects against surges, short circuits, and overheating.

INCLUDES: 4 Keurig Rinse Pods, 1 Descale Solution, and 2 Water Filter Cartridge Refills
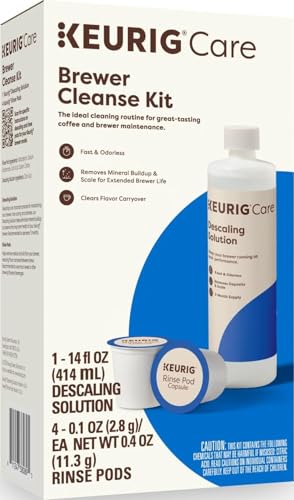
Better tasting beverages: Reduces flavor carry over between brews
What Does the Descale Light on Your Keurig Mean?

The Descale light means the brewer is due for maintenance or has not completed the descaling process expected by its controls. It does not necessarily mean a sensor has detected a solid blockage. Depending on the model, the reminder can be tied to a maintenance schedule or a brew-count threshold rather than direct measurement of scale inside the machine.
Minerals in water can still collect inside the heating and water-delivery system over time. Keurig explains that descaling removes calcium deposits before they interfere with performance. Many current Keurig guides call for descaling every three months or when the Descale notification appears. Other Keurig documentation may specify a 3–6-month interval or a set number of brews, so the exact model guide should control your schedule.
A lit Descale indicator is a maintenance prompt. The full model-specific descale and rinse sequence—not a universal reset—is usually what clears it.
If the light remains on after you believe the process is complete, do not immediately pour in another bottle of solution. First confirm that you entered the correct Descale Mode when required, completed all required water-only rinses, and did not stop when the reservoir first became empty or the Add Water light appeared.
Keurig Descaling Steps
The exact sequence depends on your brewer. Some machines use a guided Descale Mode, while others require repeated cleansing brews followed by a soak and several fresh-water rinses. The steps below show the safe framework that applies across many models without replacing your brewer’s official guide.
Gather Necessary Supplies
Prepare the following before you begin:
- The descaling product specified for your exact model
- Fresh water
- A large ceramic mug that fits beneath the outlet
- Access to a sink
- A straightened paper clip for needle cleaning, if needed later
- The official use-and-care or descaling instructions for your brewer
Remove any K-Cup pod. If the reservoir contains a water-filter cartridge, check whether your model guide tells you to remove it before adding descaling liquid. If you remove the filter, keep it out until the complete fresh-water rinse is finished, then reinstall or replace it according to its instructions.
Pro Tip: Keep your exact model instructions open throughout the process. Stopping a guided cycle when the Add Water light first appears is one of the easiest ways to leave the brewer in Descale Mode.
Follow the Correct Descaling Sequence
- Empty the reservoir. Remove old water and any used pod.
- Add the specified descaler. Use the amount and dilution stated in the model guide. Do not create a vinegar mixture unless the instructions for that brewer specifically permit it.
- Enter Descale Mode if required. Some brewers must be plugged in but powered off while a model-specific button combination is held.
- Run the solution cycles. Empty the mug into the sink after every cycle. Do not insert a beverage pod.
- Complete any required rest period. Some older reservoir brewers use an internal soak, while newer guided modes may use a different sequence.
- Rinse the reservoir thoroughly. Remove all remaining descaling liquid before filling it with fresh water.
- Run every required fresh-water cycle. Continue until the model guide says the procedure is complete or the Descale notification turns off.
- Reinstall the water filter if applicable. Do this only after the complete fresh-water rinse and according to the filter instructions.
Keurig’s current descaling instructions emphasize choosing the correct brewer because activation controls, rinse requirements, and maintenance schedules differ.
Monitor Machine Performance
After the final rinse, remove any remaining rinse water, refill the reservoir with fresh water, and run one water-only cleansing brew. Check for:
- A steady stream of water
- A normal cup volume
- No Add Water warning when the reservoir is adequately filled
- No descaling-solution smell or taste
- No unusual leaking, electrical smell, or repeated shutdown
Do not taste the water if you can still smell descaling solution. Continue fresh-water rinses until the odor is gone and the model’s procedure is complete.
Why Your Keurig Might Still Not Brew After Descaling
Use the symptom to choose the next step. Repeating the entire descale procedure should not be the automatic first response.
| Symptom | Likely Cause | What to Do |
|---|---|---|
| No lights or response | Power, outlet, control, or internal electrical problem | Check the outlet and cord, then unplug for at least 30 seconds. Stop if the cord is damaged, the brewer smells electrical, or a breaker trips again. |
| Add Water warning remains on | Low water, reservoir misalignment, debris, or a detection problem | Fill above the minimum level and reseat a removable reservoir firmly in its base. |
| Brewer hums or blows air but dispenses little or no water | Heavy scale, remaining descaler, or restricted flow during the descale process | Discard remaining solution, rinse and refill the reservoir, power-cycle the brewer, and resume the official fresh-water rinse. |
| Only a partial cup brews | Clogged exit needle, dirty pod holder, insufficient water, or remaining scale | Clean the pod holder and needles, verify the water level, then run two cleansing brews. |
| Descale light stays on but brewing works | Incomplete guided rinse, wrong model procedure, or incorrect Descale Mode controls | Reopen the exact model guide and finish every programmed rinse before using any documented model-specific indicator reset. |
How to Power-Cycle Your Keurig Safely

A basic power cycle can clear a temporary control problem, but it does not replace a required descale rinse or model-specific procedure.
- Remove any pod and lower the handle.
- Turn the brewer off if it has a power control.
- Unplug the cord from the wall outlet.
- Wait at least 30 seconds.
- Plug the brewer directly into a grounded outlet.
- Power it on and attempt one water-only cleansing brew.
If the brewer is making an air-blowing sound or stopped dispensing after descaler was added, empty and rinse the reservoir first. Keurig documentation for several models advises leaving a heavily scaled brewer unplugged for at least 30 minutes if normal flow does not return after the fresh-water rinse is resumed.
Model-Specific Descale and Reset Examples
- K-Duo Essentials Gen 2: The current procedure enters Descale Mode by holding CUPS and OZ together for 3 seconds while the brewer is plugged in and powered off. The Descale light turns off after the programmed single-serve and carafe rinses are completed.
- K-Supreme and K-Supreme Plus: Compatible guides use the 8-ounce and 12-ounce buttons together for 3 seconds to enter Descale Mode. The notification clears after the required rinse sequence.
- K-Express Essentials Gen 2: Current guidance uses SIZE and BREW together for 5 seconds to enter Descale Mode, showing why cup-size combinations are not universal.
- Compatible first-generation K-Duo brewers: Keurig has provided an 8-ounce and 10-ounce indicator-clearing instruction for compatible units. Follow the exact K-Duo descaling guide or current product support page for your generation before using it.
- Other models: Controls may use Brew, Strong, dedicated size buttons, or a completely different sequence. Do not experiment with combinations from another model.
Cleaning the Entrance and Exit Needles
Coffee grounds can collect in the entrance or exit needle and restrict flow. Keurig’s needle-cleaning guidance permits a straightened paper clip for compatible needle openings, but the brewer must be handled carefully.
- Turn off and unplug the brewer. Allow it to cool.
- Lift the handle and remove the K-Cup pod holder according to your model guide.
- Separate the funnel from the pod holder if it is removable.
- Locate the exit-needle opening inside the bottom of the pod holder.
- Insert the end of a straightened paper clip into the opening and move it gently to loosen coffee grounds.
- Rinse the pod holder and funnel thoroughly.
- With the handle raised, locate the entrance needle or needles beneath the lid.
- Without touching the sharp metal with your fingers, gently insert the paper clip into each visible opening that your model’s cleaning instructions identify.
- Reassemble the pod holder, plug the brewer in, and run two water-only cleansing brews without a pod.
Warning: Do not force the paper clip, bend the puncture needles, place your fingers in the pod holder, or open the brewer’s outer housing.
Troubleshooting Water Reservoir Issues
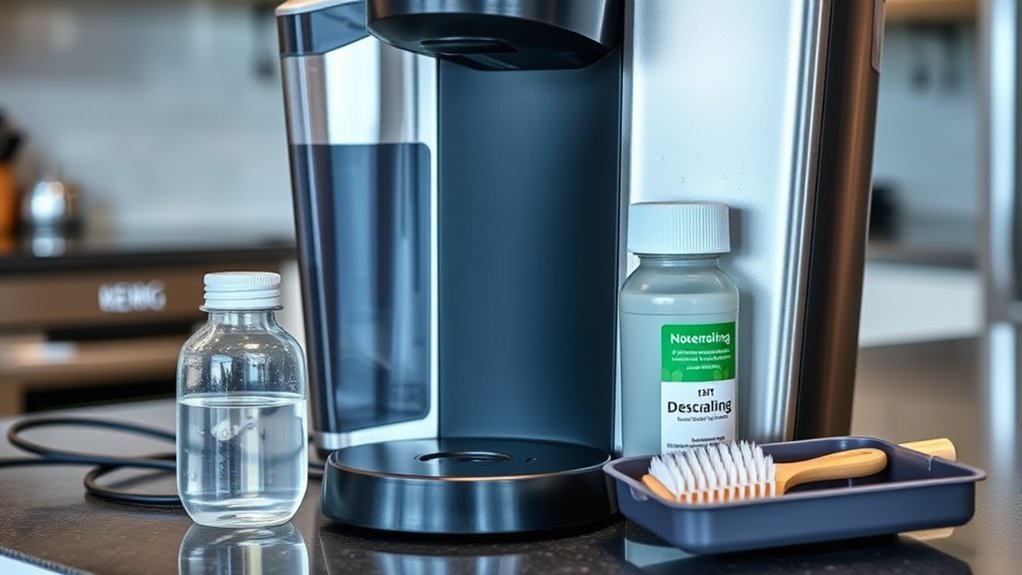
The reservoir must contain enough water and, on removable-reservoir models, sit correctly in its base.
- Fill the reservoir above the brewer’s minimum level without exceeding the MAX line.
- Remove a detachable reservoir by lifting it straight up.
- Check the base and valve area for loose debris.
- Rinse the reservoir thoroughly with fresh water.
- Return it to the brewer and press it down evenly until it is fully seated.
- Confirm that the lid is positioned correctly and does not interfere with the reservoir.
- If a filter was removed for descaling, reinstall it only after the full fresh-water rinse is complete.
- Run a water-only cleansing brew.
Keurig’s reservoir troubleshooting instructions specifically recommend removing and reseating the reservoir when alignment may be causing a warning or brewing interruption.
If the reservoir is cracked, leaking, or no longer engages with the base correctly, stop using it and obtain the correct replacement part for that model.
What to Do if the Descale Light Persists
Check Descaling Process Completion
Return to the instructions for your exact model and compare each completed step. Check whether you:
- Entered the required Descale Mode
- Removed the water-filter cartridge if directed
- Used the correct amount of solution and water
- Ran every solution cycle
- Completed the required soak, if applicable
- Rinsed the reservoir before adding fresh water
- Continued fresh-water brews until the light turned off or the guide stated that the process was complete
- Reinstalled the water filter only after the rinse was finished, if applicable
On guided-mode machines, the first empty reservoir or Add Water warning often marks the transition to the fresh-water rinse rather than the end of the procedure. Refill and continue exactly as the guide directs instead of exiting the cycle at that point.
Use Only the Reset Documented for Your Model
Do not treat the 8-ounce and 10-ounce buttons—or any other cup-size combination—as a universal Keurig reset. Compatible first-generation K-Duo units may use 8-ounce and 10-ounce controls for the indicator, while K-Duo Essentials Gen 2 uses CUPS and OZ to enter Descale Mode. K-Supreme models commonly use 8-ounce and 12-ounce controls, and K-Express Essentials Gen 2 uses SIZE and BREW.
If the light remains on after the correct full procedure, perform the basic 30-second power cycle described above. Then consult the model guide or contact Keurig Customer Support before trying undocumented controls.
Inspect for Remaining Clogs
If the light remains on and the brewer also produces a partial cup or no water, inspect the pod holder and entrance and exit needles. After cleaning, run two water-only cleansing brews.
If the brewer made an air-blowing sound and produced little or no output immediately after the descaler was added:
- Turn off and unplug the brewer.
- Discard any remaining descaling solution from the reservoir.
- Rinse the reservoir thoroughly.
- Refill it with fresh water.
- Reconnect the brewer and continue the official fresh-water rinse.
- If normal flow still does not return, leave the brewer unplugged for at least 30 minutes when the instructions for your model recommend this recovery pause.
- Resume the fresh-water rinse after the pause.
Repeat a complete descale only when the model guide recommends doing so or when restricted flow remains after the reservoir, rinse cycle, pod holder, and needles have been checked. Do not repeatedly run the pump with an empty reservoir.
Tips for Maintaining Your Keurig’s Performance
| Maintenance Task | Recommended Timing | Why It Helps |
|---|---|---|
| Descale the brewer | Follow the model guide; many current models specify every 3 months or when prompted, while some materials use 3–6 months or a brew-count reminder | Removes mineral deposits from internal water-contact parts |
| Run a cleansing brew | After cleaning and after pods containing cocoa or other sweetened ingredients when recommended | Flushes residue and reduces needle or flavor carryover |
| Clean the pod holder and needles | When flow slows, grounds appear, or a partial cup is dispensed | Removes coffee grounds that can restrict the brew path |
| Wash the removable reservoir | Periodically and whenever residue appears | Keeps the water path clean and helps the reservoir seat correctly |
Use fresh water that meets the recommendations in your brewer’s guide. Do not assume distilled water is suitable for every model, because some Keurig manuals specifically advise against it.
Final Recommendations for Keurig Troubleshooting
Use this order when your Keurig will not brew after descaling:
- Identify the exact model and generation and reopen its official descaling procedure.
- Remove the pod and verify that enough fresh water is available.
- Rinse and firmly reseat a removable reservoir.
- Finish every required fresh-water rinse.
- Run a water-only cleansing brew.
- Power-cycle the brewer for at least 30 seconds.
- Unplug the cooled machine and clean the pod holder and needles if flow remains restricted.
- Use documented model-specific Descale Mode or indicator controls only after confirming the correct procedure.
- Contact Keurig if normal water flow does not return.
Stop troubleshooting and unplug the brewer if you see water entering the electrical base, smell burning plastic or wiring, find a damaged cord, hear arcing, or repeatedly trip a circuit breaker. Do not open the machine’s housing.
Frequently Asked Questions
How often should I descale my Keurig?
Follow the schedule in your exact model guide. Many current Keurig models call for descaling every three months or when the Descale notification appears. Some product materials use a 3–6-month interval or a brew-count reminder, so one schedule does not apply to every Keurig.
Can I use vinegar instead of Keurig Descaling Solution?
Use vinegar only if the official instructions for your exact brewer permit it. Some older Keurig manuals specify white vinegar, while many current procedures specify Keurig Descaling Solution. Do not assume an equal-parts vinegar mixture is correct for every model.
Why is my Keurig making noise but not pumping water after descaling?
Heavy scale or remaining descaling liquid may be interfering with flow. Turn off and unplug the brewer, discard remaining solution, rinse and refill the reservoir, then continue the fresh-water rinse. Several Keurig guides advise leaving a brewer unplugged for at least 30 minutes if flow still does not return.
Why did my Keurig brew only part of a cup?
A partial cup can result from insufficient water, a clogged exit needle, a dirty pod holder, remaining scale, or an interrupted rinse. Check the reservoir, clean the pod holder and needles, and run two water-only cleansing brews.
What if my Keurig will not power on?
Confirm that the brewer is plugged into a working grounded outlet, inspect the cord for damage, and unplug it for at least 30 seconds before trying again. Stop using it if it repeatedly trips a breaker, smells electrical, or has a damaged cord.
How do I know whether the water reservoir is faulty?
Inspect it for cracks, leaks, a damaged outlet valve, or a fit that no longer sits evenly in the brewer’s base. If it leaks or cannot engage correctly after being cleaned and reseated, replace it with the part listed for your exact model.
Can I brew coffee immediately after descaling?
Only after the complete fresh-water rinse is finished and no descaling odor remains. Run an additional water-only cleansing brew before inserting a coffee pod if you are uncertain.
Which buttons turn off the Keurig Descale light?
There is no universal combination. K-Supreme models commonly use 8 oz + 12 oz to enter Descale Mode, K-Duo Essentials Gen 2 uses CUPS + OZ, K-Express Essentials Gen 2 uses SIZE + BREW, and compatible first-generation K-Duo guidance may use 8 oz + 10 oz for the indicator. Verify the exact model before pressing a combination.
Why did the Add Water light come on during descaling?
On many guided procedures, Add Water indicates that the descaling-solution stage is finished and the brewer is ready for the fresh-water rinse. It does not necessarily mean the entire descale procedure is complete. Rinse and refill the reservoir, then continue according to the model guide.
When should I contact Keurig instead of repeating the process?
Contact Keurig when the brewer still produces no or partial output after the correct procedure, reservoir check, fresh-water rinse, and needle cleaning. Also seek support immediately for internal leaking, electrical odors, repeated breaker trips, or controls that remain unresponsive.
Conclusion
If your Keurig will not brew after descaling, start with the completed rinse—not another bottle of solution. Verify the exact model and generation, add enough fresh water, reseat the reservoir, finish the programmed rinse, and safely clean the needles if flow remains restricted. Use Descale Mode or indicator button combinations only when Keurig documents them for your brewer. Persistent no-flow, leaking, electrical problems, or unresponsive controls require manufacturer support rather than further disassembly.
Sources
- Keurig: How to Descale Your Keurig Coffee Maker — model selection, descaling procedures, guided modes, and rinse requirements
- Keurig: Cleaning Your Brewer Needles — official entrance- and exit-needle cleaning guidance
- Keurig: How to Descale the K-Duo — K-Duo-specific descaling and indicator guidance; verify the brewer generation before applying button instructions
- Keurig: Water Reservoir and Flashing-Light Troubleshooting — removable-reservoir alignment and water-only troubleshooting guidance
- Keurig Descaling Information — mineral-scale explanation and general maintenance information
- Keurig Customer Support — current model guides, troubleshooting, warranty assistance, and customer service