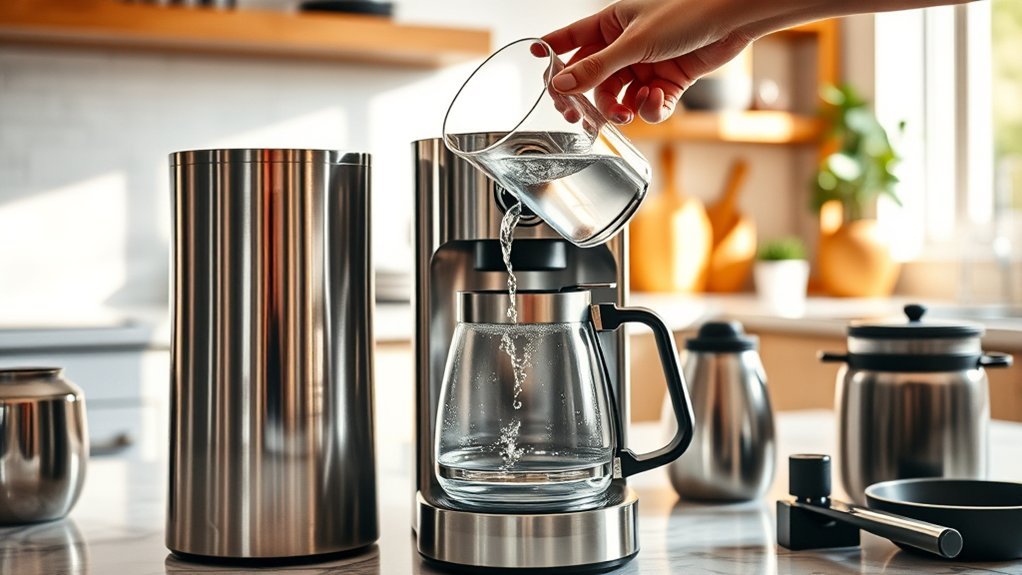
A clean coffee maker water reservoir helps prevent stale odors, visible film, mineral scale, and poor water flow. The right method depends on whether the tank is removable and what your exact coffee maker allows. Treat washing the reservoir and descaling the internal water system as two separate jobs, and check the owner’s manual before using vinegar, citric acid, descaler, soap, or any other cleaner.
Quick Answer
Unplug and cool the coffee maker, empty the reservoir, and confirm whether the tank is removable. Wash a removable reservoir with warm water, mild dish soap, and a soft sponge, then rinse and dry it completely. Descale the internal water system separately, using only the cleaner, ratio, timing, and rinse process approved for your model.
Key Takeaways
- Check the owner’s manual before removing the reservoir or circulating any cleaning solution.
- Wash visible residue from a removable tank with warm water, mild dish soap, and a nonabrasive sponge.
- Reservoir washing removes surface residue; descaling removes mineral deposits from the heater and internal water passages.
- There is no universal vinegar ratio. Some manufacturers allow vinegar, while others require a commercial descaler.
- Never mix vinegar, bleach, ammonia, descaler, dish soap, or different cleaning products.
- Replace or service the machine when contamination is trapped in inaccessible passages, the reservoir leaks, or electrical problems develop.
- Use fresh water and let an emptied reservoir dry before long storage to reduce recurring odor and residue.
At a Glance
| Time Required | Usually 10–20 minutes for routine reservoir washing; a separate descale may take roughly 30–90+ minutes depending on the model |
| Difficulty | Easy when the manufacturer’s cleaning and removal instructions are followed |
| Tools Needed | Soft sponge or cloth, small soft brush, mild dish soap, clean water, and an approved descaler when needed |
| Cost | Often $0 if you already have basic cleaning supplies; roughly up to $15 in many cases if an approved descaler is needed |
How to Clean Your Coffee Maker Water Reservoir Effectively

Start by identifying the type of reservoir. Some coffee makers have a removable tank that can be carried to the sink. Others have a fixed reservoir built into the machine. Do not pull, twist, pry, or unscrew a tank unless the manual confirms that the part is intended for user removal.
Warning: Unplug the coffee maker and let it cool before cleaning. Never immerse the electrical base, cord, or plug. Do not mix vinegar, bleach, ammonia, descaler, dish soap, or other cleaners. Circulate a product through the machine only when the manufacturer approves it for that model.

Power your essentials anywhere with a 999Wh pure sine wave power station delivering up to 1000W continuous with 2000W surge. It supports fast charging via USB-C PD 60W and USB-A QC 18W, plus simultaneous output for multiple devices through AC, USB, wireless, and car/DC ports. Recharge using AC, car, or solar with a built-in MPPT controller and dual cooling fans, while the upgraded battery management system protects against surges, short circuits, and overheating.

1-Year Supply, Better Value - Includes 24 coffee maker descaling tablets—enough for monthly cleaning for up to a year. A cost-effective alternative to powders, liquids, pods, sachets, or packets.

Bulk Coffeemaker Decalcifier Tablet: 24 Tablets Work out to a Year Supply or more. Compare to other products like powder, pods, sachet, packets. Choose ACTIVE Cleaning Tablets for better Values
Cleaning a Removable Water Reservoir
- Empty the tank. Pour out standing water and remove the lid if it is designed to come off.
- Remove the water filter when required. Many charcoal or softening filters must be taken out before washing or descaling. Check the manual before discarding, soaking, or reinstalling a filter.
- Wash the reservoir. Use warm water, a small amount of mild dish soap, and a soft sponge or cloth. Clean the bottom, corners, seams, lid, handle, and accessible water-outlet area.
- Reach narrow areas gently. Use a soft bottle brush or toothbrush only where it fits without forcing a valve, gasket, spring, screen, or seal.
- Do not dismantle sealed outlet parts. If debris sits behind a screen or valve that the manual does not identify as user-serviceable, contact the manufacturer rather than prying it apart.
- Rinse thoroughly. Continue rinsing until no suds, slippery soap residue, or fragrance remains.
- Dry completely. Air-dry the tank with the lid removed or open when practical. This helps moisture evaporate from corners and seams.
- Reinstall it securely. Seat the reservoir and water filter exactly as the manual directs before adding fresh drinking water.
Use a dishwasher only when the manufacturer specifically identifies the reservoir as dishwasher-safe. A coffee maker may have some dishwasher-safe accessories while still requiring the water tank to be hand-washed.
Cleaning a Fixed Water Reservoir
For a fixed reservoir, remove the carafe, filter, and brew basket if doing so improves access. Wipe the accessible interior with a clean, soft cloth dampened with warm water. Use mild dish soap only when the manufacturer permits it and the surface can be fully rinsed without flooding the machine.
Do not pour soapy water into internal brewing passages unless the manual gives that procedure. Keep water away from controls, vents, seams, and the electrical base. If visible slime, growth, or debris is trapped where you cannot safely reach it, stop using the machine and ask the manufacturer about service or replacement.
Note: Washing the reservoir removes residue from surfaces you can reach. Descaling is a separate maintenance procedure for dissolving mineral deposits inside the heater and water passages.
How to Identify Slimy Film in Your Coffee Maker
Inspect the empty reservoir in bright light. A slippery, sticky, fuzzy, or unusual coating deserves prompt cleaning, but appearance alone cannot prove whether the material is mold, bacteria, mineral residue, dust, staining, or another deposit.
Off-tastes and musty, sour, or stale odors are also reasons to inspect the tank, lid, filter, brew basket, carafe, and internal water system. Smell can alert you to a problem, but it cannot reliably identify a specific microorganism.
Visual Signs of Film
| What You Notice | What It May Indicate | What to Do |
|---|---|---|
| Slippery, greasy, or sticky film | Surface residue or possible microbial buildup | Stop brewing and physically wash all accessible removable surfaces. |
| White or chalky crust | Mineral scale from water | Descale the machine with the product and process listed in the manual. |
| Dark spots or fuzzy growth | Possible mold, debris, or staining | Clean accessible hard surfaces. Service or replace the machine if growth is trapped inside inaccessible passages. |
| Cloudiness or discoloration without texture | Staining, minerals, or surface residue | Wash the area and inspect it again after it dries. |
| Persistent musty or chemical odor | Standing-water contamination, an old filter, or incomplete rinsing | Clean the tank, check the filter, and complete the approved fresh-water rinse procedure. |
If a mark remains after cleaning but the surface is smooth, dry, and odor-free, it may be staining rather than removable buildup. Monitor it for changes instead of repeatedly scrubbing the plastic with abrasive tools.
What to Do if You Suspect Mold or Microbial Growth
The U.S. Environmental Protection Agency recommends cleaning mold from hard surfaces with detergent and water and drying them completely. For a removable coffee maker reservoir, that supports the basic approach of physical washing with a manufacturer-approved mild detergent, thorough rinsing, and complete drying.
That EPA guidance does not mean you should circulate bleach or another household disinfectant through a coffee maker. Food-appliance materials, valves, heaters, tubing, and seals vary by model. Use a sanitizing or disinfecting procedure only when the coffee maker manufacturer explicitly provides one.
If suspected growth is inside tubing, a sealed valve, or another cavity that cannot be physically cleaned or inspected, stop using the coffee maker until the manufacturer confirms a safe service procedure or replacement option.
Causes of Slimy Build-Up
Recurring residue is more likely when water sits in a reservoir for long periods, the tank stays damp during storage, or dust and debris enter through an open lid. Touching the inside of the tank can also transfer skin oils or other residue.
Hard water more commonly creates white or chalky mineral scale. If you find oily or unusual residue in a reservoir that normally holds only fresh water, clean the tank and surrounding parts rather than assuming exactly where the material came from.
Emptying stale water, cleaning accessible surfaces, and allowing the tank to dry before long storage can reduce recurring odor and residue. If film quickly returns despite correct cleaning, inspect the filter, lid, seals, and accessible outlet area or contact the manufacturer.
Reservoir Cleaning vs. Descaling: Which One Do You Need?
Reservoir washing and descaling solve different problems. Many cleaning mistakes happen because the two jobs are treated as interchangeable.
| Problem | Best First Step | Why |
|---|---|---|
| Slippery film or visible residue on tank walls | Physically wash accessible reservoir surfaces | Scrubbing removes surface material that a descale cycle may not remove. |
| White or chalky mineral deposits | Use the approved descale procedure | Acidic descalers dissolve mineral scale inside the water path. |
| Slow brewing with visible scale | Descale and inspect user-serviceable screens or outlets | Scale can restrict flow through heating and water-delivery components. |
| Musty reservoir plus surface film | Wash and dry removable surfaces first | Physical cleaning addresses residue on the tank itself before any model-approved internal maintenance. |
Soap-and-water washing cleans the reservoir surface; descaling targets mineral deposits inside the machine. One process does not automatically replace the other.
Essential Materials for Effective Coffee Maker Cleaning

Gather only the materials approved for the part you are cleaning:
- Warm, clean water
- Mild, preferably unscented dish soap for washable removable parts
- A soft sponge or microfiber cloth
- A soft toothbrush or small bottle brush for accessible corners
- A clean towel or drying rack
- The manufacturer-approved descaling product when descaling is due
- Plain white vinegar only when the exact model’s instructions allow it
- Protective gloves if you have sensitive skin or are handling visible contamination
Avoid steel wool, abrasive powders, stiff metal brushes, scented cleaners, and sharp tools. They can scratch plastic or damage valves, screens, seals, and protective finishes.
A suitable water filter may reduce mineral accumulation, but it does not eliminate routine tank washing, filter replacement, or descaling when the machine calls for it.
Step-by-Step Guide to Removing the Water Reservoir
Before attempting to remove a reservoir, find the coffee maker’s model number and review the removal instructions in its manual. A tank that looks detachable may still connect to a valve, sensor, hose, or locking mechanism.
- Switch the coffee maker off, unplug it, and let hot parts cool.
- Remove the carafe, brew basket, and water filter if they block access.
- Empty as much water as possible without tipping the electrical base.
- Look for a handle, release tab, latch, clip, or upward-lift direction shown in the manual.
- Release the specified mechanism and lift the reservoir evenly.
- Stop if the tank resists movement. It may be fixed, locked, or still seated on a valve.
- Inspect the removed tank for cracks, mineral deposits, residue, damaged seals, and debris around the accessible outlet.
- After cleaning and drying, reinstall the tank until it sits level and locks or seats securely.
Pro Tip: Take a quick photo of the filter, valve, gasket, and seal positions before removing user-serviceable parts. It can make reassembly easier and helps you avoid forcing delicate components into the wrong position.
How to Clean Your Coffee Maker With Vinegar

White vinegar can dissolve mineral deposits in coffee makers whose manufacturers permit it. It should not be treated as a universal coffee-machine cleaner, disinfectant, or substitute for physically washing a dirty removable reservoir.
Manufacturer instructions vary considerably. Mr. Coffee’s general drip-machine method uses about half as much vinegar as water. Hamilton Beach publishes different vinegar quantities and procedures for different machines. A Breville cleaning guide gives a 1:1 vinegar-and-water example while still telling owners to consult their machine instructions. De’Longhi tells owners of its fully automatic machines to use its descaler and not vinegar.
The correct descaling recipe is the one specified for your exact coffee maker—not a universal vinegar ratio copied from another machine.
If your manual permits vinegar, follow this general sequence while using the model’s exact quantities, timing, and controls:
- Remove the water filter if the manual tells you to do so.
- Empty the brew basket and carafe, then place the empty carafe or another approved container beneath the outlet.
- Add the specified vinegar-and-water mixture without exceeding the maximum fill line.
- Select the machine’s clean or descale program. Use a normal brew cycle only when the instructions direct you to do so.
- Pause or soak the solution only for the time stated by the manufacturer.
- Discard the used solution. Do not reuse it.
- Rinse the reservoir and complete the required fresh-water cycles.
- Reinstall or replace the water filter when directed.
Do not use brown or cloudy discharge as proof that the machine is completely clean. Discoloration may come from loosened mineral deposits, coffee residue, or other debris. Complete the prescribed procedure and inspect the reservoir, water flow, carafe, and odor after rinsing.
Natural Alternatives for Cleaning Your Reservoir
Lemon juice, powdered citric acid, baking soda, and vinegar are often described as household cleaning alternatives, but they are not interchangeable and are not approved for every coffee maker.
- Lemon juice: Its acidity can react with mineral deposits, but juice may contain pulp, sugars, oils, or added ingredients. Use it only when the manufacturer specifically allows it.
- Citric-acid descaler: This may be suitable when supplied or approved by the manufacturer. Follow the exact concentration, timing, and rinse instructions on both the product and machine directions.
- Baking soda: It is not an acid descaler and can clump when poorly dissolved. Do not circulate it through the machine unless the manufacturer provides a procedure.
- Manufacturer-approved descaler: This is the safest default when the manual requires a commercial descaling product.
For a removable reservoir with slippery surface film, mild dish soap and physical cleaning are generally more useful than simply circulating an acidic solution. For mineral scale inside the water circuit, use the approved descale method.
Warning: Never combine vinegar or another acid with bleach. Never mix different descalers or cleaning products. The CDC advises against mixing bleach or disinfectants with other cleaners because dangerous vapors can result. Rinse one manufacturer-approved product away completely before using another approved treatment.
Effective Rinsing Techniques to Remove Vinegar Residue
Rinsing removes remaining cleaner from the reservoir, heater, tubing, and outlet. The required number of cycles differs by machine, so the owner’s manual should determine the minimum rinse procedure.
| Step | Action | Purpose |
|---|---|---|
| 1 | Discard the cleaning solution and rinse the accessible reservoir. | Removes concentrated cleaner from the tank. |
| 2 | Fill the tank with fresh drinking water to the level specified by the manufacturer. | Provides water for flushing the internal circuit. |
| 3 | Run a complete water-only cycle and discard the water. | Flushes loosened deposits and remaining cleaner. |
| 4 | Repeat for the number of cycles required by the manufacturer. | Completes the prescribed rinse process. |
| 5 | Check the cooled reservoir and rinse water for a lingering cleaner odor. | Helps identify whether another approved water-only cycle is needed. |
If vinegar or descaler odor remains, do not brew coffee yet. Run another fresh-water cycle when the manual permits it. Persistent odor after thorough rinsing can also indicate that the water filter, reservoir seal, carafe lid, or another accessible component needs cleaning or replacement.
Tips for Maintaining a Clean Water Reservoir
There is no single cleaning calendar that fits every coffee maker. Usage, water hardness, reservoir design, filters, and manufacturer instructions all affect the schedule. A practical routine is:
- After use or at the end of the day: Discard old water when practical instead of leaving it stagnant for extended periods. Refill with fresh drinking water before brewing.
- Weekly inspection: Check the reservoir, lid, filter holder, outlet area, and corners for film, scale, debris, cracks, or unusual odor.
- Wash when needed and according to the manual: Clean a removable tank whenever visible residue develops and at the interval recommended for the machine. For example, Breville’s general espresso-maintenance guidance says a water tank may need cleaning every two to three weeks when roughly two to five cups are prepared per day; other manufacturers use different schedules.
- Deep-clean on the machine’s schedule: Some drip machines recommend monthly cleaning, while others rely on a CLEAN indicator, brew count, or another maintenance prompt.
- Descale when prompted or required: Follow the machine’s indicator, water-hardness setting, brew count, or manual rather than choosing an arbitrary vinegar schedule.
- Before storage: Empty the reservoir, clean it, and let removable parts dry completely before closing the machine for storage.
- After storage: Inspect for odor or residue, clean accessible parts, replace an overdue filter, and complete the manufacturer’s rinse or descale procedure before brewing.
A compatible water filter may reduce mineral accumulation and the frequency of descaling, but it does not make the machine maintenance-free. Replace built-in filters on schedule and continue watching for chalky deposits, reduced flow, or maintenance alerts.
Pro Tip: After emptying a removable reservoir, leave the lid off or open long enough for accessible moisture to evaporate. Once the tank is dry, close it again so dust and debris do not settle inside.
Troubleshooting Persistent Odor, Film, or Slow Flow
Odor Remains After Rinsing
Wash the reservoir lid, carafe lid, filter holder, brew basket, and reusable filter separately when their instructions allow it. Replace an overdue charcoal water filter, then complete another approved water-only rinse. A persistent chemical smell may indicate incomplete flushing, while a musty odor can point to moisture or contamination that still needs investigation.
Slimy Film Returns Quickly
Avoid leaving the same water in the tank for long periods. Clean the lid, seams, accessible outlet valve, and filter holder rather than wiping only the broad tank walls. If the film returns soon after complete washing and drying, contact the manufacturer because a hose, seal, valve, or hidden cavity may need service.
Coffee Maker Brews Slowly
Slow flow can result from mineral scale, a clogged user-serviceable screen, a misplaced water filter, or a blocked outlet. Run the approved descale program and inspect only the screens, valves, or openings the manufacturer identifies as user-serviceable. Do not insert knives, wire, needles, or other sharp objects into internal tubing.
White Residue Remains
White or chalky deposits are consistent with mineral scale. Dish soap may remove dirt from the surface without dissolving the mineral deposit. Use the manufacturer-approved acid or commercial descaler at the correct concentration.
Dark Marks Remain After Cleaning
Some staining can remain even when a surface is clean. If the area is smooth, dry, stable, and odor-free after correct washing, monitor it. If it becomes fuzzy, spreading, slippery, or is located inside inaccessible water passages, stop using the machine until it is serviced or replaced.
When to Consider Replacing Your Coffee Maker
Age alone does not determine when a coffee maker should be replaced. A well-maintained older machine may remain serviceable, while a newer one may need replacement after a crack, electrical fault, inaccessible contamination, or unavailable replacement part.
Persistent off-tastes or odors are reasons to investigate the reservoir, filter, carafe, and internal water path—not proof by themselves that a coffee maker has reached a particular age limit.
Stop using the coffee maker and consider professional service or replacement when:
- The reservoir, housing, valve, or seal is cracked and leaking.
- Water enters the electrical base or leaks near the cord, plug, controls, or heating components.
- The cord, plug, switch, or heating system shows visible damage, sparking, smoke, or overheating.
- Possible mold or recurring slime is trapped in inaccessible tubing or cavities.
- A persistent odor remains after the complete manufacturer-approved cleaning and rinse process.
- The machine no longer heats, pumps, or completes a cycle after correct descaling and troubleshooting.
- Required replacement seals, tanks, filters, or other service parts are unavailable.
- The manufacturer advises discontinuing use after a fault code, recall-related instruction, or safety problem.
A removable reservoir, lid, seal, or filter can sometimes be replaced without discarding the entire appliance. Check the manufacturer’s parts catalog and support information before replacing an otherwise functional coffee maker.
Frequently Asked Questions
Can I Use Bleach to Clean My Coffee Maker Reservoir?
Do not improvise a bleach cleaning or brewing cycle. Use bleach only if the manufacturer provides an explicit procedure for your exact model. Never mix bleach with vinegar, ammonia, acids, descaler, dish soap, or another cleaner. For an ordinary washable removable reservoir, physical cleaning with mild dish soap and water is usually the appropriate first step when the manufacturer permits it.
How Often Should I Clean My Coffee Maker Water Reservoir?
Follow the schedule in your owner’s manual and clean the reservoir sooner if you notice film, scale, debris, or odor. Inspecting it weekly is useful. Manufacturer schedules differ: Breville, for example, gives a two-to-three-week water-tank interval in one common home-use example, while other brands recommend different routines. Descaling follows a separate schedule.
Is It Safe to Use Soap on the Reservoir?
A small amount of mild dish soap is generally suitable for a removable, washable reservoir when the manufacturer permits it. Rinse until no suds, fragrance, or slippery residue remains. Do not pour soapy water through internal brewing lines unless the manual specifically instructs you to do so.
What if Vinegar Doesn’t Remove the Slimy Film?
Physically wash an accessible removable tank with mild dish soap and a soft sponge. Vinegar is mainly used to dissolve mineral scale and may not remove surface film without scrubbing. If residue remains inside inaccessible tubing or quickly returns after complete washing and drying, stop using the machine and contact the manufacturer.
Can I Clean the Coffee Maker Without Removing the Reservoir?
Yes, when the reservoir is fixed. Unplug and cool the machine, wipe only the accessible tank surfaces, and avoid flooding seams or electrical parts. Descale the internal circuit separately using the product and cycle approved for the machine.
Can I Use Lemon Juice, Baking Soda, or Citric Acid?
Use them only when the manual or manufacturer approves the specific substance and concentration. Lemon juice can contain pulp or other residue, baking soda can clump, and citric acid may require an exact dose. A manufacturer-approved descaler is the safer default when the machine calls for one.
Does Filtered Water Prevent Mineral Buildup?
It may reduce scale when the filter removes minerals that contribute to hardness, but it does not guarantee a scale-free machine. Replace filters on schedule and continue descaling when the indicator, flow rate, water-hardness setting, or manual says it is necessary.
How Do I Clean a Coffee Maker After Storage?
Inspect the reservoir and filter for odor, film, insects, or debris. Wash removable parts, replace an overdue water filter, and complete the manufacturer’s rinse or descale procedure before brewing. Do not use the machine if contamination is trapped inside inaccessible areas.
Should I Leave Water in the Coffee Maker Reservoir Overnight?
For the freshest water and easier maintenance, discard old water when practical and refill before brewing, especially if the machine will sit unused. For longer storage, empty, clean, and dry the reservoir. Follow the manufacturer’s instructions if your machine has a different water-management requirement.
How Do I Clean the Reservoir Outlet Valve or Screen?
Clean only the portions the manufacturer identifies as user-accessible. A soft toothbrush or small bottle brush can help around exposed edges, but do not pry apart sealed valves, puncture screens, or insert sharp objects into tubing. If buildup is trapped behind a non-serviceable part, contact the manufacturer.
Conclusion
To clean a coffee maker water reservoir safely, start with the owner’s manual, unplug the machine, and determine whether the tank is removable. Wash accessible reservoir surfaces with warm water, mild dish soap, and a soft sponge when permitted, rinse thoroughly, and let removable parts dry. Treat descaling as a separate job for mineral deposits inside the water system.
Do not rely on one universal vinegar recipe, a fixed cleaning interval, brown rinse water, or the machine’s age as proof that cleaning worked or replacement is required. Instead, watch for recurring film, chalky scale, leaks, persistent odors, reduced flow, inaccessible contamination, damaged seals, and electrical problems.
Sources
- Mr. Coffee — How to Clean a Coffee Maker — supports manufacturer-specific vinegar proportions, drip-machine cleaning guidance, and fresh-water rinsing.
- Hamilton Beach Coffee Maker FAQs — documents different vinegar quantities, cleaning cycles, removable-part washing, and rinse procedures across coffee-maker models.
- Breville Cleaning and Maintenance — supports separating routine cleaning, water-tank care, water-filter maintenance, and descaling.
- De’Longhi Coffee Machine Maintenance Guide — explains limescale, water hardness, filtration, and model-specific descaling requirements.
- U.S. Environmental Protection Agency — Mold Cleanup — supports cleaning hard surfaces with detergent and water and drying them completely.
- Centers for Disease Control and Prevention — Cleaning and Disinfecting With Bleach — supports the distinction between cleaning and disinfection and the warning against mixing bleach with other cleaners.