Setting up a new automatic drip coffee maker is usually simple: inspect the machine, wash the removable parts, run one or two plain-water rinse cycles, install the correct filter, and brew a test batch. Always read your model’s manual first, because its cleaning solution, water-filter, capacity, and first-use instructions override generic advice.
Quick Answer
Unpack your coffee maker, remove all tape and packing pieces, wash the removable coffee-contact parts, and run one or two cycles with fresh water and no coffee. Do not automatically use vinegar in a brand-new machine. Use it only when the manufacturer’s manual specifically recommends it.
Key Takeaways
- Read the exact model manual before cleaning, priming, or installing a water filter.
- Wash removable parts with warm water and mild dish soap, but never immerse the electrical base.
- Run plain-water cycles before the first brew unless the manufacturer specifically requires another process.
- Start with a medium drip grind and 1 to 2 tablespoons of coffee per 6 ounces of water.
- Stop using the machine if it leaks, has a damaged cord or carafe, produces smoke, or gives off a persistent electrical smell.
At a Glance
| Time Required | About 20–30 minutes, plus drying time |
| Difficulty | Easy |
| Tools Needed | Model manual, mild dish soap, soft sponge or cloth, fresh water, correct coffee filter, and coffee |
| Cost | Usually $0–$5 if basic supplies are already available |
Warning: Keep the appliance base, cord, and plug out of water. Unplug the machine before washing or wiping it, allow hot parts to cool, and never open the brew basket while hot water is flowing.
Unpacking Your New Coffee Maker

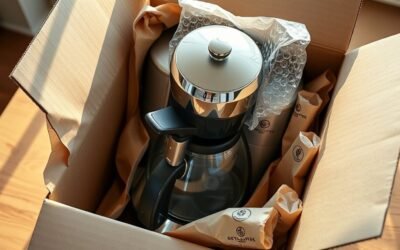
Carefully remove the coffee maker, carafe, filter basket, lid, scoop, water filter, and other accessories from the box. Remove every piece of tape, cardboard, foam, plastic film, and protective insert from the reservoir, basket area, carafe, warming plate, and cord.
Check the packaging one more time before discarding it. Small parts such as charcoal filters, filter holders, measuring scoops, replacement seals, and instruction booklets can be hidden inside cardboard compartments.
The model manual—not a generic vinegar formula—is the final authority for the first cleaning and rinse cycle.
Inspect the machine for cracks, dents, loose pieces, a damaged plug, a cut cord, or a carafe that does not sit flat. Do not operate a damaged appliance. Keep the original box and purchase information until you have completed a successful test brew.

Power your essentials anywhere with a 999Wh pure sine wave power station delivering up to 1000W continuous with 2000W surge. It supports fast charging via USB-C PD 60W and USB-A QC 18W, plus simultaneous output for multiple devices through AC, USB, wireless, and car/DC ports. Recharge using AC, car, or solar with a built-in MPPT controller and dual cooling fans, while the upgraded battery management system protects against surges, short circuits, and overheating.

Descales your coffee maker, fighting hard water deposits and mineral buildup for a better tasting brew

Bulk Coffeemaker Decalcifier Tablet: 24 Tablets Work out to a Year Supply or more. Compare to other products like powder, pods, sachet, packets. Choose ACTIVE Cleaning Tablets for better Values
What to Look for When Unpacking Your Coffee Maker
Before plugging in the machine, confirm that the main parts are present, clean, and correctly fitted.
| Part | What to Check |
|---|---|
| Carafe and lid | No cracks, chips, loose handles, warped lids, or damaged seals |
| Filter basket | Correctly seated, able to open and close, and free of packing material |
| Reservoir | Clean interior, readable fill markings, and no visible cracks or loose debris |
| Hot plate | Clear, dry, level, and free of film, cardboard, or plastic |
| Cord and plug | No cuts, exposed wiring, bent blades, scorching, or other damage |
| Accessories | Correct filter holder, permanent filter if included, scoop, and water-filter parts |
Place the coffee maker on a stable, dry, heat-resistant counter away from the edge, sink, stovetop, curtains, and areas where the cord could be pulled. Confirm that the voltage shown on the appliance matches the household outlet.
Read the Manual and Wash the Removable Parts
Find the model number on the machine or packaging and read the “Before First Use,” “Cleaning,” and “Brewing” sections of its manual. Coffee makers differ in reservoir design, filter preparation, cleaning products, dishwasher-safe parts, brew controls, and automatic shutoff behavior.
Unplug the machine. Wash the carafe, carafe lid, removable filter basket, permanent filter, scoop, and removable reservoir in warm water with mild dish soap when the manual permits. Use a soft sponge or cloth, rinse thoroughly, and dry the parts before reassembly.
Note: Do not put a part in the dishwasher unless the manual identifies it as dishwasher-safe. Never immerse the coffee maker’s electrical base, cord, plug, control panel, or warming plate.
If the brewer includes a charcoal or other water filter, prepare it exactly as directed. Some filters must be soaked or rinsed before installation, and many must be removed before a vinegar or descaling cycle.
Clean Your Coffee Maker Before First Use
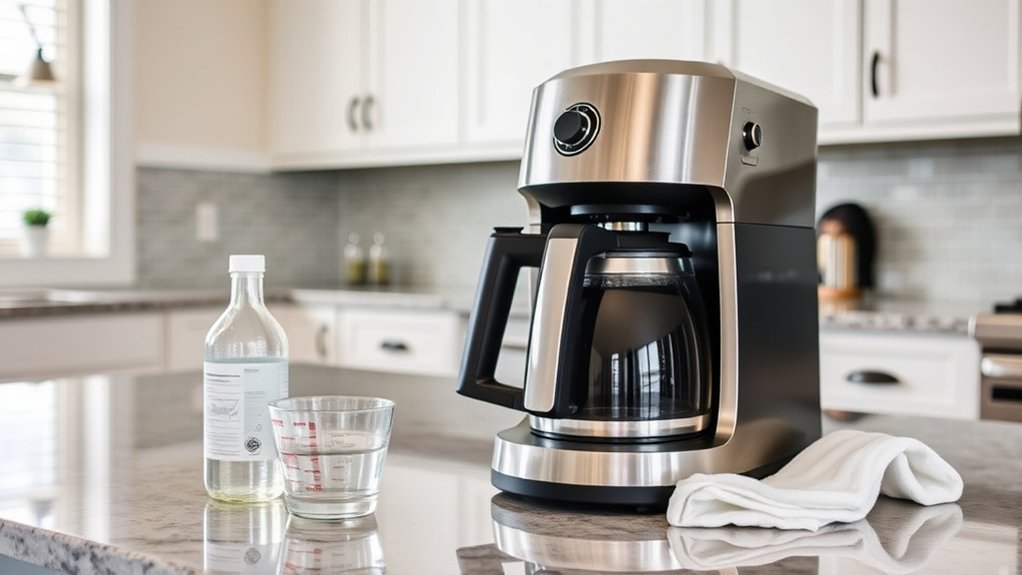
For a generic first-use setup, the safest default is to wash the removable parts and run one or two cycles with fresh water and no coffee. For example, an official Hamilton Beach manual directs users to run one or two clean-water cycles before first use. Other machines may include a dedicated priming sequence. Always follow the instructions supplied with your model.
| Step | Action | Purpose |
|---|---|---|
| 1 | Wash approved removable parts | Remove dust, packing debris, and handling residue |
| 2 | Reassemble the empty filter basket and carafe | Ensure the drip-stop system and carafe are aligned |
| 3 | Fill the reservoir with fresh water | Prepare a plain-water priming cycle |
| 4 | Run a full cycle without coffee | Rinse the internal water path |
| 5 | Discard the water and repeat if directed | Complete the first-use rinse |
Should You Use Vinegar in a Brand-New Coffee Maker?
Do not automatically pour a half-vinegar, half-water mixture into a new coffee maker. Vinegar is mainly used to dissolve mineral scale during periodic maintenance, and approved ratios vary. Cuisinart, for example, documents model-dependent cleaning processes and directs owners to consult the coffee maker manual.
Use vinegar, citric acid, a cleaning tablet, or a branded descaling solution only when the manufacturer approves that product and gives the required amount. Remove a charcoal water filter first if the manual tells you to do so.
Warning: Never mix vinegar with bleach, chlorine cleaners, ammonia, or another household cleaning product. Do not add soap to the internal reservoir unless the manufacturer expressly allows it.
Rinse Your Coffee Maker for a Fresh Start
A plain-water rinse primes the water path and helps remove loose dust or ordinary packaging odors. It also removes approved descaling solution if your manual required one.
Importance of Rinsing
- Clears the water path: Fresh water passes through the reservoir, heater, showerhead, basket, and carafe.
- Removes cleaner residue: When an approved cleaning product was used, water-only cycles reduce leftover taste and odor.
- Confirms correct assembly: A test cycle can reveal a poorly seated basket, carafe, lid, valve, or reservoir.
- Checks normal operation: You can confirm that the machine heats, pumps, drains, and shuts off as described in the manual.
First-Use Rinse Preparation
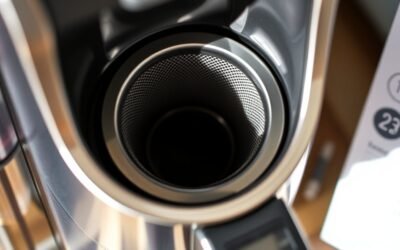
Place the clean filter basket in its holder without coffee grounds. Install the permanent filter only if the manual requires it during a rinse. Set the carafe and lid firmly in the brewing position so the drip-stop valve can open correctly.
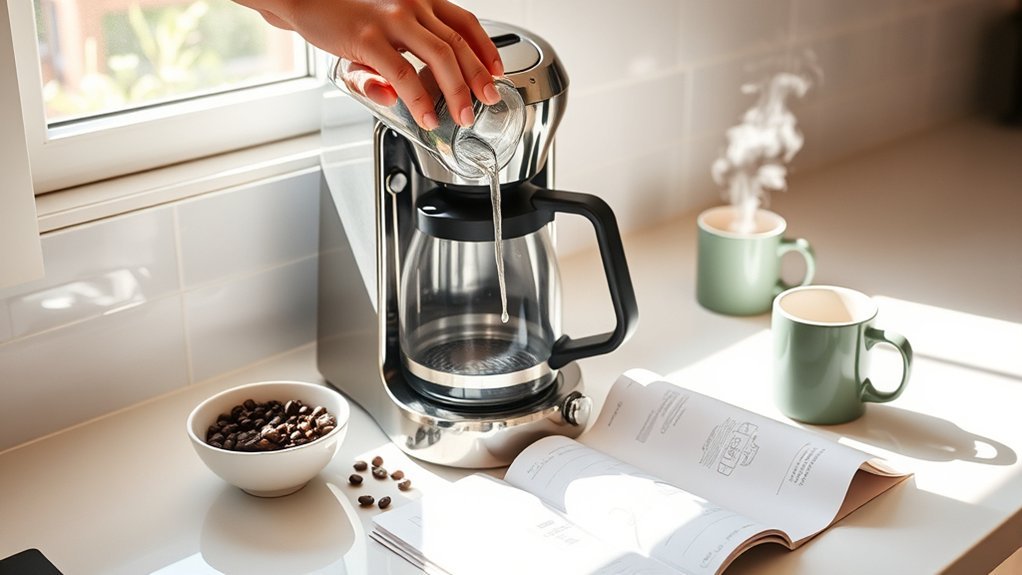
Fill the reservoir with fresh, cold, potable water. Stay at or below the maximum fill line. Be aware that a coffee maker’s numbered “cups” may be smaller than an 8-ounce household measuring cup, so use the machine’s reservoir markings rather than guessing.
Rinse Cycle Steps
- Confirm that the basket is empty and the carafe is correctly seated.
- Fill the reservoir to the level directed by the manual.
- Plug in the machine with dry hands and start a normal brew or first-use cycle.
- Do not open the basket, remove the carafe for an extended period, or touch the hot plate while the cycle is running.
- When the cycle finishes, turn off the machine if required and allow hot parts to cool.
- Discard the rinse water.
- Run a second plain-water cycle if the manual calls for one or if an approved cleaner was used.
If a vinegar smell remains after a manufacturer-approved descaling process, continue with fresh-water cycles as directed by the manual. Do not brew coffee until the odor is gone.
Set Up Your First Brew
Once the machine is clean and assembled, choose the filter specified for the basket. Use either the approved permanent filter or the correct paper filter unless the manual specifically allows both. Doubling the filters can slow drainage and cause overflow.
- Add fresh water: Use cold drinking water. Filtered water can improve taste when the local water has a strong odor or flavor.
- Insert the filter: Smooth a paper filter against the basket so it does not fold over.
- Measure the coffee: Start with 1 to 2 tablespoons of ground coffee for every 6 ounces of water.
- Use a medium drip grind: Grounds that are too fine can drain slowly or clog the basket.
- Level the coffee bed: Gently shake the basket so the grounds lie evenly. Do not pack or tamp them.
- Seat the carafe: Make sure its lid is installed and the carafe is centered beneath the basket.
- Select the brew mode: Choose normal, regular, bold, small-batch, or another mode according to the manual.
- Start the cycle: Keep the basket closed and wait for dripping to stop before serving.
The National Coffee Association recommends cold water, filtered when possible, and a starting ratio of 1 to 2 tablespoons of coffee per 6 ounces of water. It also advises against using distilled or softened water as the normal brewing water. See its drip coffee brewing guide.
If your machine has adjustable temperature or a Gold-style brewing mode, use the manufacturer’s recommended setting. The commonly cited hot-brewing range is a performance target, not a control available on every basic coffee maker.
Pro Tip: For the first pot, brew a medium-size batch rather than filling the machine to maximum capacity. It is easier to spot leaks, overflow, poor basket seating, or an incorrect ratio without wasting a full carafe of coffee.
Enjoying Your First Brew of Coffee

Let the brew cycle finish before judging the result. Gently swirl the carafe to mix the stronger early coffee with the lighter liquid produced later in the cycle. Pour a small cup, allow it to cool enough to taste safely, and note whether it seems weak, bitter, sour, stale, or balanced.
Change only one variable at a time. Adjusting the coffee dose, grind, water, roast, and brew mode together makes it difficult to learn which change improved the cup.
Perfecting Your Coffee Ratio
Use 1 to 2 tablespoons of ground coffee for every 6 ounces of water as a practical starting range. Begin near the middle, then adjust:
- Too weak or watery: Add slightly more coffee before changing the grind.
- Too strong: Use slightly less coffee or add a small amount of hot water to the finished cup.
- Bitter or harsh: Use less coffee, confirm the grind is not too fine, and avoid leaving the carafe on a hot plate for too long.
- Sour or thin: Confirm that you used enough coffee, the machine completed the full cycle, and the grounds were not excessively coarse.
Do not exceed the basket’s maximum coffee level. Too many grounds or an overly fine grind can block drainage and cause hot coffee to overflow.
Choosing Quality Coffee Beans
Arabica and Robusta are coffee species. Ethiopian, Colombian, and Sumatran coffees describe origins, not species or required roast levels. A coffee from any origin may be offered as a light, medium, or dark roast.
| Term | What It Describes | Examples |
|---|---|---|
| Species | The coffee plant category | Arabica, Robusta |
| Origin | Where the coffee was grown | Ethiopia, Colombia, Sumatra |
| Roast | How far the beans were roasted | Light, medium, medium-dark, dark |
Whole beans generally retain flavor better than coffee ground far in advance. Buy an amount you can use promptly, store it in an airtight opaque container in a cool, dark place, and grind only what you need shortly before brewing. The National Coffee Association’s storage guidance recommends smaller batches and grinding immediately before brewing.
Experimenting With Flavor Profiles
Once the first brew is working correctly, experiment in small steps:
- Try another roast: Light, medium, and dark roasts emphasize different parts of the coffee’s flavor.
- Adjust the dose: Use a little more or less coffee while keeping the water amount fixed.
- Make a small grind adjustment: Stay within the medium-drip range and watch the basket’s drainage.
- Try another origin or blend: Compare coffees while keeping your recipe the same.
- Add flavor after brewing: Cinnamon, nutmeg, syrup, or milk is less likely to clog the basket when added to the cup instead of the machine.
Only place spices, tea, cocoa, or another ingredient in the filter basket when the manufacturer says the machine is designed for it.
First-Brew Troubleshooting
| Problem | Likely Cause | What to Do |
|---|---|---|
| Machine will not start | No power, empty reservoir, unseated basket, missing carafe, or control not confirmed | Check the outlet, water level, basket, carafe, lid, clock, and start button according to the manual |
| Water leaks | Overfilled reservoir, loose removable tank, cracked part, or incorrect carafe position | Stop the cycle, unplug the machine, let it cool, dry the area, and inspect the assembly before trying again |
| Basket overflows | Too much coffee, grind too fine, folded filter, two filters, blocked permanent filter, or carafe not opening the drip valve | Unplug and cool the brewer, then reduce the dose, use a medium grind, install one filter, and reseat the carafe |
| Coffee is weak | Too little coffee, stale grounds, excessive water, or wrong small-batch mode | Add slightly more fresh coffee and confirm the selected water and brew settings |
| Coffee is bitter | Too much coffee, grind too fine, dirty basket, or coffee held too long on the hot plate | Reduce the dose, use a medium grind, clean the basket, and serve sooner |
| Grounds appear in the cup | Wrong filter size, torn or folded paper, very fine grind, or normal fine sediment from a permanent filter | Use the specified filter, flatten it against the basket, and choose a medium drip grind |
| Plastic or vinegar odor remains | Parts were not washed, rinse cycles were incomplete, or too much cleaning solution was used | Wash approved parts and run fresh-water cycles; contact the manufacturer if the odor remains after following the manual |
Warning: Immediately unplug the coffee maker if you see smoke or sparks, smell burning insulation, hear abnormal electrical buzzing, or find water entering the control area. Do not open the housing or attempt an internal repair.
Cleaning and Maintenance After First Use
After each brew, allow the basket and carafe to cool. Discard the paper filter and grounds, or empty the permanent filter. Wash or rinse the basket, permanent filter, carafe, and lid as directed by the manufacturer. Dry the parts before reassembly to limit stale coffee oil, odor, and residue.
Wipe the exterior and warming plate with a soft damp cloth after the machine is unplugged and cool. Never spray cleaner directly into controls, vents, seams, or the electrical base.
Descaling is separate from daily washing. Mineral scale forms inside the water path over time, especially with hard water. Descale when the clean indicator appears or at the interval stated in the manual. Use only the approved vinegar ratio, citric-acid mixture, tablet, or descaling solution.
Official manufacturer guidance reinforces the need to follow the model-specific process. Cuisinart provides different cleaning instructions depending on the machine’s controls, while Breville directs users to unplug before cleaning and wash coffee-contact parts regularly.
Frequently Asked Questions
Can I use tap water instead of vinegar for the first cleaning?
Yes. Fresh potable water is the normal first-use rinse for many coffee makers. Wash the approved removable parts and run one or two water-only cycles unless your manual specifically requires vinegar, a tablet, or another cleaning product. For brewing, cold filtered tap water is a good default when the local water has a noticeable taste or odor.
How often should I clean my coffee maker after the first use?
Discard grounds and wash or rinse the carafe, lid, basket, and permanent filter after each use. Wipe spills after the machine cools. Descale the internal water path when the manufacturer’s indicator or maintenance schedule says to do so; there is no single 30-day rule for every model.
What type of coffee grounds should I use for the best results?
Use a medium grind labeled for automatic drip coffee makers. Grounds that are extremely fine can slow the flow and cause bitterness or basket overflow. Adjust the coffee dose before making large grind changes.
Is it safe to leave the coffee maker plugged in overnight?
Follow the appliance manual. A programmed auto-brew feature normally requires the machine to remain connected to power, but the reservoir, basket, and carafe must be prepared exactly as directed. When no timer is needed, unplugging the brewer after it has cooled reduces unnecessary power use and follows the safety guidance supplied with many appliances.
Can I use my coffee maker to brew tea?
Only if the manufacturer says the model can brew tea. Use the approved basket and amount, and avoid loose leaves that can pass through or clog the filter. Clean the basket, carafe, and coffee residue thoroughly before and after brewing tea.
Why does my new coffee maker smell like plastic?
A mild packaging odor may improve after washing approved removable parts and running the required water-only cycles. Do not cover it with coffee or unapproved cleaners. Stop using the machine and contact the manufacturer if the odor is strong, electrical, smoky, or remains after the documented first-use process.
Should I use a paper filter and a permanent filter together?
Usually not. Use the filter system specified in the manual. Combining a paper filter with a permanent filter can restrict flow and contribute to overflow unless the manufacturer expressly designed the basket for both.
Can I ever clean a coffee maker with vinegar?
Yes, when the model manual approves vinegar for descaling or cleaning. Use the exact ratio and cycle in that manual, remove a charcoal filter if directed, and complete every fresh-water rinse. Do not assume that a 50/50 mixture is correct for all machines.
Conclusion
A new coffee maker should be easy to prepare when you follow a safe order: inspect it, read the model manual, wash the removable parts, run the required plain-water cycles, install the correct filter, and brew a small test batch. Avoid treating vinegar, grind size, cleaning frequency, or temperature controls as universal. Model-specific instructions will protect the machine and help your first cup taste clean and balanced.
Sources
- National Coffee Association: Drip Coffee — coffee-to-water ratio, grind, water, and basic drip-brewing guidance
- National Coffee Association: Storage and Shelf Life — bean storage, smaller purchases, and grinding before brewing
- Specialty Coffee Association: Certified Home Brewers — brewing-equipment performance and certification context
- Hamilton Beach The Scoop Use and Care Manual — first-use water cycles, medium drip grind, appliance placement, and electrical safety
- Cuisinart Coffee Maker Cleaning Guide — model-dependent vinegar ratios, filter removal, washing, and rinse guidance
- Breville Coffee Maker Instruction Manual — unplugging before cleaning, hot-basket safety, filter care, and overflow troubleshooting