A reliable office coffee maker cleaning schedule keeps old grounds, coffee oils, spills, and mineral scale from affecting flavor or slowing the machine. The right schedule depends on the brewer type, daily volume, water hardness, and manufacturer instructions. Use the routine below as a practical baseline, then adjust it to match your exact model.
Quick Answer
Rinse the carafe, discard grounds, clean the filter basket, and wipe spills every day. Deep-clean removable parts weekly. Inspect the machine monthly, but descale only when the manual, warning light, water hardness, or slower flow indicates it is due. Clean milk-contact parts after every use.
Key Takeaways
- Clean the carafe and brew basket daily so old grounds and oils do not affect the next batch.
- Unplug the machine and let hot surfaces cool before deep cleaning.
- Inspect removable parts, sprayheads, pod holders, and drip trays each week.
- Check the machine monthly, but follow the exact model manual for descaling frequency and solution.
- Clean grinders with dry tools or approved grinder-cleaning products; do not wet the burr chamber.
- Record completed tasks so responsibility does not fall through the cracks in a shared office.
At a Glance
| Time Required | 5–10 minutes daily; 20–30 minutes weekly; 30–60 minutes for descaling |
| Difficulty | Easy for routine cleaning; moderate for model-specific descaling |
| Tools Needed | Mild dish soap, soft cloth, nonabrasive brush, clean water, dry grinder brush, and an approved descaler when due |
| Cost | Usually a few dollars for routine cleaning; descaler and replacement filters cost extra |
Why Skipping Coffee Maker Maintenance Hurts Coffee Quality

When an office coffee maker is not cleaned, used grounds, coffee oils, dust, and spills collect on the parts that employees handle or that touch the beverage. These residues can create stale odors and unpleasant flavors in later batches.
Minerals in water can also form scale inside the brewer. Scale may restrict water flow, lengthen brew time, reduce the amount dispensed, or trigger a maintenance warning. BUNN notes that keeping sprayhead openings clean helps maintain proper flow, while manufacturer manuals commonly include separate descaling instructions for internal scale.
The safest maintenance interval is the one supported by the machine’s manual, actual office use, and local water conditions—not a single schedule applied to every brewer.
Warning: Turn off and unplug the coffee maker before deep cleaning. Let the hot plate, water, and internal parts cool. Never immerse the main unit, cord, or plug, and do not open electrical, boiler, or plumbed components unless you are an authorized technician.

Power your essentials anywhere with a 999Wh pure sine wave power station delivering up to 1000W continuous with 2000W surge. It supports fast charging via USB-C PD 60W and USB-A QC 18W, plus simultaneous output for multiple devices through AC, USB, wireless, and car/DC ports. Recharge using AC, car, or solar with a built-in MPPT controller and dual cooling fans, while the upgraded battery management system protects against surges, short circuits, and overheating.

Bulk Coffeemaker Decalcifier Tablet: 24 Tablets Work out to a Year Supply or more. Compare to other products like powder, pods, sachet, packets. Choose ACTIVE Cleaning Tablets for better Values
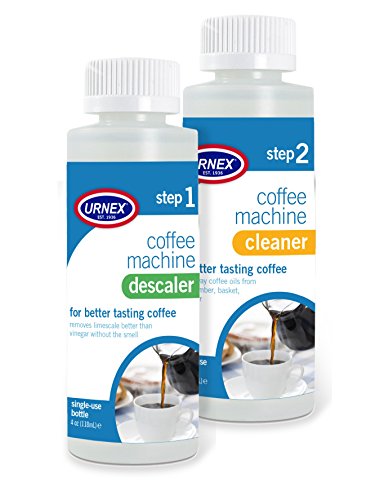
Single-use kit for full maintenance of automatic drip coffee makers
Office Coffee Maker Cleaning Schedule
Use this schedule as a starting point. A heavily used break-room brewer may need some tasks more often, while a low-use machine may need them less often.
- After each brew: Discard grounds or pods, rinse the carafe, and wipe fresh spills.
- At the end of each workday: Wash the carafe and filter basket, empty the drip tray, wipe the exterior, and clean any milk-contact parts.
- Weekly: Deep-clean removable parts, inspect the sprayhead or pod holder, clean the reservoir as allowed, and wipe the surrounding station.
- Every four to six weeks: Inspect and clean a separate grinder according to its manual. Some grinder manufacturers use this interval as a routine-cleaning baseline.
- Monthly: Inspect flow, brew time, seals, cords, warning lights, filters, and visible scale. A monthly inspection does not mean every machine should be descaled monthly.
- When prompted or required by the manual: Replace the water filter and complete the correct descaling procedure.
Note: Hard water, a high daily brew count, and small spray or needle openings can shorten the time between maintenance cycles. Record unusual changes instead of waiting for the next scheduled date.
Daily Cleaning Tasks to Keep Your Coffee Maker Fresh
Daily cleaning removes residue before it dries, hardens, or affects the next batch. Check the manual before putting any removable part in a dishwasher because some parts are hand-wash only.
Rinse the Carafe After Brewing
Empty the carafe when the coffee is no longer being served. Once it is safe to handle, rinse it with warm water. At the end of the day, wash it with mild dish soap and a soft sponge or cloth, then rinse thoroughly.
Pay attention to the lid, pouring channel, and rim. Coffee can collect in these narrow areas even when the main carafe looks clean. Allow the parts to air-dry before reassembly or storage.
Clean the Filter Basket Daily
Discard the paper filter and grounds after each batch. Remove the filter basket and wash it with warm, soapy water if the manual allows. Rinse until no soap remains and dry it before returning it to the machine.
A quick rinse after brewing prevents grounds from drying in the basket, but it does not replace the daily wash. Check the drip-stop mechanism and basket outlet for trapped grounds.
Wipe the Machine Exterior Regularly
Use a damp, nonabrasive cloth to remove coffee splashes, fingerprints, and dust. Wipe the controls, handle, dispensing area, warming-plate surroundings, and the counter beneath the machine.
Do not spray cleaner directly into buttons, vents, seams, or electrical openings. Apply the cleaner to the cloth first when the manufacturer permits its use.
Empty the Drip Tray and Rinse Removable Parts
Empty the drip tray before it overflows. Wash the tray and grate with mild soap, rinse them, and dry them before reinstalling. If the machine has a removable water reservoir, clean it only by the method stated in the manual.
Remove any installed water-filter cartridge before washing a reservoir when the manufacturer instructs you to do so. Do not dry the inside with a lint-shedding towel if the manual recommends air-drying.
Clean Milk Parts After Every Use
Milk residue spoils faster than plain coffee residue. Rinse and clean frothing pitchers, steam-wand exteriors, milk tubes, detachable frother parts, and dairy dispensing components immediately after use.
Automatic espresso and bean-to-cup machines may require a programmed milk-rinse or cleaning cycle. Run it at the required time and use only the approved cleaner and concentration.
Weekly Cleaning Duties for Better Coffee Quality
A weekly deep clean reaches areas that a quick daily wipe may miss.
- Wash the carafe, lid, filter basket, drip tray, and other approved removable parts.
- Inspect the brew basket outlet, drip stop, pod holder, and accessible needles for grounds.
- Check the sprayhead openings and clean them by the method supplied with the machine.
- Clean the reservoir and lid if the manual permits removal or internal wiping.
- Wipe the warming plate only after it has cooled completely.
- Clean the cabinet, counter, condiment organizers, waste bin, and storage area around the brewer.
- Check for cracks, loose parts, damaged seals, leaks, or cord damage.
Some commercial BUNN equipment calls for frequent sprayhead attention because clear openings support correct flow and water distribution. Follow the instructions for the installed brewer rather than inserting pins, wires, or tools that were not approved for that model.
Clean a Built-In or Separate Grinder Safely
Unplug a separate grinder before opening its removable parts. Empty the hopper and grounds bin. Wash only the parts the manual identifies as washable, and dry them completely before reassembly.
Use a dry grinder brush or vacuum method approved by the manufacturer for the burr chamber and chute. Do not pour water onto burrs, motors, or electrical parts. Baratza recommends routine grinder cleaning every four to six weeks for its grinders and advises using products designed for burr-grinder cleaning when deeper oil removal is needed.
Pro Tip: Keep a small brush and labeled cleaning cloth beside the coffee station. Do not use the same cloth for the floor, trash area, or restroom surfaces.
Descaling and Monthly Maintenance Steps

Inspect the machine each month for slower brewing, reduced output, unusual noises, warning lights, visible deposits, leaks, or a change in taste. Descale only when the manual, maintenance alert, service plan, water conditions, or performance indicates that it is due.
For example, one Keurig use-and-care guide specifies descaling every three months, while other machines use cycle counters or automatic alerts. A plumbed commercial brewer may have a service schedule based on water testing and filtration.
How to Descale an Office Coffee Maker
- Find the exact manual. Confirm the model number, required descaler, dilution ratio, cycle, rinse volume, and filter-removal instructions.
- Prepare the machine. Remove coffee, pods, and loose grounds. Empty the reservoir and drip tray as directed.
- Remove or protect the filter. Take out the water-filter cartridge if the instructions require removal before descaling.
- Add the approved solution. Use the manufacturer’s descaler or the precise vinegar mixture stated in the manual. Do not improvise a stronger concentration.
- Run the required cycle. Follow the model’s sequence, pause time, and container-size instructions.
- Rinse thoroughly. Empty and rinse the reservoir, then run the required number of fresh-water cycles.
- Check the result. Confirm that the machine dispenses a normal volume without a cleaning-solution smell or taste.
- Record the date. Note the descaling date, product used, filter status, and any remaining problem.
Warning: Vinegar is not approved for every coffee maker. Some Cuisinart models use three parts water to one part vinegar, while certain Keurig procedures specify Keurig descaling solution. Never assume that equal parts vinegar and water are safe for an unknown model.
Do not mix vinegar, descaler, bleach, ammonia, or other cleaning products. Never run a surface disinfectant through the water system unless the appliance manufacturer specifically approves that product and procedure.
Adjust the Schedule for Your Machine Type
Traditional Drip Coffee Makers
Focus on the carafe, lid, filter basket, drip stop, sprayhead, warming plate, and reservoir. Remove used grounds promptly and avoid leaving coffee on a warming plate for long periods.
Single-Serve Pod Brewers
Empty the drip tray and used-pod bin frequently. Clean the pod holder and accessible entrance or exit needles only as the manual directs. A partial cup can result from a clogged needle, insufficient water, or scale.
Bean-to-Cup and Espresso Machines
Follow the machine’s automatic rinse, brew-group, cleaning-tablet, milk-system, and descaling prompts. Empty the puck bin and drip tray daily. Removable brew groups may require rinsing, lubrication, or professional service according to the manufacturer.
Plumbed Commercial Brewers
Check the water filter, supply line, sprayhead, funnel, dispenser, and service schedule. Do not disconnect plumbing, open boilers, or bypass filtration without an authorized technician.
Machines With Hot-Water or Sweetened-Drink Options
Run any required cleansing cycle after cocoa, powdered drinks, syrups, or sweetened pods. Sugar residue can block small passages and requires more attention than plain coffee alone.
Signs Your Coffee Maker Needs Immediate Attention
Do not wait for the next scheduled cleaning when performance changes. Check the following signs:
- Stale, bitter, sour, or chemical taste: Wash food-contact parts, verify that fresh coffee and water are being used, and confirm that all cleaning solution was rinsed out.
- Slow brewing or reduced output: Inspect accessible openings, confirm the reservoir is seated correctly, and check whether descaling is due.
- Grounds in the cup: Check the filter, basket seating, pod holder, needles, and basket outlet.
- Visible residue or growth: Stop using the machine, clean all approved removable parts, and arrange service if contamination appears inside inaccessible components.
- Recurring clogging: Check grind size, dose, filter placement, sprayhead openings, and the manufacturer’s cleaning procedure.
- Leaks: Stop use if water is reaching the cord, plug, electrical base, or counter opening. Inspect removable seals only when the manual permits it.
- Burning smell, smoke, overheating, sparking, or damaged wiring: Unplug the machine and arrange professional service immediately.
- Repeated error messages: Follow the manual’s reset and maintenance steps. Contact service if the fault returns.
A dirty machine is not the cause of every problem. Failed pumps, heaters, sensors, seals, valves, and control boards require diagnosis rather than repeated cleaning.
Effective Tips for a Spotless Coffee Station
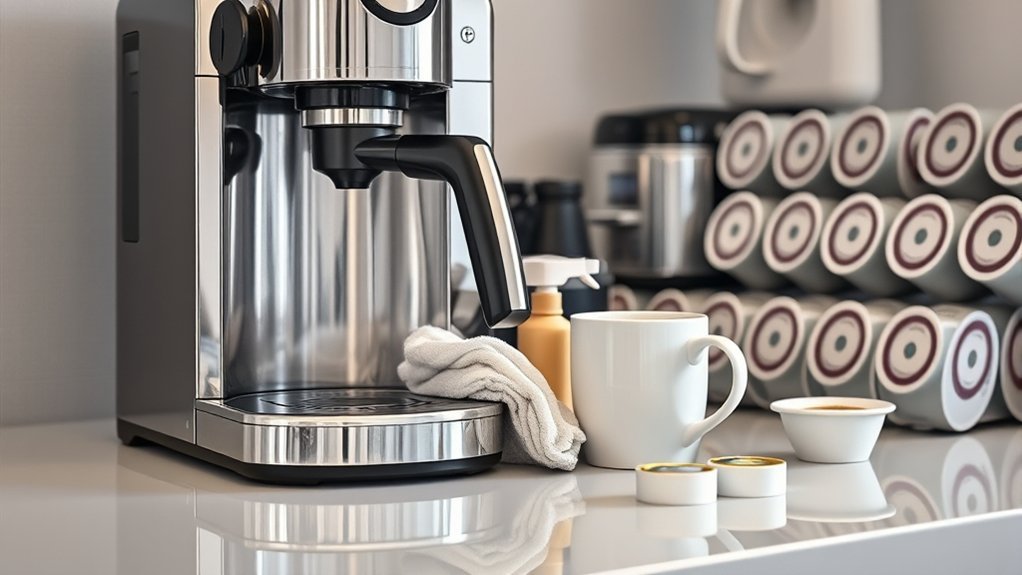
Clean the countertop and splash area every day with a product approved for that surface. The FDA advises washing utensils, dishes, and countertops with hot, soapy water after food preparation; follow your workplace’s cleaning and sanitizing policy when additional controls apply.
- Keep clean cups, filters, stirrers, and lids protected from splashes.
- Store beans and grounds in sealed containers away from heat, moisture, and direct light.
- Empty the waste bin before wet grounds or pods create odors.
- Remove spilled sugar, creamer, and milk promptly.
- Keep cleaning chemicals separate from coffee, filters, cups, and condiments.
- Label brushes and cloths for coffee-station use only.
- Restock supplies during cleaning so employees do not open several packages at once.
- Leave washed parts dry before closing lids or placing them in storage.
Creating an Effective Cleaning Schedule for Your Team
A shared machine needs named responsibilities. Avoid a vague rule that asks “everyone” to clean, because everyone may assume someone else handled it.
Assign a daily closer to empty grounds, wash the carafe and basket, clean milk parts, and wipe the station. Assign a weekly owner to inspect removable parts, reservoirs, sprayheads, pod holders, and supplies. A facilities employee or service provider should own filter changes, descaling, and repair calls.
Use a simple log with these fields:
- Date and time
- Task completed
- Employee initials
- Descaler or filter used
- Warning light or performance issue
- Service request number, when applicable
Review the schedule after staffing changes, a new machine installation, increased office attendance, or a change in water supply. A machine brewing dozens of servings each day will need closer attention than one used a few times.
Note: For leased or vendor-managed equipment, confirm which tasks employees may perform. Unauthorized disassembly or chemical use can interfere with the service agreement.
Avoid These Common Coffee Maker Cleaning Mistakes
- Using one descaling recipe for every machine: Product type, concentration, and cycle vary by model.
- Descaling every week without a manufacturer requirement: Inspect regularly, but descale at the specified interval.
- Resetting a descale alert without completing the process: The underlying scale remains.
- Immersing the appliance: The main unit, cord, plug, grinder motor, and electrical base must stay dry.
- Assuming every part is dishwasher-safe: Heat can deform parts or damage seals.
- Using abrasive pads: They can scratch warming plates, carafes, coatings, and plastic surfaces.
- Leaving soap or descaler in the water path: Complete every fresh-water rinse required by the manual.
- Putting rice through a burr grinder: Use a brush, vacuum method, or grinder-cleaning tablets approved by the manufacturer.
- Wetting grinder burrs: Moisture can cause corrosion, clogging, or electrical damage.
- Ignoring milk parts: Clean them after each use rather than waiting for the weekly routine.
- Mixing cleaning chemicals: Use one approved product at a time and follow its label.
- Treating every malfunction as a cleaning issue: Leaks, electrical faults, overheating, and recurring errors need service.
How a Clean Coffee Machine Supports Employee Satisfaction
A clean coffee machine produces more consistent results and makes the shared break area feel better managed. Employees are less likely to encounter stale odors, overflowing trays, old grounds, empty supplies, or an out-of-service brewer when routine tasks are assigned and recorded.
Regular upkeep can also reduce avoidable interruptions caused by clogged baskets, blocked openings, full waste containers, or overdue maintenance alerts. It cannot prevent every mechanical failure, but it makes simple problems easier to spot before they disrupt service.
A tidy station also sets a clear standard for shared-kitchen behavior. Employees can see where supplies belong, which parts are clean, and who is responsible for the next task.
Consistency matters more than an aggressive cleaning schedule: complete the right task, with the right product, at the right interval.
Frequently Asked Questions
How often should I replace the coffee maker’s water filter?
Follow the cartridge and coffee maker instructions. Replacement intervals vary by filter type, water quality, and use. Certain Keurig cartridges, for example, are rated for two months or 60 reservoir refills, but that interval should not be applied automatically to another brand or filter.
Can I use vinegar to descale my coffee maker?
Use vinegar only when the exact model manual permits it. Follow the stated vinegar-to-water ratio and rinse procedure. Some machines call for a commercial or proprietary descaler instead, so equal parts vinegar and water should not be treated as a universal recipe.
How often should an office coffee maker be descaled?
Descale when the manufacturer specifies, when the maintenance alert appears, or when water conditions and performance show it is due. Some models use a three-month interval, while others calculate the interval from brew cycles or water hardness. Weekly descaling is not a suitable general rule.
What is the best way to store coffee beans?
Keep beans in a clean, airtight container in a cool, dry, dark cabinet. Avoid storing them beside the brewer’s hot plate, in direct sunlight, or near strong odors. Refill a smaller working container instead of leaving a large supply open at the coffee station.
How can I tell whether the coffee maker is brewing properly?
Check whether it dispenses the selected volume in its normal time, wets the grounds evenly, avoids grounds in the cup, and produces coffee without stale or chemical flavors. Use the manufacturer’s test procedure for temperature or flow. A temperature reading taken in the carafe may not equal the water temperature at the grounds.
Are there cleaning products I should avoid?
Avoid abrasive cleaners, unapproved descalers, and chemicals that the manual does not permit. Never mix bleach, ammonia, vinegar, or descaling products. Do not run a countertop disinfectant through the internal water system unless the manufacturer expressly approves it.
Can coffee maker parts go in the dishwasher?
Only when the manual identifies those parts as dishwasher-safe. Some carafes, lids, filter baskets, reservoirs, pod holders, and drip trays require hand washing. When uncertain, wash the removable part gently by hand and contact the manufacturer.
When should I call a technician instead of cleaning the machine again?
Arrange service for electrical smells, smoke, sparks, overheating, damaged wiring, internal leaks, repeated error codes, failed heating, inaccessible contamination, or problems that remain after the approved cleaning and descaling procedures. Do not open a boiler, electrical housing, or plumbed connection yourself.
Conclusion
A good office coffee maker cleaning schedule is simple, visible, and matched to the equipment. Wash the main food-contact parts daily, inspect and deep-clean removable components weekly, check the machine each month, and descale only at the interval required by the manual or operating conditions.
Assign each task, record when it is completed, and stop using the brewer when leaks, electrical faults, overheating, or persistent errors appear. That approach protects the machine, improves coffee consistency, and keeps the shared station ready for the next person.
Sources
- Keurig K-Duo Use & Care Guide — daily carafe and basket cleaning, unplugging, descaling, rinsing, and troubleshooting guidance.
- Cuisinart: How to Clean Your Coffee Maker — an example of model-specific vinegar dilution and cleaning instructions.
- BUNN Sprayhead Basics — sprayhead flow, scale, water distribution, and cleaning considerations.
- Baratza Grinder Cleaning Essentials — routine burr-grinder cleaning frequency and safe cleaning steps.
- U.S. Food and Drug Administration: Safe Food Handling — general guidance for washing utensils and countertops.
- Specialty Coffee Association Certified Home Equipment — coffee-brewer performance evaluation factors, including temperature and consistency.