A programmable coffee maker is an automatic drip brewer that can start making coffee at a time you choose. Most models combine a clock and delayed-start timer with conveniences such as brew strength control, auto shut-off, keep-warm settings, or a pause-and-pour function. More advanced machines may also offer small-batch modes, thermal carafes, pod compatibility, temperature control, or smart connectivity.
Quick Answer
A programmable coffee maker is a drip brewer with a clock and delayed-start control that can begin brewing at a time you set. Depending on the model, it may also offer brew-strength settings, small-batch modes, auto shut-off, keep-warm controls, a thermal carafe, or smart features. Coffee quality still depends on your water, grind, coffee-to-water ratio, and maintenance.
Key Takeaways
- The timer starts the brew cycle at a preset time, but you still need to load the correct amount of water, coffee, and the proper filter beforehand.
- Programmable features vary by model. Brew-strength controls, keep-warm times, auto shut-off, small-batch modes, pod support, and app control are not universal.
- For a repeatable starting recipe, weigh your water and coffee. SCA brewer testing begins at about 55 grams of coffee per liter of water.
- A medium grind works well as a starting point for most automatic drip brewers; adjust gradually if the coffee tastes weak, sour, bitter, or the basket drains too slowly.
- Clean removable parts after use and descale according to your specific manufacturer’s instructions rather than following one universal vinegar schedule.
At a Glance
| Time Required | About 5–10 minutes to set up and program; brewing time varies by model and batch size |
| Difficulty | Easy |
| Tools Needed | Fresh water, automatic-drip coffee, the correct filter, and ideally a kitchen scale |
| Cost | No extra setup cost beyond coffee and any disposable filters your machine requires |
What Is a Programmable Coffee Maker and How Does It Work?

A programmable coffee maker is usually an automatic drip machine with an electronic clock and a delayed-start function. You set a future brew time, prepare the machine with water and coffee, and activate the program. When the scheduled time arrives, the brewer starts its normal heating and brewing cycle.
The timer does not make the basic extraction process different from ordinary automatic drip coffee. A heating system warms the water, the machine distributes that water over the coffee grounds, soluble flavor compounds move into the water, and the brewed coffee passes through the filter into a carafe or cup.
What makes the machine programmable is the control system around that process. Depending on the model, you may also get brew-strength settings, a small-batch mode, an adjustable warming plate, a thermal carafe, brew pause, cleaning reminders, or smart controls.
Note: “Programmable” does not guarantee a particular brewing temperature, carafe type, auto-off time, or strength control. Always check the specifications and manual for the exact model you own or plan to buy.

Power your essentials anywhere with a 999Wh pure sine wave power station delivering up to 1000W continuous with 2000W surge. It supports fast charging via USB-C PD 60W and USB-A QC 18W, plus simultaneous output for multiple devices through AC, USB, wireless, and car/DC ports. Recharge using AC, car, or solar with a built-in MPPT controller and dual cooling fans, while the upgraded battery management system protects against surges, short circuits, and overheating.

Compact Design: Perfectly fits in small spaces, making it ideal for any kitchen size

Programmable Single-Serve Coffee Maker - This single-serve coffee maker comes with a programmable 24-hour illuminated LCD display, allowing you to preset the brewing time at your convenience. Simply fill the 14-ounce water reservoir, add your preferred ground coffee to the washable permanent filter, and press the power switch. In just a few minutes, the single-serve carafe will dispense hot, delicious coffee directly into your mug, ready for you to enjoy.
Key Features That Make Programmable Coffee Makers Convenient
The most useful feature is delayed brewing, but several other controls can make an automatic drip machine easier to fit into your routine.
| Feature | What It Does | Why It Helps |
|---|---|---|
| Delayed Start / Timer | Starts brewing at a scheduled time | Coffee can be ready when you wake up or begin work |
| Auto Shut-Off | Stops heating or powers down according to the machine’s programmed behavior | Reduces unnecessary heater operation and adds convenience |
| Brew Strength | Changes brewing parameters to produce a bolder or more concentrated-tasting cup | Lets you adjust flavor without manually controlling the brew cycle |
| Small-Batch Mode | Adjusts brewing for a partial carafe on supported models | Can improve extraction when making only a few cups |
| Pause-and-Pour | Temporarily stops coffee flowing from the basket when the carafe is removed | Lets you pour a cup before the full batch finishes |
| App / Voice Control | Available on some connected models | Provides remote settings or status controls where supported |
Programmable Timer Functionality
A delay-brew timer lets you prepare the machine in advance and tell it when to start. Many current programmable machines allow scheduling up to 24 hours ahead, although the exact interface differs.
For the timer to work, the brewer generally needs the correct amount of water, coffee grounds, filter, and carafe in place before the scheduled time. Check that the display shows the correct clock time and that the delayed-brew indicator is active.
Pro Tip: The first time you use delayed brew, test the program while you are awake. This catches AM/PM mistakes, an incorrectly seated carafe, a closed drip-stop lever, or a timer that was set but not activated.
After a power outage or after unplugging some models, you may need to reset both the clock and the scheduled brew time. Recheck the clock after daylight-saving-time changes as well.
Brew Strength Customization
A brew-strength control normally changes one or more brewing parameters, such as water-flow rate, contact time, temperature, or the way the brewer handles a batch. The exact method is manufacturer-specific.
Settings may be labeled Regular, Classic, Bold, Strong, Rich, Robust, or something similar. A stronger setting can make a fuller-tasting cup, but it cannot compensate for a severely incorrect coffee-to-water ratio or an unsuitable grind.
If your machine has no strength control, you can still adjust flavor by changing the amount of coffee, grind size, bean choice, or water volume. Make only one adjustment at a time so you know what improved or worsened the cup.
Auto Shut-Off Safety Feature
Many programmable brewers include an auto shut-off or automatic standby function. However, there is no single standard shut-off time. Current models range from shutting down when brewing ends to keeping a glass carafe warm for several hours.
For example, Cuisinart’s DCC-3200 provides adjustable auto-off settings, while current Mr. Coffee programmable models can use a four-hour automatic shutoff. Check your own manual rather than assuming a 30-minute or two-hour limit.
Warning: Auto shut-off is not a substitute for safe appliance use. Stop using a brewer that leaks, overheats, has a damaged cord, releases unexpected steam, or is subject to a recall. Keep hot coffee and steam away from children, and unplug and cool the machine before cleaning unless the manual specifically instructs otherwise.
Customizing Brew Strength: How to Get the Cup You Want
The strength button is only one part of the recipe. The amount of coffee, water volume, grind size, roast, water quality, and brewing performance all affect the final cup.
Start With a Consistent Coffee-to-Water Ratio
Instead of relying only on tablespoons or the number printed on the carafe, weigh the water and coffee when possible. The Specialty Coffee Association’s public home-brewer certification requirements begin testing at approximately 55 grams of coffee per liter of water.
That gives you a repeatable baseline. If the result tastes too light for you, increase the coffee dose gradually. If it is too intense, reduce the dose slightly.
Note: A coffee maker’s “cup” is not necessarily an 8-fluid-ounce household measuring cup. Many carafe brewers use smaller manufacturer-defined cup markings. Base your recipe on the machine’s actual water volume or the recipe in its manual.
Adjusting Brew Strength Settings
- Start with the normal setting. Brew one batch using a consistent dose, water volume, and grind.
- Try the stronger mode. If the machine offers Bold, Strong, Rich, or Robust, use the same coffee and water so you can judge what the setting itself changes.
- Adjust the dose next. Increase or decrease the coffee in small increments rather than making a large jump.
- Fine-tune the grind last. A slightly finer grind generally increases extraction, while a coarser grind generally allows faster flow and lower extraction.
If your brewer has a dedicated 1–4 cup or small-batch setting, use it when making a partial pot. Manufacturers may slow or otherwise alter the cycle to improve extraction from a shallower bed of coffee.
Coffee Grind Size Matters
Grind size changes how quickly water moves through coffee and how readily flavors dissolve. For most automatic drip brewers, a medium grind is the best place to start.
| Typical Grind | Common Brewing Method |
|---|---|
| Fine | Espresso |
| Medium-Fine | Some pour-over brewers |
| Medium | Most automatic drip coffee makers |
| Coarse | French press and some cold-brew recipes |
| Extra Coarse | Long-steep cold-brew recipes |
If your coffee tastes thin or noticeably sour, a slightly finer grind may help if the machine is otherwise working correctly. If it tastes harsh, overly bitter, or the basket drains very slowly, try a slightly coarser grind.
Do not use espresso-fine grounds in a drip brewer unless the manufacturer specifically permits it. Fine grounds can slow drainage and increase the risk of overflowing the basket.
Experimenting With Coffee Types
Light, medium, and dark roasts can produce very different flavor profiles even when you keep the brewing recipe unchanged. Try several coffees before assuming that a machine setting is responsible for every flavor difference.
Roast level and brew strength are also not the same thing. A dark roast may taste smokier or more intense, but the brewed concentration still depends heavily on how much coffee you use and how it is extracted.
For the most useful comparison, keep your dose, water volume, grind, and brew setting constant when trying a new bean. Then adjust the recipe after you know how that coffee tastes.
Do Not Ignore the Water
Coffee is mostly water, so poor-tasting water can produce poor-tasting coffee. Start with fresh, cold, potable water. If your tap water has a strong chlorine taste or odor, an appropriate filter may improve the cup.
Mineral buildup from water can also slow the brewer and affect temperature and flow over time. That is why regular descaling matters, especially in hard-water areas.
The Brewing Process: From Water to Coffee Cup
When brewing begins, the machine heats water and sends it toward the brew basket. The water wets the coffee bed, dissolves soluble flavor compounds, passes through the filter, and collects in the carafe.
For SCA home-brewer certification, the public requirements specify that water at the coffee bed should reach at least 92°C (197.6°F) within the first minute and should not exceed 96°C (204.8°F).
The same SCA requirements specify a coffee-water contact time of more than four minutes but less than eight minutes for full-capacity certification testing under standard conditions. That does not mean every machine’s total wall-clock cycle will be four to eight minutes; preheating, blooming, batch size, and programmed brew modes can change total cycle time.
For that reason, there is no reliable universal “19-minute average” for programmable coffee makers. A better quality check is whether the machine heats properly, wets the grounds evenly, drains without overflowing, and produces consistent coffee from the same recipe.
Some higher-end brewers allow control over temperature, bloom time, and water flow. Basic programmable machines handle these variables automatically.
Setting Up Your Coffee Maker: A Step-by-Step Guide
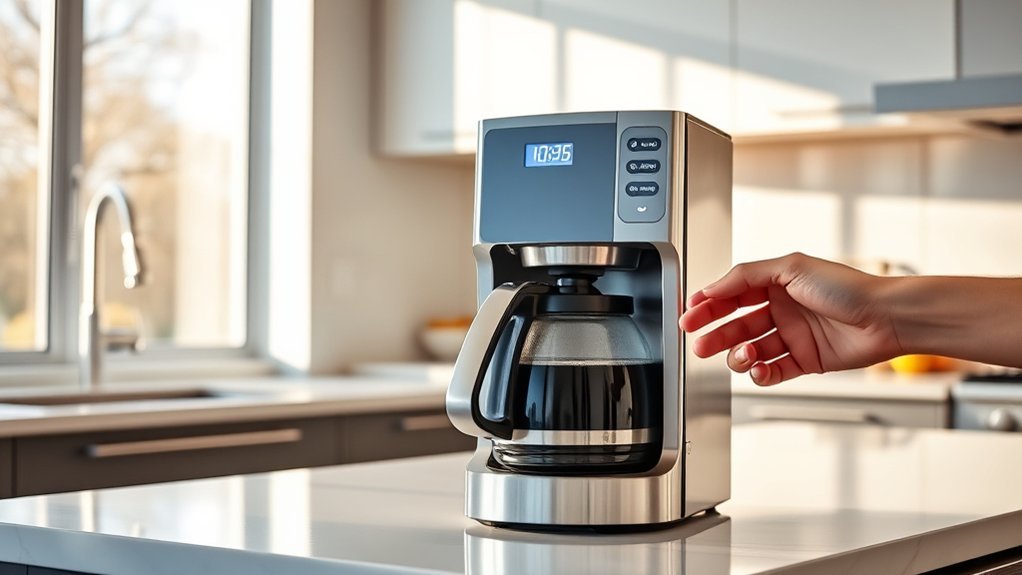
Button names vary, so keep your model’s manual nearby the first time you program the machine. The basic process is similar across most carafe-style programmable brewers.
- Prepare the machine for first use. Remove packaging and wash removable parts as directed. If the manufacturer calls for a water-only rinse or initial cycle, complete it before brewing coffee.
- Place the brewer safely. Use a flat, dry, stable surface with enough clearance around vents and steam outlets. Plug it directly into an appropriate outlet according to the manual.
- Insert the correct filter. Use the paper-filter size, reusable basket, or filter insert specified for your model.
- Add fresh water. Fill the reservoir only to the amount you intend to brew and never above its maximum line.
- Add measured coffee. A medium automatic-drip grind is a sensible starting point. For repeatability, begin near 55 grams per liter of water unless your manufacturer recommends a different recipe.
- Seat the carafe correctly. Make sure the empty carafe and lid are positioned properly beneath the basket so the drip-stop or pause valve can open as designed.
- Set the clock. Verify the correct hour, minutes, and AM/PM setting if your display uses a 12-hour clock.
- Set the delayed brew time. Press the Program, Auto, Delay Brew, Brew Later, or equivalent control and choose the desired start time.
- Activate the program. Look for the indicator light or display message confirming that delayed brewing is actually enabled.
- Check the result. On the first programmed cycle, confirm that the machine started at the expected time and that the basket drained normally.
Warning: Never run a carafe brewer without the correct carafe or cup positioned as required by the manufacturer. An incorrectly seated carafe can keep the basket valve closed and allow hot water and coffee to overflow.
Glass vs. Thermal Carafes
The type of carafe affects how your coffee is held after brewing.
Glass carafes normally sit on a warming plate. They make it easy to see how much coffee remains, but continued heating can gradually change the flavor of the coffee. Models may let you control how long the warming plate stays on.
Thermal carafes use insulated walls to retain heat without relying on a continuously heated plate. They are useful when you plan to drink the pot over a longer period.
The best choice depends on whether you value a visible carafe and active warming or prefer passive heat retention.
Essential Maintenance Tips to Extend Your Coffee Maker’s Life
Regular cleaning helps prevent stale coffee oils, mineral scale, restricted water flow, and off flavors.
| Maintenance Task | When to Do It |
|---|---|
| Discard grounds and rinse or wash the filter basket | After each brewing session |
| Wash the carafe and lid | After use, following the manufacturer’s dishwasher or hand-washing instructions |
| Wipe the exterior | As needed, after unplugging and cooling the machine |
| Replace a water filter | At the interval specified for that filter and model |
| Descale the internal water path | When the CLEAN indicator appears or at the interval stated in the manual |
Some manufacturers permit white vinegar for descaling. For example, Hamilton Beach publishes vinegar-cleaning instructions for applicable coffee makers. Other machines may specify a proprietary descaling solution or a different process.
Do not assume that a monthly vinegar cycle is correct for every machine. Follow your model’s instructions, especially if it has a charcoal filter, removable reservoir, built-in grinder, pod adapter, or special cleaning program.
Never immerse the electrical base, plug, or power cord in water.
Troubleshooting Common Coffee Maker Issues

When a programmable brewer stops behaving normally, start with the simplest causes before assuming the machine has failed.
It Did Not Brew at the Programmed Time
- Confirm the outlet has power.
- Check the machine’s clock and AM/PM setting.
- Make sure you set the brew time, not just the current clock time.
- Confirm the delayed-brew indicator is illuminated or shown on the display.
- Reset the program after a power outage if your model does not retain it.
The Coffee Tastes Weak or Watery
- Verify that you are using enough coffee for the actual water volume.
- Try a weight-based recipe near 55 g/L as a starting point.
- Use the Bold, Strong, Rich, or equivalent setting if available.
- Try a slightly finer drip grind if the brew drains unusually quickly.
- Descale the brewer if mineral buildup has reduced heating or flow performance.
The Coffee Tastes Bitter or Harsh
- Try a slightly coarser grind.
- Check that you did not accidentally use substantially too much coffee.
- Clean old coffee oils from the basket, carafe, and reusable filter.
- Avoid leaving a glass carafe on a hot plate longer than necessary for your taste.
The Coffee Tastes Sour or Thin
Sourness can indicate insufficient extraction. Make sure the brewer is fully heating, use a suitable automatic-drip grind, and try a slightly finer grind before making large changes to the dose.
The Machine Brews Very Slowly or Makes More Noise Than Usual
Mineral scale is a common cause of restricted flow. Run the manufacturer-approved descaling process. If performance does not improve, inspect the manual’s troubleshooting guidance rather than disassembling electrical components yourself.
The Brew Basket Overflows
- Stop the brew if you can do so safely.
- Check that the carafe is correctly seated beneath any drip-stop valve.
- Do not exceed the machine’s maximum coffee dose or water level.
- Make sure you are using the correct filter size and only the number of filters specified.
- Use a coarser grind if your grounds are excessively fine and slowing drainage.
- Clean the brew basket outlet if the manual allows it.
The Coffee Maker Leaks
Confirm that the reservoir is not overfilled and that removable tanks, lids, valves, and carafes are installed correctly. Stop using the appliance if water is leaking from the electrical housing, the base is cracked, or you see heat damage.
Note: Before continuing to use an older or secondhand coffee maker, check the U.S. Consumer Product Safety Commission’s coffee-maker recall listings. Coffee-maker recalls can involve burn, fire, electrical, or hot-liquid hazards.
How to Choose a Programmable Coffee Maker
The best machine is not necessarily the one with the longest feature list. Focus on the features you will actually use.
- Capacity: Match the real carafe volume to the amount you normally brew.
- Delayed start: Check how far ahead you can schedule and whether the setting repeats automatically.
- Carafe: Choose glass with a warming plate or an insulated thermal carafe.
- Small-batch performance: A dedicated partial-pot mode is useful if you sometimes brew only a few cups.
- Brew control: Decide whether you need a basic Regular/Bold selector or advanced control over temperature, bloom, and flow.
- Grounds or pods: Traditional carafe machines usually use grounds, while hybrid models can support both.
- Cleaning: Look for accessible removable parts and a clear descaling procedure.
- Brewing performance: For shoppers focused on technical brewing quality, the SCA Certified Home Equipment list identifies models that have passed the association’s testing program.
Programmable Coffee Maker Brand Examples: How Features Differ
Features can differ even within the same brand, so it is more useful to compare specific machines than to assume one manufacturer always offers a particular function.
| Brand Example | Verified Feature Examples | Best Fit |
|---|---|---|
| Mr. Coffee programmable models | Brew Later, auto pause, automatic shutoff on supported models | Straightforward scheduled carafe brewing |
| Cuisinart DCC-3200 | 24-hour programmability, Regular/Bold strength, 1–4 cup setting, adjustable auto-off, brew pause | Large batches with more traditional drip controls |
| Ninja DualBrew CFP101 | Delay Brew, grounds and pods, multiple sizes, Classic/Rich/Over Ice modes, keep-warm function | Households wanting both single-serve and carafe options |
| Hamilton Beach programmable models | Depending on model: scheduled brewing, strength selection, small-batch modes, auto shut-off, pause-and-serve | Users who want practical controls without advanced precision settings |
| Breville Luxe Brewer Thermal | Delayed start up to 24 hours, thermal carafe, custom bloom, temperature, and flow settings | Users who want more control over brewing variables |
Prices and availability change, so compare the current model page, warranty, replacement-parts availability, and manual rather than choosing from an old fixed price.
Why Does a Programmable Coffee Maker Enhance Your Morning Routine?
The practical benefit is simple: it moves several tasks to the night before. Instead of measuring coffee and water while you are getting ready for the day, you can load the machine in advance and schedule the start time.
- Scheduled brewing: Coffee can begin brewing before you enter the kitchen.
- Repeatable settings: Once you find a dose, grind, and strength setting you enjoy, you can reproduce it more consistently.
- Small-batch and strength options: Supported models let you adapt the same machine to different mornings or household preferences.
- Auto shut-off or thermal storage: Depending on the design, the machine can reduce the need to monitor a warming plate manually.
- Pause-and-serve: On supported machines, you can pour a cup before the entire batch finishes.
Caution: A pause-and-serve valve is designed for a brief pour, not for leaving the carafe out through the rest of the brew cycle. Return the carafe promptly so the basket does not fill and overflow.
Frequently Asked Questions
Can I Use Ground Coffee Instead of Coffee Pods?
Most traditional programmable carafe coffee makers are designed for ground coffee, not pods. Hybrid machines may accept both grounds and compatible pods. Use only the filter, adapter, pod type, or brew basket specified for your model.
Is a Programmable Coffee Maker Energy-Efficient?
It can reduce unnecessary heater use when it includes automatic shut-off, standby, or a thermal carafe, but total energy use depends on the model, batch size, heating system, and how long a warming plate operates. Check the machine’s specifications if electricity use is an important buying factor.
How Long Can Coffee Sit in the Carafe?
For the best flavor, drink brewed coffee reasonably soon after brewing. A glass carafe on a warming plate continues to receive heat, which can change flavor over time. A clean thermal carafe holds heat without continuous hot-plate heating and is usually a better choice when you plan to keep a pot for longer.
Are Programmable Coffee Makers Easy to Clean?
Most are straightforward to maintain because the carafe, lid, brew basket, and reusable filters can usually be removed. Wash removable parts as directed and descale the internal water path when the manual or CLEAN indicator calls for it. Use vinegar only when your manufacturer permits that method.
Can I Brew Tea in a Programmable Coffee Maker?
Only if the manufacturer supports it. Some machines have an independent hot-water system or dedicated tea function. Running tea through a normal coffee basket can pick up coffee oils and flavors, and the brewer may not provide the temperature you want for a particular tea.
Why Didn’t My Coffee Maker Brew at the Programmed Time?
Check the current clock time, AM/PM setting, programmed start time, delayed-brew indicator, and power source. Some machines lose their clock or timer settings after being unplugged or after a power outage, so the schedule may need to be entered again.
Does Setting Up Coffee the Night Before Affect Freshness?
Freshly ground coffee generally preserves more aroma than grounds left exposed for hours. Delayed brewing trades a little freshness for convenience. To reduce the difference, start with fresh beans, grind shortly before loading the machine, and close the brew-basket lid rather than leaving the grounds exposed.
Conclusion
A programmable coffee maker is most useful when it combines reliable delayed brewing with good basic drip-coffee performance. Set the clock carefully, load the machine correctly, and start with a consistent coffee-to-water ratio and medium grind rather than relying on the timer or strength button to fix the recipe.
Just as important, treat features as model-specific. Auto shut-off times, brew-strength controls, small-batch modes, keep-warm settings, pod support, and smart functions differ widely. Follow your manufacturer’s instructions for programming and cleaning, keep the machine descaled, and stop using it if you notice leaking, overheating, damaged electrical parts, or an active safety recall.
Sources
- Specialty Coffee Association — Minimum Certification Requirements for Coffee Brewers — brewing temperature, contact time, coffee-to-water ratio, and brewer-performance guidance.
- Cuisinart — 14-Cup Programmable Coffee Maker — current examples of 24-hour programmability, brew-strength control, small-batch mode, brew pause, and adjustable auto-off.
- Mr. Coffee — 12-Cup Programmable Coffee Maker — Brew Later, Grab-a-Cup Auto Pause, and automatic shutoff examples.
- Hamilton Beach — Coffee Maker FAQs — manufacturer cleaning, descaling, brew-strength, automatic shutoff, and troubleshooting guidance.
- Breville — Luxe Brewer Thermal — current delayed-start, thermal-carafe, and customizable brewing-feature examples.
- U.S. Consumer Product Safety Commission — Coffee Maker and Teapot Recalls — current recall and appliance-safety information.