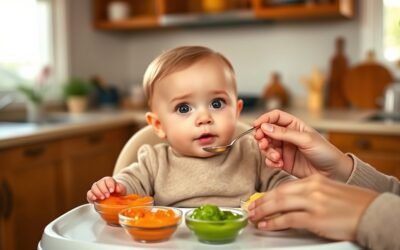
Baby food stages are best used as a guide to texture, not as a strict calendar. Most babies are ready to begin solid foods at about 6 months, when they can control their head, sit upright with support, bring objects to their mouth, and swallow food instead of pushing it back out. From there, move from smooth foods to mashed, lumpy, finely chopped, and soft finger foods as your baby’s skills develop.
Quick Answer
Most babies start solids at about 6 months with smooth or mashed foods. They can then progress to thicker, lumpy textures and soft finger foods as their sitting, swallowing, grasping, and chewing skills improve. Continue breast milk or infant formula throughout the first year, and always prepare food to reduce choking risk.
Key Takeaways
- Start solid foods at about 6 months when your baby shows developmental readiness; do not rely on age alone.
- Treat Stage 1, Stage 2, and Stage 3 as approximate texture labels because brands use different systems.
- Begin with small amounts and increase meals, variety, and texture according to your baby’s hunger cues and feeding skills.
- Include iron-rich foods such as meat, beans, lentils, eggs, tofu, and iron-fortified infant cereal.
- Introduce common allergens in baby-safe forms without unnecessary delay, unless your pediatrician recommends a different plan.
- Keep your baby upright and supervised during every meal, and avoid foods that are hard, round, sticky, or otherwise difficult to swallow.
At a Glance
| Usual Starting Point | About 6 months, once developmental readiness signs are present |
| First Textures | Smooth, mashed, puréed, or strained foods that are easy to swallow |
| Texture Progression | Thicker and lumpy foods, followed by finely chopped foods and soft finger foods |
| Main Nutrition | Breast milk or infant formula remains the main nutrition source from 6 through 12 months |
| Most Important Safety Rule | Seat your baby upright and watch closely throughout every meal |
A Comprehensive Guide to Baby Food Stages

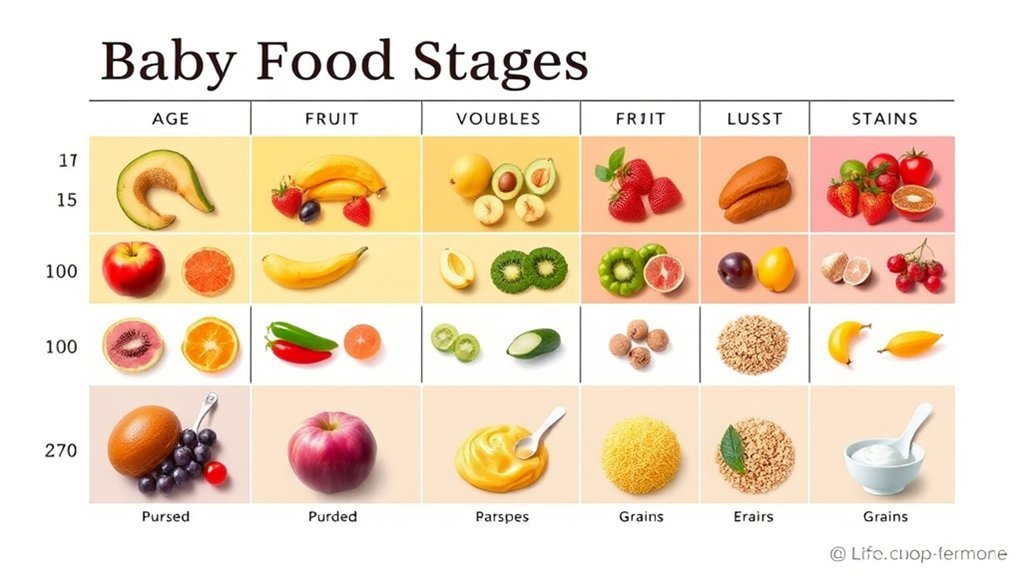
Stage numbers on commercial baby food are convenient shorthand, but they are not universal medical milestones. One company may organize foods by number, while another may use terms such as “supported sitter,” “sitter,” or “crawler.” Check the actual texture and ingredients instead of choosing a product by its stage number alone.
The Centers for Disease Control and Prevention recommends starting foods other than breast milk or infant formula at about 6 months. Progress to thicker and more varied textures as your baby learns to swallow, move food around the mouth, grasp food, and chew with their gums.
| Common Label | Approximate Timing | Typical Texture | Examples |
|---|---|---|---|
| Stage 1 | Around 6 months, when ready | Smooth, mashed, strained, or thin purée | Mashed avocado, smooth beans, puréed meat, oatmeal, sweet potato, pear |
| Stage 2 | Often around 6-9 months, depending on skill | Thicker, mashed, lumpy, or finely minced | Mashed lentils, thick oatmeal, mashed banana, minced chicken, soft scrambled egg |
| Stage 3 | Often around 9-12 months, depending on skill | Finely chopped foods and soft finger foods | Soft pasta, flaky fish, ripe fruit, tender vegetables, shredded meat, toast strips |
Note: The ages in this chart are approximate. A baby who was born prematurely or has low muscle tone, reflux, poor growth, oral-motor difficulties, or a history of coughing during feeds may need an individualized plan.

Power your essentials anywhere with a 999Wh pure sine wave power station delivering up to 1000W continuous with 2000W surge. It supports fast charging via USB-C PD 60W and USB-A QC 18W, plus simultaneous output for multiple devices through AC, USB, wireless, and car/DC ports. Recharge using AC, car, or solar with a built-in MPPT controller and dual cooling fans, while the upgraded battery management system protects against surges, short circuits, and overheating.

7G OF PROTEIN FOR BABY: Beech-Nut Meat Baby Food is a savory blend of real pureed chicken & chicken broth. Each jar contains 7 grams of protein to help keep baby full.

ON THE GO BABY FOOD: Gerber Stage 1 Baby Food Puree Tubs are designed for ease and convenience. These tubs are the perfect on the go baby food, made in a portable and easy-to-store format for busy parents
When to Start Introducing Solid Foods to Your Baby
Most babies are ready to begin solids at about 6 months. Starting before 4 months is not recommended. Look for several readiness signs together rather than using a birthday as the only test.
Your baby may be ready when they can:
- Sit upright alone or with support and remain stable during feeding
- Control their head and neck
- Open their mouth when food is offered
- Bring hands and objects to their mouth
- Move food toward the back of the mouth and swallow it
- Show interest in food without immediately pushing every spoonful out
Reaching for your plate can be one sign of interest, but interest alone is not enough. Good head control, upright posture, and the ability to swallow food safely are more important.
Warning: Do not put infant cereal or other food in a bottle unless your baby’s clinician has given specific medical instructions. Thickening a bottle without guidance can create choking, overfeeding, and formula-mixing risks.
Ask your pediatrician before starting if your baby was premature, has trouble sitting upright, coughs or chokes during feeds, has poor weight gain, or has a condition that affects swallowing or muscle control.
Best Foods for Baby Food Stages

There is no required order for first foods. Fruits and vegetables are useful, but babies also need nutrient-dense foods that supply iron, zinc, protein, and healthy fats. Within the first few months of starting solids, aim to offer foods from several groups rather than relying mainly on fruit purées.
Stage 1 Food Ideas
Stage 1 foods are smooth, soft, and easy to swallow. Start with a teaspoon or two and gradually work toward larger portions as your baby shows interest.
Good first-food options include:
- Iron-fortified oat, barley, or multigrain infant cereal
- Finely puréed beef, chicken, turkey, fish, or beans
- Mashed lentils or tofu thinned to a safe consistency
- Well-cooked egg mashed with breast milk, formula, or water
- Mashed avocado or banana
- Puréed sweet potato, squash, peas, carrots, pears, peaches, or apples
- Plain, pasteurized, full-fat yogurt without added sugar
If you use infant cereal, offer several fortified grains instead of serving only rice cereal. Grain variety reduces reliance on a single food and helps broaden flavor and nutrient exposure.
Stage 2 Food Options
When your baby manages smooth foods comfortably, make meals thicker and lumpier. You can also combine ingredients your baby has already tolerated.
Stage 2 options include:
- Thick oatmeal mixed with mashed berries or banana
- Mashed beans with avocado
- Mashed lentils with cooked carrot
- Soft scrambled egg
- Mashed potato with finely minced chicken
- Plain yogurt mixed with mashed fruit
- Fork-mashed vegetables with tofu, fish, or shredded meat
Food combinations add variety, but they do not by themselves teach self-feeding. Self-feeding develops when a baby can reach, grasp, bring food to the mouth, and release it safely.
Stage 3 Food Choices
Stage 3 foods include finely chopped family foods and soft pieces that a baby can pick up. Teeth are not required for every soft food; babies can mash many tender foods with their gums.
Suitable options may include:
- Very soft pasta cut into manageable pieces
- Flaked fish with all bones removed
- Finely shredded chicken or tender beef mixed into a moist food
- Soft-cooked vegetables that flatten easily between your fingers
- Ripe banana, pear, peach, melon, or avocado
- Toast strips spread with a thin layer of mashed avocado, beans, or thinned nut butter
- Small pieces of omelet or soft scrambled egg
Pro Tip: Use the finger-squish test. A food offered as a finger food should usually flatten easily between your thumb and forefinger. Cut round foods and remove bones, pits, tough skins, and hard seeds.
How Much Should Your Baby Eat at Each Age?

Portion charts are starting points, not intake requirements. Your baby may eat more at one meal and very little at the next. Growth spurts, teething, illness, sleep, and milk intake can all affect appetite.
Age-Specific Portion Sizes
| Approximate Age or Stage | Starting Portion | Typical Progression |
|---|---|---|
| Around 6 months | About 1-2 teaspoons of one or two foods | Gradually work toward 1-2 tablespoons and one or two short meals a day |
| About 7-9 months | Several tablespoons from two or more food groups | Move toward two or three meals as appetite and skills increase |
| About 9-12 months | Small servings of several family foods | Often three meals, with milk feeds and optional snacks based on hunger |
Offer more when your baby leans toward the food, opens their mouth, reaches, or becomes excited. Pause or end the meal when they turn away, close their mouth, push the spoon, drop food repeatedly, arch back, or lose interest.
Feeding Frequency Guidelines
At first, one short solid-food meal a day may be enough. Increase to two and then three meals as your baby becomes interested and capable. Do not reduce milk feeds simply to make a baby eat more solids.
The CDC’s feeding guidance recommends beginning with small amounts and watching the child’s hunger and fullness signs. Regular meal and snack times become more useful as children approach and pass their first birthday.
Your job is to offer safe, nutritious food. Your baby decides whether to eat and how much.
Breast Milk, Formula, Water, and Other Drinks
Breast milk or infant formula remains the main nutrition source from 6 through 12 months. Continue breastfeeding on cue or follow your baby’s established formula-feeding plan while solids gradually become a larger part of the diet.
- Breast milk: Continue for as long as parent and child desire.
- Infant formula: Continue through 12 months unless your child’s clinician recommends another plan.
- Water: Small amounts can be offered in an open, straw, or training cup with meals after solids begin.
- Juice: Babies younger than 12 months do not need fruit juice.
- Cow’s milk as a drink: Wait until 12 months. Pasteurized yogurt and cheese can be introduced earlier.
Do not use homemade infant formula. Formula recipes made from ordinary milk, plant beverages, powders, or supplements can have unsafe nutrient and electrolyte levels.
How to Introduce Common Food Allergens
Common allergens include peanut, egg, cow’s-milk products, wheat, soy, sesame, fish, shellfish, and tree nuts. Once your baby is ready for solids, there is usually no benefit to delaying these foods.
Introduce an allergen in a baby-safe form when your baby is healthy, preferably at home and earlier in the day. Begin with a small taste, wait several minutes, and offer more if no symptoms appear. After a food is tolerated, continue serving it as a normal part of the diet.
- Peanut: Thin smooth peanut butter with warm water, breast milk, formula, yogurt, or purée. Never offer whole peanuts or a sticky spoonful of peanut butter.
- Egg: Serve fully cooked egg mashed or cut into soft pieces.
- Dairy: Offer plain pasteurized yogurt or soft pasteurized cheese. Do not use cow’s milk as the main drink before 12 months.
- Tree nuts: Use smooth nut butter or finely ground nuts mixed into a moist food.
- Fish and shellfish: Cook thoroughly and remove bones, shells, and tough pieces.
- Wheat, soy, and sesame: Offer in soft foods such as cooked cereal, tofu, hummus thinned to a safe consistency, or soft bread strips.
Warning: Ask your baby’s clinician about peanut introduction before serving it if your baby has severe eczema, an egg allergy, or a previous food reaction. Call emergency services for trouble breathing, wheezing, repeated vomiting with other symptoms, facial or tongue swelling, sudden limpness, or loss of responsiveness.
The American Academy of Pediatrics’ starting-solids guidance also recommends introducing foods one at a time initially and including iron- and zinc-rich foods early.
Gagging vs. Choking
Gagging is a protective reflex that can occur while a baby learns to handle texture. A gagging baby may cough, make noise, push the tongue forward, or become red in the face. Stay calm and allow the baby to work the food forward.
Choking happens when the airway is blocked. A choking baby may be unable to cry, cough effectively, or breathe. They may become silent or turn blue or gray. Choking requires immediate first aid and emergency help.
Follow the CDC’s choking-prevention guidance:
- Seat your baby upright in a stable high chair or safe feeding seat.
- Watch continuously during meals.
- Keep meals calm and free from rushing or distracting play.
- Do not let a baby eat while lying down, crawling, walking, riding in a stroller, or traveling in a car.
- Cook hard foods until soft.
- Cut grapes, berries, cherries, and small tomatoes into small pieces.
- Cut cylindrical foods lengthwise rather than into round coins.
- Remove bones, pits, seeds, tough skin, gristle, and large pieces of fat.
Foods and Drinks to Avoid or Modify
Some foods are unsafe for babies because of choking, infection, botulism, mercury, or poor nutritional value.
- Honey before 12 months: Do not add honey to food, water, formula, or a pacifier because it can cause infant botulism.
- Whole nuts and seeds: Use smooth, thinned nut butter or finely ground nuts instead.
- Sticky spoonfuls of nut butter: Thin the nut butter and mix it into another food.
- Whole grapes, cherries, berries, and small tomatoes: Cut them into small pieces.
- Popcorn, hard candy, gum, and hard snack pieces: These are choking hazards.
- Raw hard vegetables and hard fruit chunks: Cook until soft or grate finely.
- Hot dog coins, sausage rounds, and firm cheese cubes: Avoid or cut into short, thin strips and modify for softness.
- Undercooked eggs, meat, poultry, fish, or shellfish: Cook animal foods thoroughly.
- Unpasteurized milk, cheese, yogurt, or juice: Choose pasteurized products.
- Foods with added sugar or high sodium: Choose plain, minimally processed foods when practical.
- High-mercury fish: Avoid shark, swordfish, king mackerel, marlin, orange roughy, Gulf of Mexico tilefish, and bigeye tuna.
See the CDC list of foods and drinks to avoid or limit for additional safety guidance.
Essential Feeding Tips for New Parents
- Wash your hands and clean feeding surfaces before preparing food.
- Use a stable, upright feeding position.
- Begin with small portions so food is not wasted.
- Offer iron-rich food regularly.
- Vary fruits, vegetables, proteins, healthy fats, dairy foods, and grains.
- Use soft spoons, open cups, straw cups, and safe finger foods to practice different skills.
- Do not pressure, distract, bribe, or force your baby to finish a portion.
- Expect mess. Touching, smearing, and dropping food are part of learning.
- Serve rejected foods again on another day without pressure.
- Eat together when practical so your baby can watch family members chew and use cups and utensils.
Pro Tip: Freeze homemade purées in small portions and thaw only what you need. Do not save food from a bowl, jar, or pouch after a used spoon or your baby’s mouth has introduced saliva into it.
How to Monitor Your Baby’s Reactions to New Foods
Offer one new single-ingredient food at a time when you first begin solids. Waiting three to five days before another unfamiliar food can make it easier to connect a reaction with a specific ingredient. Once several foods have been tolerated, you can combine them and increase variety.
Keep a simple food log if your baby has eczema, a previous reaction, digestive symptoms, or a strong family history of allergy. Record:
- The food and ingredients
- The amount eaten
- The time it was served
- Any skin, breathing, stomach, or behavior changes
- How long the symptoms lasted
Possible food-allergy symptoms include hives, swelling, vomiting, diarrhea, coughing, wheezing, or trouble swallowing. Stop serving the suspected food and contact your baby’s clinician for mild or uncertain symptoms.
Warning: Trouble breathing, facial or tongue swelling, sudden weakness, repeated vomiting with breathing or skin symptoms, or loss of responsiveness may signal anaphylaxis. Use prescribed epinephrine if available and call emergency services immediately.
Homemade vs. Store-Bought Baby Food
Homemade and store-bought baby foods can both fit a healthy feeding plan. Neither option is automatically safer or more nutritious.
Homemade food gives you control over ingredients and texture, but it still requires safe preparation, cooking, cooling, and storage. Commercial food is convenient and must meet manufacturing requirements, but parents should check the ingredient list, package condition, expiration date, and texture.
The FDA notes that making baby food at home does not necessarily lower exposure to naturally occurring toxic elements. The best practical strategy is to offer a varied diet rather than relying heavily on one ingredient, grain, brand, or food category. See the FDA’s guidance on reducing exposure to toxic elements.
When to Contact Your Pediatrician
Contact your baby’s clinician if your baby:
- Is not showing readiness for solids near 6 months
- Was born prematurely and you are unsure whether to use chronological or corrected age
- Regularly coughs, chokes, turns blue, or sounds wet or congested during meals
- Has persistent vomiting, diarrhea, blood in the stool, or poor weight gain
- Refuses nearly all textures or cannot progress beyond thin purées
- Frequently arches, cries, or appears to be in pain while eating
- Has severe eczema, a known food allergy, or a previous allergic reaction
- Consumes much less breast milk or formula after solids are introduced
This guide provides general education and does not replace medical or feeding-therapy advice tailored to your child.
Frequently Asked Questions
Can I mix breast milk or formula with solid foods?
Yes. You can use prepared infant formula, expressed breast milk, or water to thin infant cereal, mashed food, or purées. Prepare formula exactly as directed before adding it to food, and discard leftovers that have been in contact with your baby’s mouth or used spoon.
What common allergenic foods should I introduce?
Common allergens include peanut, egg, dairy, wheat, soy, sesame, fish, shellfish, and tree nuts. Introduce them in soft, age-appropriate forms once your baby is ready for solids. Ask your pediatrician about peanut introduction first if your baby has severe eczema, egg allergy, or a previous reaction.
How can I tell if my baby is ready for solids?
Look for good head and neck control, the ability to sit upright alone or with support, interest in food, opening the mouth for a spoon, bringing objects to the mouth, and swallowing food instead of pushing it out. Most babies develop these skills at about 6 months.
When should I stop puréeing foods for my baby?
Begin offering thicker, mashed, and lumpy foods once your baby swallows smooth foods comfortably. Progress to finely chopped foods and soft finger foods as sitting, grasping, chewing, and swallowing skills improve. Do not wait for a specific tooth count or package-stage age.
Is homemade baby food safer than store-bought food?
Not automatically. Homemade and commercial baby food can both be safe when prepared, packaged, stored, and served properly. Homemade food gives you more control over ingredients and texture, while commercial food offers convenience. Dietary variety is more useful than relying on one preparation method.
Does my baby need teeth before eating finger foods?
No. Babies can mash many soft foods with their gums. Choose foods that flatten easily between your fingers, modify round or firm foods, and supervise every bite. Hard, sticky, round, or tough foods remain unsafe even after a few teeth appear.
Can babies drink water or juice with meals?
Small amounts of water can be offered in a cup after solids begin. Breast milk or infant formula should remain the main drink before 12 months. Babies younger than 12 months do not need fruit juice, and cow’s milk should not replace breast milk or formula as the main drink before the first birthday.
Conclusion
Baby food stages provide a useful picture of how textures change, but your baby’s development should guide the pace. Begin at about 6 months when readiness signs are present, offer small portions of nutrient-dense foods, and gradually progress from smooth foods to mashed, lumpy, finely chopped, and soft finger foods.
Continue breast milk or infant formula throughout the first year, introduce common allergens in safe forms, and make choking prevention part of every meal. When feeding skills, growth, or reactions concern you, ask your pediatrician or a qualified feeding professional for individualized guidance.
Sources
- CDC: When, What, and How to Introduce Solid Foods — readiness signs, first foods, allergens, texture progression, and food preparation
- CDC: How Much and How Often to Feed — starter portions, responsive feeding, and the continuing role of breast milk or formula
- CDC: Choking Hazards — safe preparation, seating, supervision, and common choking risks
- CDC: Foods and Drinks to Avoid or Limit — honey, added sugar, sodium, mercury, and unpasteurized-food guidance
- American Academy of Pediatrics: Starting Solid Foods — first foods, iron, allergen introduction, finger foods, drinks, and choking prevention
- FDA: Reducing Exposure to Toxic Elements in Baby Foods — homemade and commercial food considerations and dietary variety