

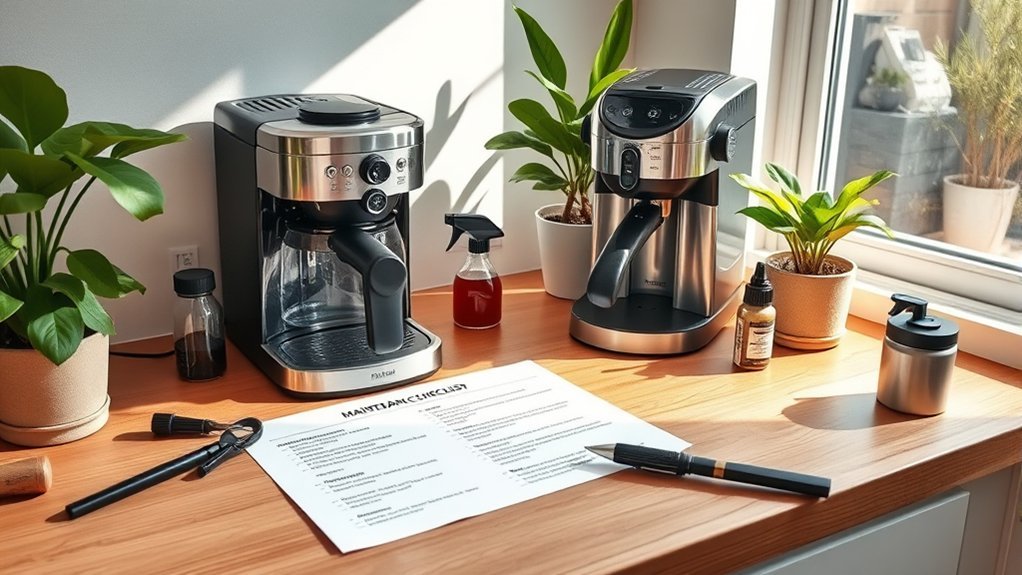
A practical coffee maker maintenance checklist helps you remove coffee residue, manage mineral buildup, catch leaks early, and keep each removable part clean. The right schedule depends on your machine type, how often you brew, your water, and the manufacturer’s instructions. Use the checklist below as a starting point, then adjust it to match your owner’s manual.
Quick Answer
Empty grounds, pods, and drip trays after use; wash removable brewing parts regularly; clean milk components immediately; and descale only on the schedule approved for your model. Check the machine each month for residue, damage, and leaks. Stop using it if you notice an electrical fault, burning smell, or persistent internal leak.
Key Takeaways
- Clean the carafe, filter basket, pod holder, portafilter, or other removable brewing parts after use or as directed by the manual.
- Routine cleaning removes coffee and milk residue; descaling removes mineral deposits inside the water system.
- Do not assume vinegar, cleaning tablets, dishwasher use, or backflushing is safe for every machine.
- Use the machine’s maintenance alert and owner’s manual to set descaling and water-filter intervals.
- Record completed work so you can spot repeated clogs, leaks, slow brewing, or other changes.
At a Glance
| Time Required | About 2–5 minutes after use; 10–20 minutes for weekly care; longer for a manufacturer-approved cleaning or descaling cycle |
| Difficulty | Easy for routine care; model-specific instructions are required for internal cleaning and descaling |
| Tools Needed | Soft cloth, mild unscented dish soap, soft brush, clean water, owner’s manual, and an approved cleaner or descaler when required |
| Cost | Low for routine washing; approved descaler, cleaning tablets, and replacement filters vary by machine |
Warning: Unplug the coffee maker and let hot surfaces cool before deep cleaning. Never immerse the machine base, power cord, or plug. Do not mix cleaning chemicals, open the appliance housing, or place your fingers near pod needles, grinder burrs, or internal moving parts. Follow the manufacturer’s instructions for every cleaning product and removable part.
Printable Coffee Maker Maintenance Checklist
This checklist covers common home coffee makers, but not every task applies to every machine. A drip brewer may have a carafe and warming plate, while a pod brewer may have a capsule holder and piercing needle. Espresso and super-automatic machines can also have portafilters, removable brew groups, grinders, steam wands, or milk circuits.

Power your essentials anywhere with a 999Wh pure sine wave power station delivering up to 1000W continuous with 2000W surge. It supports fast charging via USB-C PD 60W and USB-A QC 18W, plus simultaneous output for multiple devices through AC, USB, wireless, and car/DC ports. Recharge using AC, car, or solar with a built-in MPPT controller and dual cooling fans, while the upgraded battery management system protects against surges, short circuits, and overheating.

POWERFUL DESCALING AND DEEP CLEANING: Whirl Fresh Concentrated formula in tablet form effectively removes hard water buildup, calcium, limescale, grime, and coffee oils. Helps keep your coffee maker and brewer clean.

Bulk Coffee Maker Cleaner Tablet: 34 Tablets work out to two year supply or more.Compared to other products like powder, sachet and packets, there is no messy spilled liquid or powder. Choose USKICH coffee machine descaler to keeping your machine clean longer!
After Each Use or Daily
- ☐ Remove used grounds, paper filters, coffee pucks, or capsules.
- ☐ Rinse or wash the carafe, brew basket, reusable filter, pod holder, portafilter, and other approved removable parts.
- ☐ Empty the drip tray and grounds or capsule container before they overflow.
- ☐ Wipe coffee, water, or milk spills from the machine and counter.
- ☐ Refill the reservoir with fresh water when appropriate; do not leave stale water in a machine if the manual advises emptying it.
- ☐ Purge and wipe the steam wand after every milk drink.
- ☐ Rinse or clean milk containers and milk circuits as directed after milk preparation.
- ☐ Leave washed removable parts open to air-dry before reassembly when the design allows.
Weekly Maintenance
- ☐ Wash the removable water reservoir and lid if the owner’s manual permits it.
- ☐ Clean the filter basket, reusable mesh filter, shower screen, pod holder, or removable brew group that applies to your machine.
- ☐ Inspect accessible water outlets and spray holes for visible coffee residue or mineral deposits.
- ☐ Wipe the exterior controls and the cooled warming plate with a soft, damp cloth.
- ☐ Check the carafe lid, reservoir seating, drip tray, and removable seals for visible damage or poor fit.
- ☐ Clean the grinder hopper or grounds chute only by the approved dry-cleaning method in the manual.
Monthly Maintenance
- ☐ Review the maintenance log for slower brewing, unusual noise, recurring leaks, or changing coffee flavor.
- ☐ Inspect the power cord and plug for cracks, heat damage, or exposed wiring.
- ☐ Check the water-filter status and replace it only when the manufacturer’s schedule or alert requires it.
- ☐ Run an approved coffee-oil cleaning cycle if your machine calls for one.
- ☐ Deep-clean accessible milk-system parts according to the manual.
- ☐ Confirm that vents are clear and the machine has adequate space around it.
Every Three to Six Months, When Prompted, or as Directed
- ☐ Descale the water system using the solution and procedure approved for the exact model.
- ☐ Complete every rinse cycle required after descaling.
- ☐ Reset the descaling alert only after the complete procedure has finished.
- ☐ Replace water filters, seals, or other user-serviceable parts if their approved interval has arrived.
- ☐ Check the manual for any lubrication or removable-brew-group care required by a super-automatic machine.
Some machines need descaling sooner because of heavy use or mineral-rich water, while filtered systems may use a different schedule. For example, Keurig publishes a three-month recommendation for many brewers, while other machines rely on model-specific maintenance indicators. Always let your manual and maintenance light take priority over a generic calendar.
Annual and As-Needed Maintenance
- ☐ Review the warranty and service instructions before replacing any part.
- ☐ Replace cracked carafes, damaged reservoirs, worn removable seals, or broken filter baskets with compatible parts.
- ☐ Arrange manufacturer-authorized service for persistent leakage, electrical faults, failed heating, grinder problems, or internal mechanical noise.
- ☐ Empty and dry the system as directed before long storage, shipping, or exposure to freezing temperatures.
Pro Tip: Keep a photo or digital copy of the model number and cleaning pages from your owner’s manual. You can then check the correct descaling sequence, filter type, dishwasher-safe parts, and warning-light reset without searching each time.
Maintenance Log
| Date | Task Completed | Cleaner or Part Used | Notes |
|---|---|---|---|
How to Effectively Use Your Coffee Maker Maintenance Checklist
Start by finding the model number, owner’s manual, and manufacturer support page for your machine. Mark any checklist task that does not apply, then add the exact filter, cleaning-tablet, descaling, and milk-system intervals listed for your model.
- Keep the checklist near the machine: Print it, save it on your phone, or place it with the owner’s manual.
- Complete short tasks immediately: Empty grounds, rinse approved removable parts, and wipe milk residue before it dries.
- Use calendar reminders: Schedule weekly and monthly inspections, but use the machine’s alert or manual for descaling.
- Record what you did: Note the date, cleaning product, replacement filter, and any change in brewing performance.
- Review repeated problems: Recurring clogs, leaks, warning lights, or unusual noise may show that the machine needs a replacement part or professional service.
The safest maintenance schedule is the one written for your exact coffee maker—not a universal calendar copied from a different brand or machine type.
Why You Need a Coffee Maker Maintenance Checklist
Coffee residue, milk residue, standing water, and minerals affect different areas of a coffee maker. A checklist separates the small jobs that should happen after brewing from occasional cleaning and descaling.
- Supports consistent flavor: Washing the parts that touch coffee helps prevent old oils and grounds from affecting the next brew.
- Maintains water flow: Approved cleaning and descaling can address deposits or residue that slow the machine.
- Prevents overflow and mess: Emptying drip trays, grounds bins, and capsule containers keeps them from filling beyond capacity.
- Helps identify damage: Routine inspection can reveal cracked carafes, worn removable seals, poor reservoir seating, or early leakage.
- Tracks model-specific care: A dated log makes filter replacement, cleaning cycles, and descaling easier to remember.
Cleaning Versus Descaling
Cleaning and descaling solve different problems. Routine cleaning removes grounds, coffee oils, milk residue, dust, and spills from surfaces and removable parts. Descaling uses an approved acidic solution to remove mineral deposits from the internal water path.
Note: A normal rinse or cleaning cycle may not remove mineral scale, and a descaling cycle may not remove coffee oils from a brew group or filter basket. Complete the procedure intended for the type of buildup you are addressing.
Do not choose a cleaner based only on household advice. Hamilton Beach provides vinegar instructions for specific machines, but other manufacturers direct owners to an approved descaling solution. Check your manual before putting vinegar, citric acid, tablets, detergent, or any other cleaner into the water system.
Adjust the Checklist for Your Machine Type
Drip Coffee Makers
Focus on the carafe, filter basket, reusable filter, reservoir, spray head, and warming plate. Wash approved removable parts after use, wipe the warming plate only when cool, and follow the model’s decalcification or descaling instructions.
Pod and Capsule Brewers
Empty used capsules, clean the drip tray and capsule container, and check that the water tank is seated correctly. Use only the approved tool and procedure to clean a piercing needle. Never place your fingers inside the pod holder.
Manual Espresso Machines
Rinse the portafilter and basket after brewing, flush the group head as directed, and purge and wipe the steam wand after every milk drink. Breville’s steam-wand guidance, for example, calls for cleaning after each use. Backflush only machines designed for it and only with the approved basket and cleaner.
Super-Automatic and Milk-Equipped Machines
Follow the prompts for rinsing, coffee-oil cleaning, descaling, water filters, grounds containers, and removable brew groups. Milk hoses, carafes, and frothing systems often need rinsing immediately after use. Do not postpone milk-system care until the weekly checklist.
Top Coffee Machine Problems and Prevention Tips
Use the table below for safe first checks. These steps do not replace the troubleshooting section in your manual.
| Problem | Possible Cause | Safe First Step | Get Help When |
|---|---|---|---|
| Slow or uneven flow | Residue, blocked outlet, scale, empty tank, or poorly seated reservoir | Refill and reseat the tank, clean approved removable parts, and descale if due | Flow remains poor after the full approved procedure |
| Water leak | Overflowing tray, misaligned tank, damaged removable seal, cracked part, or internal fault | Unplug the machine, empty the tray, and reseat removable parts after cooling | Water reaches the cord or base, or leakage continues |
| Stale, bitter, or unusual taste | Old oils, dirty carafe, stale beans, wrong ratio, leftover cleaner, or overheated coffee | Wash coffee-contact parts, rinse thoroughly, use fresh coffee, and review the recipe | A chemical smell or taste remains after the required rinse cycles |
| Coffee is not hot enough | Cold cup, temperature setting, scale, heating fault, or normal model limitations | Preheat the cup, check settings, and descale if the manual says it is due | Heating remains weak or inconsistent after approved maintenance |
| Maintenance light stays on | Cycle was interrupted, rinse steps were skipped, or reset sequence was not completed | Repeat the exact model procedure from start to finish | The alert remains after a correctly completed cycle |
How to Fix Common Coffee Machine Problems
Coffee Maker Brews Slowly or Will Not Brew
- Confirm that the machine is plugged in, powered on, and filled with water.
- Remove and reseat the reservoir, carafe, brew basket, pod holder, or drip tray.
- Clean any user-removable filter, basket, brew group, or outlet identified in the manual.
- Run the approved cleaning or descaling process if the machine indicates that it is due.
- Contact support if the machine hums, overheats, trips a breaker, or still does not move water.
Coffee Maker Is Leaking
- Unplug the machine and keep water away from the power cord and outlet.
- Empty an overflowing drip tray, grounds bin, or capsule container.
- Check that the reservoir, lid, carafe, and removable seals are seated correctly.
- Replace a cracked or visibly damaged user-replaceable part with a compatible part.
- Do not open the housing or tighten internal fittings. Persistent internal leakage requires service.
Coffee Tastes Burnt, Bitter, or Stale
- Wash the carafe, basket, reusable filter, pod holder, or portafilter.
- Rinse away all soap or cleaning solution.
- Use fresh water and properly stored coffee.
- Check the coffee-to-water ratio, grind size, brew setting, and warming-plate time.
- Run an approved coffee-oil cleaning cycle or descale if due.
Coffee Temperature Is Inconsistent
- Preheat the mug or carafe with hot water.
- Check any available temperature or warming-plate setting.
- Descale only if the model’s schedule, alert, or troubleshooting guide calls for it.
- Seek service if the machine repeatedly produces lukewarm coffee or shows signs of a heating fault.
Stop Using the Machine: Unplug it and contact the manufacturer if the cord or plug is damaged, water enters the electrical base, the machine emits smoke or a burning smell, it repeatedly trips a breaker, or a persistent leak cannot be traced to a removable tray or reservoir.
Steps to Enhance Your Coffee Experience
Maintaining the machine is only one part of making better coffee. Wash coffee-contact parts before residue affects the next batch, use fresh water, and match the grind and coffee-to-water ratio to your brewing method.
Store beans in an opaque, airtight container in a cool, dark place. The National Coffee Association’s storage guidance recommends protecting coffee from air, moisture, heat, and light.
You can also explore brewing techniques such as pour-over or French press to compare flavor profiles. Keep the equipment for each method clean and dry, and follow its specific care instructions rather than applying an electric coffee maker’s procedure to every brewer.
Frequently Asked Questions
How Often Should I Update My Coffee Maker Maintenance Checklist?
Review it whenever you replace the machine, change the water filter system, move to an area with different water conditions, or receive new manufacturer instructions. You do not need to rewrite it every three months if the model and care requirements have not changed.
Can I Use the Checklist for Different Coffee Maker Brands?
Yes. The general tasks—emptying grounds, washing removable parts, wiping spills, checking for leaks, and recording maintenance—apply broadly. Replace the descaling, filter, backflushing, needle-cleaning, brew-group, and milk-system instructions with those for each exact model.
Is a Printable Checklist Necessary for Regular Maintenance?
No. A paper checklist, phone reminder, calendar event, or digital note can all work. The useful part is recording the correct tasks and completing them at the interval required by your machine.
What Tools Are Needed for Coffee Maker Maintenance?
Common supplies include a soft cloth, mild unscented dish soap, a soft brush, clean water, and the owner’s manual. Use only the approved descaler, coffee-oil cleaner, cleaning tablet, needle tool, or replacement filter specified for the model.
Where Can I Find a Coffee Maker Checklist Template?
The checklist and maintenance log in this article are designed to be printed directly from your browser. Before using them, compare each task with the cleaning and maintenance section of your owner’s manual.
How Often Should I Descale My Coffee Maker?
Follow the model’s maintenance light, owner’s manual, and approved water-filter schedule. Some manufacturers use a three-month recommendation for certain brewers, while other machines calculate the interval from usage or provide a model-specific alert. Mineral-rich water and heavy use may require more frequent attention when the manufacturer permits it.
Can I Descale a Coffee Maker With Vinegar?
Only when the owner’s manual or manufacturer instructions approve vinegar for the exact model. Some drip brewers provide vinegar procedures, while other machines call for a dedicated descaling solution. Using an unapproved product can leave odor, affect parts, or interfere with the required cleaning cycle.
When Should I Stop Troubleshooting and Request Service?
Request help when the machine has a damaged cord, electrical odor, smoke, breaker trips, water inside the electrical base, persistent internal leakage, failed heating, abnormal mechanical noise, or a warning that remains after the exact approved procedure. Do not open the appliance housing yourself.
Conclusion
A useful coffee maker maintenance checklist turns care into a set of short, repeatable tasks. Clean coffee-contact and milk parts promptly, inspect the machine regularly, and use the manufacturer’s schedule for filters, cleaning cycles, and descaling. Logging each task also makes changes in taste, flow, noise, or leakage easier to recognize before the next brew.
Sources
- Cuisinart: How to Clean a Coffee Maker — unplugging, daily component care, and general cleaning guidance.
- Keurig: Regular Brewer Maintenance — cleaning and descaling intervals for applicable Keurig brewers.
- Nespresso Machine Assistance — model-specific cleaning, descaling, and troubleshooting instructions.
- Hamilton Beach: How to Clean Your Coffee Maker — model-specific vinegar cleaning and rinsing guidance.
- Breville: Cleaning a Steam Wand — after-use steam-wand care.
- National Coffee Association: Storage and Shelf Life — protecting coffee from air, moisture, heat, and light.


