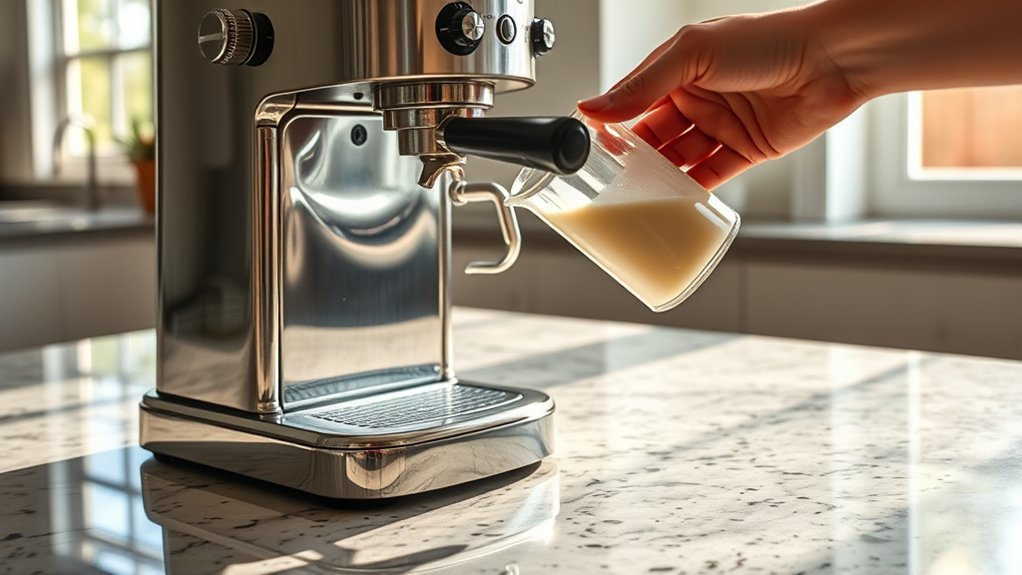
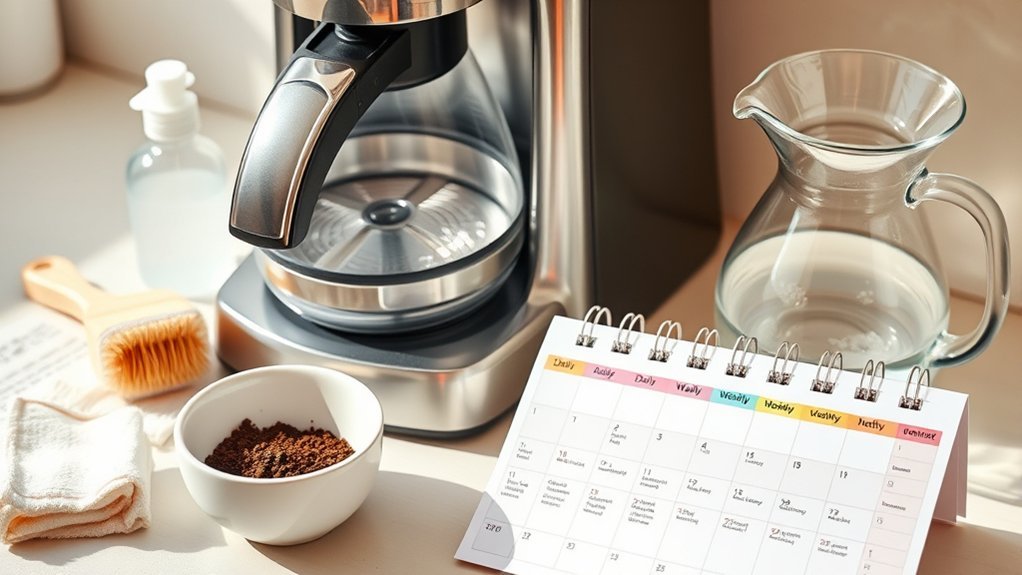
A coffee maker safety checklist helps you catch damaged parts, leaks, residue, and maintenance problems before they lead to poor coffee or an unsafe appliance. The right routine depends on whether you own a drip brewer, pod machine, manual espresso machine, or fully automatic model, so always use your exact model’s manual as the final authority.
Quick Answer
Before each use, check the cord, plug, water tank, carafe, removable parts, and surrounding surface. Clean coffee-contact parts after use, maintain milk components immediately, and descale only as directed by the manufacturer. Stop using the machine if it leaks into the base, sparks, smokes, overheats, or releases steam unexpectedly.
Key Takeaways
- Place the coffee maker on a dry, stable, heat-resistant surface with the ventilation space required by its manual.
- Inspect the cord, plug, carafe, seals, water tank, and machine body before brewing.
- Clean drip baskets, carafes, portafilters, drip trays, and other coffee-contact parts after use.
- Wipe and purge an espresso steam wand after every milk drink; clean a removable brew group only on the schedule specified for that model.
- Use the approved descaling method. Vinegar and distilled water are not suitable for every coffee maker.
- Stop using a machine that sparks, smokes, repeatedly trips a breaker, leaks into its base, or releases uncontrolled hot water or steam.
At a Glance
| Time Required | About 5–10 minutes for routine cleaning; longer for descaling |
| Difficulty | Easy for normal cleaning; professional service for electrical or pressure-system faults |
| Tools Needed | Soft cloth, soft brush, mild dish soap, clean water, and any manufacturer-approved cleaner or descaler |
| Cost | Routine rinsing costs little or nothing; replacement filters and approved cleaning products vary by model |
Warning: Turn the machine off, unplug it, and allow hot parts to cool before normal cleaning unless the manufacturer’s instructions require power for a specific automated cycle. Never immerse the appliance base, power cord, or plug in water. Do not mix vinegar, descaler, bleach, or other cleaning chemicals.
Coffee Maker Safety Checklist Before Each Use
Take a few seconds to inspect the coffee maker before filling or starting it. This is especially important when the machine has been moved, stored, dropped, or left unused for a long time.
- Check the recall status. Find the model and serial number on the rating label, then search the U.S. Consumer Product Safety Commission recall database. Stop using any recalled unit and follow the official remedy.
- Inspect the cord and plug. Do not use the machine if the cord is frayed, crushed, melted, loose, or hot to the touch.
- Use the correct outlet. Follow the voltage and grounding requirements in the manual. Do not use a damaged outlet or an adapter that defeats a grounded plug.
- Check the surface. Set the machine on a level, dry, heat-resistant counter away from the edge, sink, stove, hanging fabric, and standing water.
- Inspect the carafe and tank. Do not use a cracked glass carafe, warped lid, damaged reservoir, or part that no longer locks into place.
- Seat all removable parts. Make sure the filter basket, pod holder, drip tray, water tank, brew group, or portafilter is installed as directed.
- Look underneath the machine. Water under or inside the appliance base may indicate an internal leak. Unplug the unit and stop using it until the cause is identified.
- Fill only to the marked limit. Overfilling can cause spills, overflow, or hot-water discharge.
Note: A removable brew group, group head, portafilter, steam wand, and pressure gauge are espresso-machine parts. Most standard drip and pod coffee makers do not have all of these components.

Power your essentials anywhere with a 999Wh pure sine wave power station delivering up to 1000W continuous with 2000W surge. It supports fast charging via USB-C PD 60W and USB-A QC 18W, plus simultaneous output for multiple devices through AC, USB, wireless, and car/DC ports. Recharge using AC, car, or solar with a built-in MPPT controller and dual cooling fans, while the upgraded battery management system protects against surges, short circuits, and overheating.

Helps keep your coffee makers and kettles working efficiently and using less energy

INCLUDES: 4 Keurig Rinse Pods, 1 Descale Solution, and 2 Water Filter Cartridge Refills
Essential Daily Maintenance Tasks for Your Coffee Maker

Cleaning coffee-contact parts soon after use prevents dried grounds, coffee oils, milk residue, and mineral deposits from becoming harder to remove. Allow hot parts to cool before handling them.
Drip Coffee Maker
- Discard the paper filter and used grounds after brewing.
- Rinse the removable filter basket and reusable filter.
- Empty and rinse the carafe instead of leaving coffee in it overnight.
- Wipe the warming plate only after it is switched off and cool.
- Clean spills around the reservoir and machine base with a damp cloth.
For a deeper cleaning, wash removable parts with warm water and mild dish soap when the manual permits it. The Breville Grind Control manual, for example, instructs users to rinse the coffee basket and filter after use and to unplug the machine before cleaning.
Pod or Capsule Coffee Maker
- Remove the used pod after brewing and allow the pod area to cool.
- Empty and rinse the drip tray and used-capsule container.
- Replace standing reservoir water regularly with fresh potable water.
- Clean a pod-piercing needle only when the manual provides a safe procedure. Unplug the machine first and avoid direct contact with sharp points.
Manual or Semi-Automatic Espresso Machine
- Knock out the coffee puck and rinse the portafilter and basket.
- Flush the group head as directed by the manual.
- Empty and rinse the drip tray.
- After every milk drink, wipe the steam wand with a clean damp cloth and purge it according to the machine instructions.
- Never remove the portafilter during extraction or while the group is still pressurized.
Breville’s steam-wand instructions call for cleaning after each use, not simply at the end of the day. See the manufacturer’s steam-wand cleaning guidance.
Fully Automatic Espresso Machine
Empty the grounds container and drip tray as needed, clean the milk system after use, and follow the screen prompts. If the machine has a removable brew group, do not assume it needs daily brushing or lubrication.
Philips currently recommends rinsing applicable brew groups weekly and using an oil-remover tablet monthly. Its schedule may differ from another brand or model, so consult the exact manual before removing or treating internal parts. See Philips espresso-machine cleaning guidance.
The safest maintenance schedule is the one written for your exact model—not a universal calendar applied to every type of coffee maker.
Coffee Maker Maintenance Schedule
| Frequency | Typical Tasks |
| Before each use | Inspect the cord, plug, carafe, reservoir, removable parts, surface, and area under the machine. |
| After each use | Discard grounds or pods, rinse coffee-contact parts, empty the drip tray, and wipe spills. Clean milk-contact parts immediately. |
| Weekly | Deep-clean removable parts and the water tank where permitted. Rinse a removable automatic-espresso brew group if the manual specifies weekly care. |
| Monthly or when prompted | Run approved cleaning cycles, clean grinder chutes where user-accessible, inspect seals, and replace filters when the model schedule requires it. |
| As directed | Descale based on the manual, water hardness, brew count, or maintenance alert. Lubricate only approved user-serviceable parts. |
Pro Tip: Keep a photo of the model label and a digital copy of the manual on your phone. You will have the correct part numbers, cleaning products, error codes, and maintenance intervals when a warning appears.
Why Cleaning and Descaling Matter
Coffee oils and fine grounds can clog filters, screens, pod needles, grinder chutes, and water outlets. Milk residue can dry inside a steam tip or milk tube. Mineral scale forms as water is heated and can reduce flow, lengthen brew time, and interfere with temperature control.
Cleaning and descaling are different:
- Cleaning removes coffee grounds, oils, milk residue, dust, and spills.
- Descaling dissolves mineral deposits inside the water-heating system.
A three-to-six-month descaling interval is used for some brewers, including certain Keurig machines, but it is not universal. Other machines calculate the interval from water hardness, brew count, or an electronic maintenance alert. Follow the exact instructions instead of descaling more aggressively than required.
How to Descale a Coffee Maker Safely
- Read the model’s descaling instructions from beginning to end.
- Remove any water filter if the instructions require it.
- Use the specified amount of manufacturer-approved descaler or another method expressly allowed by the manual.
- Place a container large enough to catch the full output beneath the outlet.
- Run the exact descaling program or brew sequence described by the manufacturer.
- Avoid touching hot water, the group head, steam wand, warming plate, or other heated surfaces.
- Complete every required fresh-water rinse cycle before brewing coffee.
- Wash your hands after handling descaling solution and store the product away from children and pets.
Warning: Do not assume vinegar is safe for every coffee maker. Hamilton Beach permits white vinegar for some models, while Nespresso states that vinegar should not be used in its machines. Never combine vinegar with descaler, bleach, or another cleaner.
Choosing the Right Water
Use fresh, potable water that fits the hardness range in the manual. Filtered tap water is suitable for many machines, but distilled or heavily demineralized water is not universally recommended. Some espresso and capsule machines rely on mineral content for proper sensing or operation, and very low-mineral water can also produce flat-tasting coffee.
If your machine uses a water-hardness setting or test strip, configure it during setup. This helps the appliance calculate a more suitable descaling interval.
Safety Checks to Keep Your Coffee Maker Safe

Repeat a more detailed inspection at least monthly and whenever the appliance behaves differently.
- Power cord and plug: Look for cuts, exposed wire, melted areas, discoloration, bent blades, or looseness.
- Machine housing: Check for cracks, warping, melted plastic, corrosion, and signs that water has entered the base.
- Carafe: Replace a cracked, chipped, or loose-handled glass carafe with the correct manufacturer-approved part.
- Seals and gaskets: Check for leaks, cracks, flattening, stiffness, or a poor fit. There is no universal six-month replacement rule.
- Water flow: Investigate sudden sputtering, weak flow, overflow, or unexpected steam before continuing to use the machine.
- Heating: Stop using a machine that develops a persistent burnt-plastic odor, overheats, or keeps heating after it should shut off.
- Controls: Confirm that normal power, brew, stop, and automatic shutoff controls behave as described in the manual.
Home coffee makers do not normally have an “emergency stop” control. Use the regular stop or power button when it responds normally. If smoke, sparks, or uncontrolled hot water appear, disconnect power only when you can do so without touching water, steam, or a damaged appliance.
Espresso Pressure Safety
If an espresso machine has a pressure gauge, use it as an operating indicator—not an invitation to alter internal pressure controls. Follow the normal range stated in the manual. Do not remove a portafilter during extraction, open the housing, bypass a valve, or adjust an internal regulator unless the manufacturer specifically identifies it as a user adjustment.
Stop using the machine and arrange authorized service if the gauge remains abnormal, the portafilter unlocks unexpectedly, steam escapes from the housing, or hot water discharges without control.
Best Practices for Coffee Maker Use
- Use only the amount and type of water, grounds, beans, filters, pods, and cleaning products approved for the machine.
- Do not operate the coffee maker without the required water, carafe, drip tray, pod holder, brew group, or portafilter in place.
- Keep hands away from pod needles, grinder burrs, hot plates, steam wands, group heads, and hot-water outlets.
- Do not move the appliance while it is brewing, steaming, grinding, or full of hot liquid.
- Do not leave a machine without automatic shutoff operating unattended.
- Use the original carafe or a manufacturer-approved replacement with the correct lid and valve design.
- Do not place the appliance base, cord, or plug in a dishwasher or sink.
- Unplug the machine before normal cleaning and when it will not be used, unless a programmed brew or manufacturer-directed cycle requires standby power.
Storage and Long Periods Without Use
Before a vacation or long storage period, turn the machine off, unplug it, allow it to cool, and empty the water tank, drip tray, grounds bin, capsule container, and carafe. Clean and dry removable parts so trapped moisture does not create odors or residue.
Some espresso and pod machines have a special emptying, winterizing, or transport procedure. Use that procedure where provided, especially if the machine may be exposed to freezing temperatures.
How to Handle Coffee Maker Malfunctions

Begin with low-risk checks from the manual: confirm that the outlet works, the water tank is filled and seated, the carafe or drip tray is correctly positioned, and removable parts are not blocked. Run only the approved rinse, cleaning, reset, or descaling procedure.
Stop Using the Machine Immediately If You Notice
- Smoke, sparks, flames, melted plastic, or a strong electrical smell
- A damaged, unusually hot, or loose power cord or plug
- Repeated tripping of a circuit breaker or ground-fault outlet
- Water leaking into or from the appliance base
- Uncontrolled steam or hot-water release
- A portafilter, lid, pod holder, or pressure component opening unexpectedly
- A warming plate or heater that remains on after the normal shutoff time
- Cracks in a pressurized or hot-water component
Switch the machine off and unplug it if you can reach the plug without crossing water or contacting a hot or damaged surface. Do not continue testing it “one more time.” Check the recall database, contact the manufacturer, or use an authorized repair provider.
Common Low-Risk Troubleshooting
- Slow brewing: Check for an overdue descale alert, a blocked filter, excessive coffee grounds, or a poorly seated reservoir.
- Overflowing basket: Turn the machine off, allow it to cool, and check the filter size, grind amount, basket position, and drip-stop valve.
- Weak coffee: Confirm the correct water-to-coffee ratio and grind size before assuming the heater is faulty.
- No water flow: Refill and reseat the tank, clear only user-accessible outlets described in the manual, and run the approved rinse cycle.
- Milk system not working: Clean the wand, tip, jug, tube, and connector as directed. Do not insert improvised tools into powered or pressurized parts.
- Persistent burnt smell: Stop using the machine. Cleaning old coffee residue may help only when the smell is clearly from removable coffee-contact parts and there are no electrical warning signs.
When to Repair or Replace the Coffee Maker
A coffee maker does not have a universal five-to-ten-year expiration date. Consider replacement or professional repair when:
- It is recalled and the official remedy requires replacement, refund, or disposal.
- The cord, plug, housing, heater, or internal wiring is damaged.
- It leaks into the electrical base or repeatedly trips a breaker.
- Pressure or steam-control problems continue after approved maintenance.
- Correct replacement parts are unavailable.
- The repair cost is unreasonable compared with a safe replacement.
- It no longer shuts off, heats, or controls water reliably.
Frequently Asked Questions
Can I use distilled water in my coffee maker?
Not automatically. Some basic drip brewers may operate with distilled water, but several espresso and capsule-machine manufacturers advise against highly filtered, demineralized, or distilled water. Use fresh potable water within the hardness range listed in your model’s manual.
How often should I replace my coffee maker?
There is no universal replacement age. Continue using the machine only while it operates reliably, has no unresolved recall, and has no unsafe electrical, heating, leakage, or pressure problems. Replace it when a necessary repair is unavailable or no longer economical.
Is it safe to leave coffee in the pot?
Do not leave a glass carafe sitting on an active warming plate longer than the manufacturer allows. The coffee will become stale and bitter, and the carafe may stain. Transfer coffee to a clean thermal carafe when you want to hold it without continued heating.
Can I use vinegar for descaling?
Use vinegar only when the instructions for your exact model allow it. Some Hamilton Beach machines include vinegar-cleaning directions, while Nespresso tells users not to descale its machines with vinegar. When vinegar is not approved, use the recommended descaling product and complete all rinse cycles.
What should I do if my coffee maker smells burnt?
Turn it off and unplug it. If the smell resembles hot plastic, wiring, or insulation, stop using the machine and arrange service or replacement. If it comes only from old coffee on removable parts, clean those parts after the appliance has cooled. Do not keep brewing to test a persistent electrical smell.
Can coffee maker parts go in the dishwasher?
Only place a part in the dishwasher when the manual identifies it as dishwasher-safe. Heat and detergent can warp reservoirs, damage seals, cloud clear plastic, or remove markings. Never place the appliance base, cord, plug, grinder, or powered component in a dishwasher.
Should I adjust my espresso machine’s pressure gauge?
Do not adjust internal pressure controls unless the manufacturer’s manual clearly identifies a safe user adjustment. If the gauge stays outside the stated range or the machine releases steam or hot water abnormally, stop using it and contact an authorized service provider.
Conclusion
A safe coffee maker routine starts with a quick inspection, careful placement, and the correct maintenance schedule for your type of machine. Clean coffee and milk parts promptly, descale only with an approved method, and treat abnormal heat, pressure, leakage, smoke, or electrical behavior as a stop-use warning. Model-specific instructions always take priority over a general checklist.
Sources
- U.S. Consumer Product Safety Commission Recall Database — current appliance recalls, hazards, affected model numbers, and official remedies.
- Hamilton Beach Coffee Maker Use and Care Manual — flat-surface placement, unplugging, damaged-cord precautions, and basic appliance safety.
- Breville Grind Control Instruction Manual — cleaning removable coffee parts, carafe care, and unplugging before maintenance.
- Philips Espresso Machine Cleaning and Maintenance — weekly brew-group rinsing, monthly oil-remover cleaning, and milk-system care.
- Philips Brew Group Lubrication Guidance — model- and usage-based lubrication intervals and approved grease.
- Nespresso Descaling Guidance — manufacturer-specific descaling precautions and the warning not to use vinegar in Nespresso machines.