A small kitchen can still support a convenient coffee setup when you plan around the machine’s full operating space, not just its countertop width. The best arrangement gives you a safe power connection, room to fill and open the brewer, easy access to daily supplies, and storage that does not interfere with steam, spills, or food preparation.
Quick Answer
Set up a coffee maker in a small kitchen by measuring its full operating footprint, choosing a dry counter near a wall outlet, and keeping daily supplies within one reach. Use shelves, hooks, or a narrow cart for storage, but leave room to open the lid, refill the tank, release steam, and clean spills safely.
Key Takeaways
- Measure width, depth, operating height, reservoir movement, carafe clearance, and cord reach before choosing a location.
- Choose the smallest machine that makes the drinks you actually prepare rather than paying for unused functions.
- Place the coffee maker on a level, dry surface near a wall outlet and away from a stove, sink edge, and busy walkway.
- Use shelves, mug hooks, trays, labeled containers, or a stable cart to move supplies off the main work surface.
- Follow the machine’s manual for cleaning and descaling instead of relying on one schedule or cleaning mixture for every model.
At a Glance
| Time Required | About 20–60 minutes, plus installation time for shelves or hooks |
| Difficulty | Easy; moderate if wall-mounted storage is added |
| Tools Needed | Tape measure, cleaning cloth, tray or mat, labels, and optional shelf-mounting tools |
| Cost | $0 when reorganizing existing storage; commonly $20–$100 or more for trays, shelves, or a cart |
Warning: Place the coffee maker on a stable, level, dry surface and follow its manual for power, ventilation, and clearance. Keep the cord away from the sink, stove, counter edge, and walkways. Do not operate a steaming or heat-producing machine inside a closed cabinet unless the cabinet and appliance were specifically designed for that use.
Measure Your Space Before Choosing a Coffee Maker
Begin by measuring the exact area where you plan to brew. A machine may fit while closed but become difficult to use when its lid, handle, water tank, pod compartment, bean hopper, or carafe must move.
Record these measurements before shopping or rearranging the counter:
- Counter width: Measure the clear space between walls, appliances, and containers.
- Counter depth: Leave the machine fully supported without letting its feet or base hang over the edge.
- Closed height: Check the space below upper cabinets or shelves.
- Operating height: Measure the machine with its lid, pod handle, or bean hopper fully open.
- Reservoir clearance: Determine whether the tank lifts upward, slides sideways, or can be removed from the front.
- Carafe and cup clearance: Leave enough room to remove a carafe or tall travel mug without tilting it into a cabinet.
- Cord reach: Confirm that the original cord reaches a suitable wall outlet without stretching across water, heat, or a walkway.
Do not rely on width alone. For example, the reservoir position on a current Keurig K-Supreme changes the machine’s width and depth, and the listed height increases substantially when its handle is open. This illustrates why operating measurements matter in a small kitchen.
Pro Tip: Cut a cardboard template matching the machine’s width and depth. Place it on the counter for a day and move through your normal cooking and cleaning routine. This quickly shows whether the proposed location blocks drawers, prep space, or traffic.

Power your essentials anywhere with a 999Wh pure sine wave power station delivering up to 1000W continuous with 2000W surge. It supports fast charging via USB-C PD 60W and USB-A QC 18W, plus simultaneous output for multiple devices through AC, USB, wireless, and car/DC ports. Recharge using AC, car, or solar with a built-in MPPT controller and dual cooling fans, while the upgraded battery management system protects against surges, short circuits, and overheating.

Please refer to user guide or user manual or user guide (provided below in PDF) before first use

SEMI-TRANSPARENT WATER RESERVOIR holds up to 5 cups of water capacity with a level indicator to always ensure you have enough water ready for brewing.
Choosing the Right Coffee Maker for Your Small Kitchen
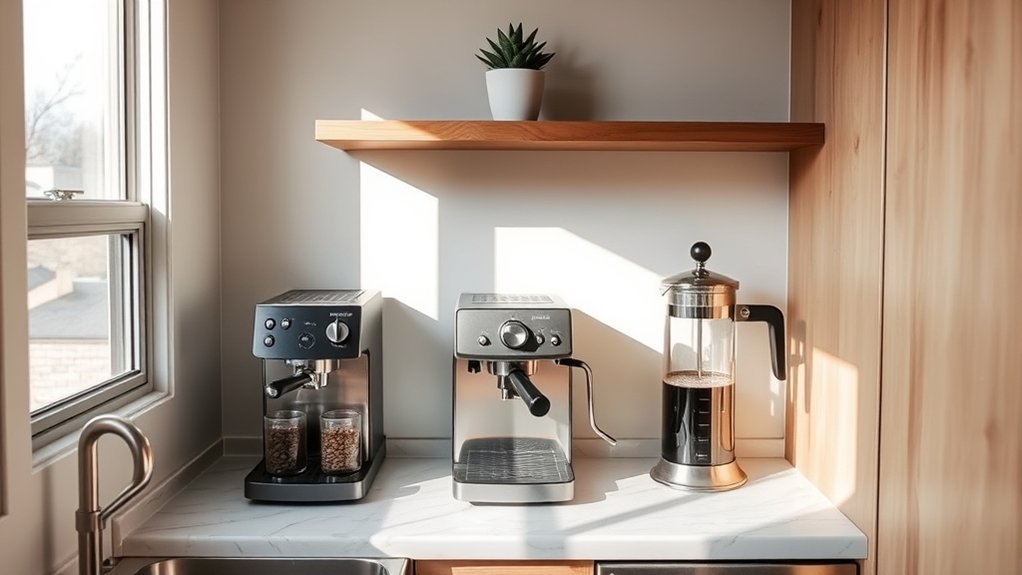
Choose a coffee maker based on your daily drinks, available clearance, cleanup tolerance, and storage needs. The narrowest machine is not always the easiest one to use. A deeper brewer may block prep space, while a short machine may still need extra room above it to open.
| Coffee-maker type | Best for | Small-space tradeoff |
|---|---|---|
| Single-serve or pod brewer | One fast cup and minimal measuring | Pod storage can create clutter; check handle and tank clearance |
| Compact drip machine | Several cups at once | Needs room for the carafe, filter basket, and water filling |
| Mini espresso machine | Espresso and milk drinks | Requires accessory storage, steam clearance, and more frequent wiping |
| Pour-over or French press | Simple equipment that can be stored after use | Requires a separate safe method for heating water |
| Machine with built-in grinder | Fresh grinding without a separate grinder | Often taller, deeper, heavier, and more involved to clean |
| Multi-function coffee system | Drip, espresso, iced drinks, or milk drinks from one appliance | Can replace several appliances but may occupy a larger permanent footprint |
A removable or repositionable reservoir can make filling easier, especially when the machine sits below a cabinet. Programmable brewing can also improve convenience, but confirm whether the machine must remain plugged in to retain its clock or schedule.
Step-by-Step: Set Up Your Coffee Maker
- Choose a dry work zone. Select a stable counter or cart away from the sink edge, stovetop, direct heat, and the main chopping area.
- Check the complete operating footprint. Open every lid and handle, remove the water tank, insert the tallest cup you use, and confirm that nothing strikes a shelf or cabinet.
- Inspect the outlet and cord. Use a properly installed wall outlet. Insert the plug fully and keep the cord from dangling, stretching, touching hot surfaces, or crossing a wet area.
- Wash removable parts. Before first use, wash the carafe, basket, reservoir, drip tray, and other approved removable parts according to the manual.
- Run the recommended first-use cycle. Many machines require one or more water-only rinse cycles, but the exact process varies by model.
- Build a one-reach workflow. Keep the mug, coffee, filter or pod, spoon, and waste container close enough that you do not cross the kitchen during each brew.
- Test the setup. Brew one full cycle while watching for steam hitting a cabinet, water dripping behind the machine, a rocking cart, a hot cord, or an awkward carafe path.
A good small-kitchen coffee station keeps the machine easy to reach without placing the cord, hot water, steam path, or carafe in the way of normal kitchen traffic.
How Can You Use Vertical Space for an Efficient Coffee Bar?
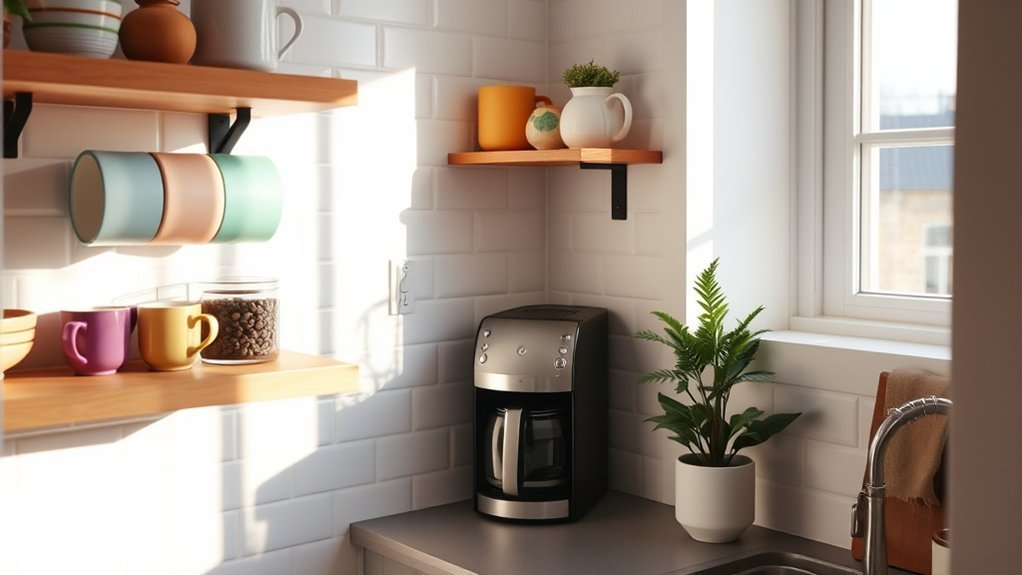
Vertical storage can free the counter without moving everyday supplies too far from the machine. Install wall-mounted or floating shelves for mugs, coffee containers, filters, and lightweight accessories. Keep the heaviest items on the lowest shelf and follow the shelf manufacturer’s load and mounting instructions.
Leave enough empty space above and around the coffee maker for its lid, water tank, bean hopper, heat, and steam. Do not install a shelf simply because it fits when the machine is closed.
Other useful vertical options include:
- A wall-mounted mug rack positioned away from the machine’s steam path
- Hooks for measuring spoons, brushes, or a reusable filter
- A narrow pegboard with movable hooks and small baskets
- A tiered counter organizer for pods, tea bags, sweeteners, or stirrers
- A cabinet-door organizer for lightweight packets and filters
Renters can use a freestanding tiered rack, removable organizer, or countertop mug tree instead of drilling into a wall. Avoid hanging heavy mugs from adhesive hooks unless the product is specifically rated for the weight and surface.
Unique Storage Hacks for Your Coffee Station
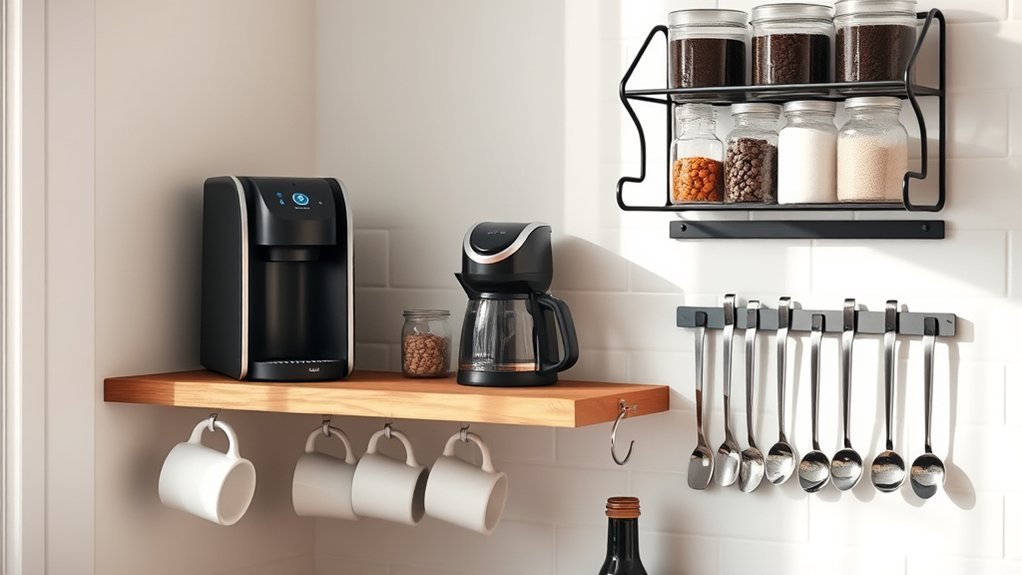
Use storage that supports the brewing sequence rather than displaying every coffee item you own. Keep the daily supply close to the machine and move refills, seasonal syrups, extra mugs, and cleaning products to a cabinet or pantry.
- Use a shallow tray: Group the coffee container, spoon, and sweetener so the entire set can be moved when you need prep space.
- Label containers: Mark regular, decaf, filters, pods, tea, and cleaning supplies for quick identification.
- Add pull-out storage: A pull-out shelf or drawer can make deep cabinets easier to use.
- Use stackable bins: Store sealed refills vertically while keeping the active package at the front.
- Divide drawers: Separate filters, reusable pods, scoops, stirrers, and cleaning brushes.
- Repurpose a pegboard: Hang light tools and small baskets while keeping the counter clear.
Airtight coffee canisters can reduce exposure to air and moisture, but avoid filling the counter with oversized containers. A smaller active container plus a sealed refill stored elsewhere usually uses space more efficiently.
Using a Coffee Bar Cart for Flexibility
A coffee bar cart can create a dedicated brewing station when the main counter is full. Multi-tiered shelves provide room for the coffee maker, mugs, beans, filters, and accessories, while wheels allow the setup to move when you are entertaining or need more kitchen space.
Choose a cart with a level, water-resistant top and enough load capacity for the machine, full reservoir, mugs, and supplies. Lock the casters before brewing, keep heavier items on the lower shelves, and avoid placing the machine near an unsupported edge.
Note: A mobile cart does not make the power cord mobile. Park the cart close enough to a suitable wall outlet that the original cord remains loose, protected, and out of the walking path. Unplug the machine before moving the cart.
Use the top tier for brewing, the middle tier for daily mugs and coffee, and the bottom tier for sealed refills or cleaning supplies. A small basket can keep filters, pods, spoons, and napkins from falling when the cart moves.
Design Your Compact Coffee Station for Maximum Style
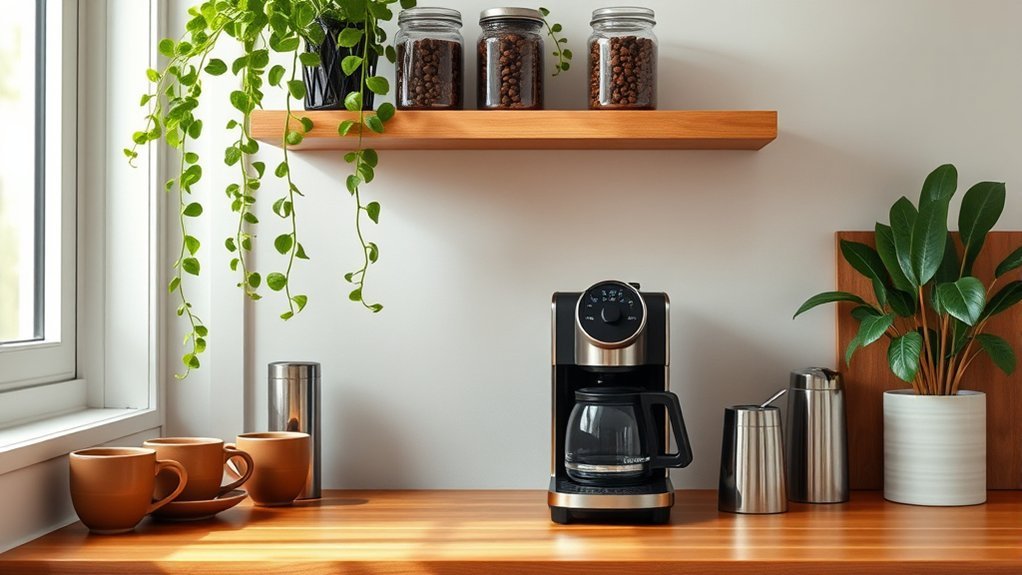
A small coffee station looks more intentional when its functional pieces share a simple visual theme. Start with the coffee maker as the largest item, then add only the storage needed for your daily routine.
| Element | Practical role | Simple styling approach |
|---|---|---|
| Coffee maker | Main brewing appliance | Choose a finish that works with nearby appliances |
| Floating shelves | Move mugs and light supplies upward | Limit the display to frequently used pieces |
| Labeled jars | Identify coffee, tea, sugar, or filters quickly | Use matching labels or similar container shapes |
| Tray | Contains small items and catches minor drips | Match the tray to the counter or cabinet hardware |
| Decorative mugs | Provide ready-to-use drinkware | Display a small rotation instead of the full collection |
Multi-functional furniture, such as a narrow cart with a drawer, can provide both a brewing surface and concealed storage. If the coffee station shares a nook with a compact microwave or another heat-producing appliance, follow both manuals, maintain their required clearances, and avoid overloading the outlet or power strip.
How to Hide Your Coffee Supplies for a Neater Look
A pull-out drawer or cabinet can store coffee pods, filters, scoops, stirrers, and accessories without leaving them on the counter. Drawer dividers prevent small supplies from becoming a mixed pile, while labeled bins make refills easy to find.
Use a decorative tray or basket for the items you use every day. When you need the full counter, move the group as one unit rather than relocating each jar, spoon, and packet separately.
A pull-out appliance shelf can also hide the coffee maker when it is cool and unplugged. Before brewing, pull the shelf fully forward and confirm that the machine has the clearance required by its manual.
Warning: Do not close cabinet doors around an operating coffee maker. Heat and steam can damage cabinet finishes, and a closed space can make the controls, hot water, and power cord harder to reach safely.
Must-Have Accessories for Your Coffee Bar Setup
A minimalist coffee station needs only the accessories that support your brewing method. Start with the machine’s required filter, pod holder, scoop, carafe, or portafilter, then add storage and serving pieces as space allows.
| Accessory | Purpose | Small-kitchen advice |
|---|---|---|
| Coffee canister | Stores beans or ground coffee | Use a container sized for the amount you normally keep open |
| Coffee grinder | Grinds whole beans before brewing | Store it in a cabinet if it is not used every day |
| Decorative mugs | Provide drinkware and personal style | Keep only the most-used mugs at the station |
| Serving tray | Groups supplies and catches minor spills | Choose one that can be wiped clean and moved easily |
| Stirrers or spoons | Mix coffee, milk, and sweeteners | Store a small daily supply in a narrow cup or drawer section |
| Washable mat | Protects the counter from drips and grounds | Choose a thin mat that does not make the machine unstable |
| Small waste container | Collects pods, filters, or grounds during cleanup | Empty it frequently to prevent odor and clutter |
Electrical, Heat, and Burn Safety
The U.S. Fire Administration advises plugging small appliances directly into a wall outlet, unplugging them when not in use, avoiding overloaded outlets and power strips, and replacing appliances with cracked, damaged, or loose cords.
- Keep the plug, outlet, and cord dry.
- Insert the plug fully into the outlet.
- Do not let the cord hang where a child or passerby can pull it.
- Keep the cord away from a burner, warming plate, kettle, or other hot surface.
- Do not reach over hot steam to access mugs or supplies.
- Do not lift a pod handle, brew basket, pressure lid, or portafilter during a cycle unless the manual instructs you to do so.
- Stop using a machine that leaks near electrical parts, releases steam unexpectedly, smells burnt, repeatedly trips a breaker, or has a damaged plug.
In a June 11, 2026 recall, the U.S. Consumer Product Safety Commission reported at least 107 incidents and 27 burn injuries involving one coffee-maker model that could release hot liquid or steam unexpectedly.
This recall does not apply to every coffee maker, but it shows why unusual steam, pressure, leaking, or clogging should not be ignored. Check the CPSC coffee-maker and teapot recall listings before using a secondhand machine or continuing to use a model that behaves abnormally.
Tips for Maintaining an Efficient Coffee Maker Setup
Keep the machine accessible enough to wipe, refill, inspect, and unplug without moving several containers first. A maintenance routine also prevents coffee grounds, pods, drips, and scale from turning a compact station into a cluttered one.
| When | Maintenance task |
|---|---|
| After each use | Discard used grounds, filters, or pods; rinse approved removable parts; wipe drips; and empty a milk system as directed. |
| Daily or as needed | Wipe the machine exterior, tray, counter, and nearby backsplash. Refill only the supplies needed for the next few brews. |
| Weekly | Wash approved baskets, carafes, pod holders, drip trays, storage jars, and reusable filters. Inspect the cord and plug. |
| As directed by the manual | Descale, replace water filters, clean needles or internal passages, and run cleaning cycles. |
There is no single descaling interval for every coffee maker. Hamilton Beach’s coffee-maker guidance recommends monthly cleaning for some daily-use drip machines and more frequent cleaning for certain models in hard-water areas. The Keurig example above uses a maintenance alert after 250 brews. Follow your model’s manual and respond sooner if flow slows, scale becomes visible, or the machine displays a cleaning alert.
Use vinegar only if the manufacturer approves it for your machine. Some models permit a vinegar solution, while others call for a specific descaler. Never immerse the machine, cord, or plug in water.
Common Coffee Station Problems and Fixes
| Problem | Likely cause | What to do |
|---|---|---|
| The lid hits the cabinet | Only the closed height was measured | Move the machine forward for filling or choose a front-access or removable-tank design |
| Steam marks appear above the machine | Insufficient operating clearance | Relocate the machine and follow the manual’s clearance guidance |
| Brewing becomes slow or noisy | Scale, a clogged path, or an incorrectly seated part | Stop the machine, let it cool, check removable parts, and perform the approved cleaning process |
| Coffee or water overflows | Overfilled tank or basket, wrong filter, excess grounds, or misaligned parts | Unplug the machine, let hot liquid cool, clean the spill, and follow the model’s filling instructions |
| The counter remains cluttered | Too many backup supplies are stored at the station | Keep one active container and move refills to a cabinet or pantry |
| The cart moves while brewing | Unlocked casters, uneven flooring, or poor weight distribution | Lock the wheels, level the cart, and move heavy supplies to the bottom |
| The plug or cord becomes hot | Damaged equipment, loose outlet, overload, or electrical fault | Stop using the appliance, unplug it if safe, and have the equipment or outlet inspected |
Frequently Asked Questions
What coffee-maker types are best for limited counter space?
A single-serve brewer, compact drip machine, slim espresso machine, French press, or pour-over setup can work well. Choose according to the drinks and quantities you make. Compare the complete operating footprint, including open-lid height, reservoir removal, cup clearance, and accessory storage.
How do I clean and maintain a compact coffee maker?
Discard used coffee after each brew, rinse approved removable parts, wipe spills, and wash the carafe, basket, pod holder, or drip tray regularly. Descale and replace filters according to the model’s manual or maintenance alert. Use vinegar only when the manufacturer approves it.
Can I use a coffee maker in a tiny apartment kitchen?
Yes. Use a dry, stable surface near a suitable wall outlet and confirm that the machine does not block drawers, prep space, or the walkway. Renters can add a freestanding rack, countertop organizer, removable tray, or stable cart without drilling into walls.
What accessories are essential for a minimalist coffee setup?
Keep the machine’s required filter or pod holder, one or two mugs, coffee, a scoop or spoon, and a washable tray or mat. Add a grinder, milk pitcher, scale, or serving tray only when your brewing method requires it.
How do I choose coffee storage that matches my kitchen decor?
Choose airtight containers that fit the amount of coffee you normally keep open. Coordinate the labels, container shapes, tray, and mug colors with nearby cabinets or hardware, but prioritize easy cleaning and a compact footprint over decoration.
Can I operate a coffee maker under an upper cabinet?
Only when the location provides the clearance required by the machine’s manual. Check the lid, handle, reservoir, heat, and steam path. You may need to pull the machine forward before filling or brewing so steam does not collect beneath the cabinet.
Is it safe to put a coffee maker on a rolling cart?
A cart can be suitable when it is level, stable, water-resistant, and rated for the machine’s loaded weight. Lock the casters before brewing, keep heavy items low, plug the machine into a nearby wall outlet, and unplug it before moving the cart.
How much clearance does a coffee maker need?
There is no universal clearance for every coffee maker. Measure the unit with all lids and handles open, then follow the model’s manual for ventilation and safe placement. Leave enough room to remove the reservoir, carafe, brew basket, portafilter, or tallest cup without striking a shelf.
Conclusion
Setting up a coffee maker in a small kitchen requires more than finding an empty patch of counter. Measure the machine while it is open, choose a dry and stable location near a suitable outlet, and arrange your mug, coffee, filter, and spoon in the order you use them. Shelves, labeled jars, pull-out storage, and a stable coffee cart can add capacity without crowding your main work surface.
Keep the setup simple enough to clean and inspect. Follow the manufacturer’s maintenance schedule, protect cabinets from heat and steam, and stop using the machine if it leaks, releases steam unexpectedly, damages its cord, or appears in a safety recall. A compact coffee station works best when it makes brewing easier without creating a new obstacle in the kitchen.
Sources
- U.S. Fire Administration — Appliance and Electrical Fire Safety — outlet, cord, power-strip, and small-appliance safety guidance
- U.S. Consumer Product Safety Commission — Coffee Maker and Teapot Recalls — current product recall and hazard information
- U.S. Consumer Product Safety Commission — June 11, 2026 Coffee-Maker Recall — hot-liquid and steam burn-hazard example
- Hamilton Beach — Coffee-Maker Use, Cleaning, and Maintenance FAQs — model-specific cleaning, unplugging, and descaling guidance
- Keurig — K-Supreme Specifications and Maintenance Information — operating dimensions, reservoir position, open-handle height, and maintenance alert example
- KitchenAid — How to Make a Coffee Bar — appliance-first layout, cord planning, clearance, and coffee-station organization