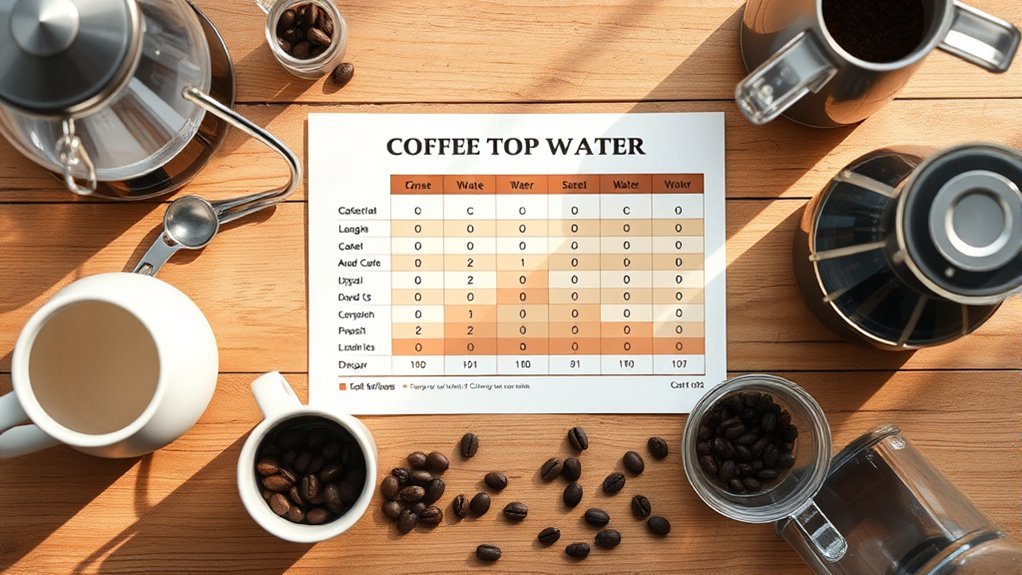
For most drip coffee makers, a 1:17 coffee-to-water ratio is an easy place to start. That means about 59 grams of coffee for every 1 liter, or roughly 1,000 grams, of brew water. A 1:16 ratio makes a more concentrated cup, while 1:18 is milder. The key is measuring consistently and knowing whether you need to change brew strength or troubleshoot extraction.
Quick Answer
For a drip coffee maker, start at 1:17 by weight: about 59 grams of coffee per 1,000 grams, or roughly 1 liter, of brew water. Try 1:16 for a stronger cup or 1:18 for a milder one. Adjust the dose for strength and the grind for extraction or flow problems.
Key Takeaways
- 1:17 equals about 58.8 grams of coffee per 1,000 grams of water, which you can round to 59 grams for home brewing.
- A useful home-drip range is roughly 1:16 to 1:18, depending on how concentrated you like your coffee.
- Use the amount of brew water you add when calculating the ratio, not the smaller amount of finished coffee that reaches the carafe.
- Use a scale whenever possible because scoops and tablespoons are less consistent than weight.
- Change the dose to adjust strength; adjust grind and evaluate brew flow when troubleshooting extraction.
- Do not assume your brewer’s numbered “cups” equal standard 8-fluid-ounce measuring cups.
At a Glance
| Time Required | About 5–10 minutes for a test brew, depending on your coffee maker |
| Difficulty | Easy |
| Tools Needed | Drip coffee maker, suitable filter, kitchen scale, and preferably a grinder |
| Cost | No extra brewing cost beyond coffee and filters if you already own a scale |
Understanding the Coffee-to-Water Ratio

A coffee-to-water ratio tells you how much brewing water to use for a given weight of dry ground coffee. In a 1:17 ratio, the “1” is one part coffee and the “17” is 17 parts water by weight.
For example, 20 grams of coffee at 1:17 needs 340 grams of water. For normal kitchen calculations, 1 milliliter of water is close enough to 1 gram that a measured 500 mL of water can be treated as roughly 500 grams when calculating a home coffee recipe.

Power your essentials anywhere with a 999Wh pure sine wave power station delivering up to 1000W continuous with 2000W surge. It supports fast charging via USB-C PD 60W and USB-A QC 18W, plus simultaneous output for multiple devices through AC, USB, wireless, and car/DC ports. Recharge using AC, car, or solar with a built-in MPPT controller and dual cooling fans, while the upgraded battery management system protects against surges, short circuits, and overheating.

Plastic-Free Brew Path - Heated water travels through stainless steel and glass instead of plastic, helping preserve the character of your coffee. It is a thoughtful material choice designed around better brewing from start to finish.

𝘿𝙤𝙪𝙗𝙡𝙚-𝙡𝙖𝙮𝙚𝙧 𝙁𝙞𝙡𝙩𝙚𝙧 : Dual layers of 304 stainless steel allow fine oils from coffee powder to infuse themselves into your coffee, creating a richer, fuller flavor and no coffee ground deposits
Use Brew Water, Not Finished Coffee, in the Ratio
The ratio refers to the water you put into the brewer, not the amount of coffee that eventually reaches the carafe. Coffee grounds and the filter retain some water, so the finished beverage normally weighs less than the brew water you started with.
For example, if you add 1,000 grams of water at a 1:17 ratio, calculate the coffee dose from that 1,000-gram input. Do not wait until the brew is finished and calculate from the smaller beverage yield.
SCA Standard 310-2021 for home coffee brewers defines its standard test brew ratio as 55 grams of coffee per 1,000 grams of fresh water, which is approximately 1:18.2. That is an equipment-testing benchmark, not a rule that every home drinker must prefer.
Note: A 1:17 ratio equals about 58.8 g/L. The SCA’s 55 g/kg standard test ratio is approximately 1:18.2. Both can produce good coffee; your preferred concentration may be different.
| Style | Ratio | Coffee per 1,000 g Water |
|---|---|---|
| Quite strong | 1:15 | 66.7 g |
| Strong | 1:16 | 62.5 g |
| Practical starting point | 1:17 | 58.8 g |
| Milder | 1:18 | 55.6 g |
What’s the Best Ratio for Flavorful Coffee?
For most home drip brewing, 1:17 is a practical starting point because it falls inside a useful range between a stronger 1:16 recipe and a milder 1:18 recipe. It is a starting recipe, not a universal flavor standard.
Ideal Brew Ratios Explained
There is no single ratio that every coffee drinker will prefer. The Specialty Coffee Association’s discussion of an updated Brewing Control Chart explains why beverage strength, extraction, sensory characteristics, and consumer preference should not be treated as one measurement.
For practical home brewing:
- 1:16: Use when you want a more concentrated, stronger cup.
- 1:17: Start here when you want a middle-ground recipe.
- 1:18: Use when you prefer a lighter, less concentrated cup.
The National Coffee Association’s drip-coffee guide gives consumers the broader volume-based guideline of 1–2 tablespoons of ground coffee for every 6 fluid ounces of water. Measuring by weight is more repeatable because tablespoons measure volume rather than coffee mass.
Adjusting for Personal Taste
Make small changes instead of jumping from one extreme to another. If 1:17 tastes less concentrated than you like, try 1:16.5 or 1:16 before moving all the way to 1:15. If the cup is stronger than you want, move toward 1:18.
Once the strength feels right, keep the ratio stable while you adjust grind size. This makes it easier to tell which change improved the cup.
Pro Tip: Change one variable at a time. Adjust the coffee dose when the cup is simply too strong or weak. If concentration is acceptable but the brew flows unusually fast or slow or tastes harsh, hollow, or unbalanced, keep the ratio steady and test a small grind adjustment.
Customizing Ratios for Your Taste

Once you have a baseline, customizing the ratio is simple. Keep the brew-water amount fixed and change the coffee dose slightly.
- For stronger coffee: Move from 1:17 toward 1:16. At 1:16, use 62.5 grams of coffee per 1,000 grams of water.
- For a milder cup: Move toward 1:18. At 1:18, use about 55.6 grams per 1,000 grams of water.
- For an especially strong cup: A 1:15 ratio uses about 66.7 grams per 1,000 grams of water.
- Keep notes: Record the dose, water amount, grind setting, batch size, and whether you liked the result.
Roast level, coffee variety, freshness, grinder consistency, water, filter, basket shape, and the design of your coffee maker can all change what tastes best. Treat ratios as repeatable recipes rather than rigid rules.
Note: Before increasing the coffee dose substantially, check that your brew basket can hold the extra grounds after they become wet and expand. Never fill a basket beyond the brewer manufacturer’s instructions.
How to Dial In Your Drip Coffee Ratio Step by Step
- Measure your brew water. Weigh it in grams or measure the actual reservoir volume in milliliters.
- Calculate a 1:17 starting dose. Divide the water weight by 17. For 1,000 grams of water, use about 58.8 grams of coffee.
- Start with a medium grind. The NCA recommends medium grind as a starting point for drip coffee.
- Use the correct filter. Follow the brewer manual for filter size and type so water can move through the coffee bed as intended.
- Brew the full cycle. Use your machine normally and follow its instructions, including any small-batch setting when applicable.
- Taste for concentration first. If the cup is pleasant but simply too strong or weak, adjust the coffee-to-water ratio.
- Then evaluate extraction and flow. If concentration seems right but the brew runs unusually fast or slow or tastes harsh, thin, hollow, or unbalanced, make a small grind adjustment.
Avoiding Common Brewing Mistakes
Accurate ratios help, but they cannot compensate for every brewing problem. Avoid these common mistakes:
- Guessing with scoops: Coffee volume changes with grind size and bean density. Weight is more consistent.
- Calculating from finished beverage volume: Use the brew water added to the machine because some water remains in the grounds and filter.
- Assuming a brewer “cup” equals 8 fluid ounces: Check the machine’s manual or measure the reservoir volume.
- Changing several variables at once: You will not know whether dose, grind, filter, or another adjustment caused the improvement.
- Using an unsuitable grind: Start around medium for automatic drip and adjust gradually from there.
- Ignoring filter fit: A filter that folds, collapses, or does not fit the basket correctly can interfere with water flow.
- Ignoring water quality: The NCA recommends cold water, filtered if possible, and advises avoiding distilled or softened water for drip brewing.
- Overfilling the brew basket: More coffee is not useful if wet grounds swell enough to overflow the basket.
- Letting coffee oils build up: Wash the carafe and brew basket regularly and descale the machine according to its manual.
Brewing temperature also matters, although most automatic drip machines control it internally. SCA Standard 310-2021 specifies that a compliant home brewer’s coffee slurry should reach the 90–96°C (194–204.8°F) range by the time 33% of the water mass has been sprayed onto the coffee and remain in that range for the rest of the brew cycle. That is an equipment-certification test, not a reason to modify a consumer machine yourself.
Warning: Coffee makers, warming plates, carafes, steam, and freshly brewed coffee can cause burns. Follow the manufacturer’s instructions and allow hot components to cool before cleaning or handling them.
Troubleshooting Tips for Brewing Mistakes

The fastest way to troubleshoot drip coffee is to decide whether you mainly have a strength problem, a flow problem, or a broader extraction problem. One flavor word alone does not always identify the cause.
Common Brewing Errors
- Too weak but otherwise pleasant: Use slightly more coffee, such as moving from 1:17 toward 1:16.
- Too strong but otherwise pleasant: Use slightly less coffee, moving toward 1:18.
- Harsh or drying with unusually slow flow: Try a slightly coarser grind while keeping the ratio unchanged.
- Thin or hollow with unusually fast flow: Try a slightly finer grind while keeping the ratio unchanged.
- Sour or bitter without an obvious flow problem: Do not diagnose the cup from that descriptor alone. Check dose, grind, water, freshness, brew flow, and machine cleanliness before making a large change.
- Inconsistent from batch to batch: Weigh both coffee and water, keep the grind setting consistent, and use the same filter and batch size while testing.
Adjusting Brew Ratios
Changing the ratio primarily changes how concentrated the beverage tastes. A lower water-to-coffee number such as 1:15 uses more coffee for the same water amount, so the cup is generally stronger. A higher number such as 1:18 uses less coffee and produces a milder drink.
Do not automatically add water because a cup tastes bitter or add coffee because it tastes sour. Flavor perception reflects several variables, and the SCA’s work on brewing charts cautions against treating sensory characteristics, extraction, and preference as a single simple relationship.
Grind Size Impact
The NCA recommends starting with a medium grind for drip coffee. Grind size changes the available surface area and can affect water flow through the coffee bed.
- If the brew runs unusually slowly and tastes harsh or drying: Try grinding a little coarser.
- If it runs unusually quickly and tastes thin or hollow: Try grinding a little finer.
- Make small changes: Large grinder adjustments can overshoot the result you want.
- Keep the ratio fixed while testing grind: This makes the effect easier to judge.
Beverage strength and extraction are connected, but they are not the same measurement. Decide whether concentration or brew behavior is bothering you before changing the recipe.
How to Measure Coffee and Water Accurately
A kitchen scale is the simplest way to make your drip coffee repeatable. Use the amount of brew water going into the machine in this formula:
Coffee dose = brew-water weight ÷ ratio number
At 1:17, 850 grams of water requires 50 grams of coffee because 850 ÷ 17 = 50.
| Brew Water | Coffee at 1:17 | Coffee at 1:16 | Coffee at 1:18 |
|---|---|---|---|
| 250 mL / g | 14.7 g | 15.6 g | 13.9 g |
| 500 mL / g | 29.4 g | 31.2 g | 27.8 g |
| 750 mL / g | 44.1 g | 46.9 g | 41.7 g |
| 1,000 mL / g | 58.8 g | 62.5 g | 55.6 g |
| 1,250 mL / g | 73.5 g | 78.1 g | 69.4 g |
| 1,500 mL / g | 88.2 g | 93.8 g | 83.3 g |
How Can You Measure Coffee Without a Scale?
A scale is preferable, but you can still make a reasonable starting brew without one. The National Coffee Association gives a broad guideline of 1–2 tablespoons of ground coffee for every 6 fluid ounces of water.
Because one tablespoon of coffee does not always weigh the same amount, depending on the bean and grind, volume measurements will be less repeatable than grams. If you frequently adjust recipes, an inexpensive gram scale removes much of the guesswork.
What Do Coffee Maker Cup Markings Mean?
Do not assume that an “8-cup” coffee maker contains eight U.S. measuring cups of water. Coffee-maker cup markings vary by manufacturer and model.
For the most accurate recipe, check the machine’s manual for its reservoir capacity or measure how much water you are actually adding. Then calculate the coffee dose from that amount.
Note: Small batches can behave differently from full carafes because the coffee bed is shallower and water delivery may change. Use a dedicated small-batch mode when your brewer provides one. “Bold,” “strong,” and similar modes are also machine-specific, so check the manual instead of assuming every brand changes the brew in the same way.
How Filters and Brew Baskets Affect Drip Coffee
The same coffee-to-water ratio can taste different in two machines because the filter and brew-basket design influence flow and what reaches the cup.
Paper vs. Metal Coffee Filters
The National Coffee Association explains that paper filters generally retain more coffee oils and sediment, which can produce a cleaner and lighter cup. Metal mesh filters allow more oils and fine particles through, often giving the beverage more body and texture.
Use the filter type and size recommended by your machine. A poorly fitting paper filter can bunch or collapse and interfere with even flow.
Cone vs. Flat-Bottom Baskets
Basket geometry also changes how water moves through the grounds. NCA notes that a flat-bottom basket has a wider surface area and may allow quicker flow, while a cone basket concentrates flow through a smaller area. Because the machines behave differently, two brewers can prefer slightly different grinds even when both use the same 1:17 ratio.
How Different Coffee Types Affect Flavor
The ratio controls concentration, but the coffee itself determines much of what you taste. Species, variety, origin, processing, roast, age, and grind all matter.
- Arabica and canephora/robusta: The National Coffee Association’s coffee-varieties guide describes arabica as generally milder and aromatic, while robusta/canephora is commonly associated with bolder flavors and bitter undertones. These are broad tendencies, not guarantees for every coffee.
- Roast level: Light, medium, and dark roasting changes aroma, acidity, bitterness, body, and how a coffee responds to brewing.
- Origin and processing: Growing conditions and processing methods can create very different flavor profiles even within the same species.
- Freshness: Grinding shortly before brewing helps preserve volatile aromas.
You generally do not need a completely different mathematical ratio for every bag of coffee. Start with the same baseline, then adjust according to taste and how that particular coffee behaves in your brewer.
Best Practices for Consistent Coffee Brewing
Consistency comes from controlling the variables you can actually repeat:
- Start around 1:17 and record your coffee dose and brew-water amount.
- Measure coffee and water by weight whenever practical.
- Start with a medium grind for automatic drip brewing.
- Use fresh, cold water; filtered water is a good option when your tap water has noticeable flavors or odors.
- Use the filter size and type specified for your machine.
- Let the machine complete its normal brew cycle instead of interrupting it.
- Use the manufacturer’s small-batch or specialty mode when appropriate.
- Follow the manufacturer’s instructions for maximum grounds, filters, cleaning, and descaling.
- Wash the carafe and brew basket regularly so old coffee oils do not affect later brews.
- Change only one recipe variable at a time when testing.
The NCA gives approximately five minutes of coffee-water contact as a general drip-brewing figure. That should not be treated as an exact timer requirement for every automatic machine. The current SCA home-brewer certification framework evaluates factors such as brewing temperature, resulting brew, consistency, and extraction uniformity. Let your automatic machine run according to its design unless its manufacturer specifies otherwise.
Frequently Asked Questions
Can I Use Pre-Ground Coffee Instead of Whole Beans?
Yes. Pre-ground coffee works in a drip maker as long as the grind suits the filter and machine. Whole beans ground shortly before brewing can preserve more aroma, but accurate dosing, proper storage, and an appropriate grind still matter when you use pre-ground coffee.
How Does Water Temperature Affect Drip Coffee?
Temperature affects extraction, but an automatic drip maker normally controls it for you. SCA Standard 310-2021 specifies a 90–96°C (194–204.8°F) coffee-slurry range by the point 33% of the brew water has been sprayed, maintained for the rest of the brew cycle, when testing compliant home brewers. If your machine consistently brews unusually cool coffee, consult its manual or manufacturer rather than modifying the appliance.
What Type of Water Is Best for Brewing Coffee?
Use fresh, cold water that tastes good on its own. The National Coffee Association recommends filtered water when possible and advises avoiding distilled or softened water for drip brewing. The mineral content of water can influence both extraction and flavor.
How Long Should Coffee Brew in a Drip Maker?
The National Coffee Association gives approximately five minutes of coffee-water contact as a general drip guideline, but exact cycle time varies with brewer design, batch size, grind, and filter. Let an automatic brewer complete the cycle specified by its manufacturer instead of forcing it to match one exact time.
Can I Store Brewed Coffee for Later Use?
Yes, although brewed coffee gradually loses fresh aroma and flavor. Transfer coffee you plan to save to a clean, covered container and refrigerate it. If milk, cream, or another perishable ingredient has been added, FoodSafety.gov advises refrigerating perishable food within two hours, or within one hour when the surrounding temperature is above 90°F (32°C).
How Much Coffee Do I Need for 1 Liter of Water?
At a 1:17 ratio, use about 58.8 grams, which you can round to 59 grams. For a stronger 1:16 brew, use 62.5 grams. For a milder 1:18 brew, use about 55.6 grams.
Does a Coffee Maker “Cup” Equal 8 Ounces?
Not necessarily. Coffee-maker cup markings vary by manufacturer, so do not calculate your dose from an assumed 8-ounce cup. Check the machine’s stated reservoir capacity or measure the actual water you add, then calculate the coffee dose from that amount.
Does a 1:17 Ratio Use the Water I Add or the Coffee in the Carafe?
Use the brew water you add to the coffee maker. At 1:17, 20 grams of coffee is paired with 340 grams of brew water. The finished beverage will normally weigh less because the grounds and filter retain some water.
Conclusion
A 1:17 coffee-to-water ratio is a dependable starting point for drip coffee, equal to about 59 grams of coffee per 1,000 grams of brew water. Move toward 1:16 when you want greater concentration or toward 1:18 for a milder cup. Measure the water going into the brewer, start with a medium grind, use the correct filter, and change one variable at a time. Most importantly, use the ratio to control beverage strength while using grind, flow, and brewer behavior to troubleshoot extraction.
Sources
- National Coffee Association — Drip Coffee — drip grind size, water guidance, approximate contact time, filters, basket design, equipment care, and volume-based dosing guidance.
- Specialty Coffee Association — SCA Standard 310-2021: Home Coffee Brewers — standard brew ratio, brewing-temperature requirements, basket capacity, extraction performance, and brewer testing.
- Specialty Coffee Association — Standards — current listing of SCA-310 as the home coffee brewer certification standard.
- Specialty Coffee Association — Towards a New Brewing Chart — relationship between brew ratio, beverage strength, extraction, sensory characteristics, and consumer preference.
- National Coffee Association — Coffee Varieties — arabica and robusta/canephora characteristics and factors that influence coffee flavor.
- FoodSafety.gov — Four Steps to Food Safety — refrigeration guidance for beverages containing milk, cream, or other perishable ingredients.