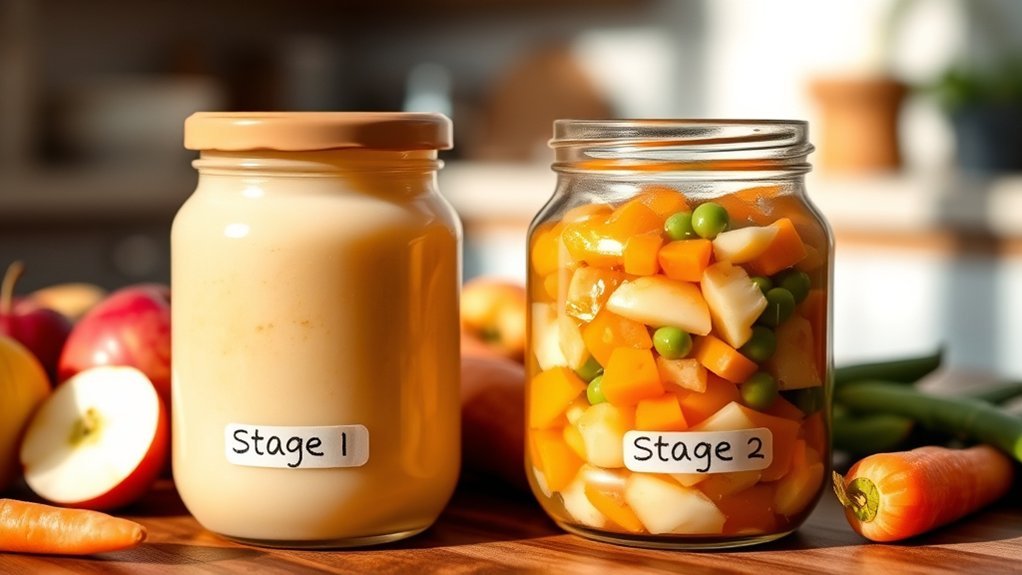
Stage 1 and Stage 2 baby foods mainly differ in texture and ingredient complexity, but the labels are not universal medical standards. Each brand may define its stages differently. Use the food’s actual texture, ingredient list, package directions, and your baby’s developmental skills—not the number alone—to decide what is appropriate.
Quick Answer
Stage 1 baby food is usually a smooth, thin puree for beginners. Stage 2 is usually thicker and may combine several ingredients, but labels vary by brand. Move forward when your baby shows developmental readiness and handles current textures safely—not simply because they reach a certain age or finish a jar.
Key Takeaways
- Stage 1 and Stage 2 are commercial labels, so textures and age suggestions can differ between brands.
- Stage 1 is usually smooth and thin; Stage 2 is generally thicker and often combines two or more ingredients.
- The stage number does not tell you whether a food is high in protein, iron, fiber, healthy fat, or calories.
- Move to thicker textures when your baby has steady head control, sits upright with support, swallows food, and manages smooth purees comfortably.
- Always supervise meals, prepare foods in developmentally safe textures, and introduce common allergens in safe forms without unnecessary delay.
At a Glance
| Stage 1 Texture | Usually a smooth, thin, strained puree with no noticeable lumps |
| Stage 2 Texture | Usually thicker or denser and may contain blended ingredients or soft texture; the exact consistency varies by brand |
| Typical Timing | After solids begin at about 6 months and the baby safely manages smoother foods; readiness matters more than age |
| Main Safety Check | Steady head control, upright posture, effective swallowing, safe texture, close supervision, and no persistent coughing or breathing difficulty |
Warning: This article provides general feeding information and does not replace advice from your pediatrician. Ask for individualized guidance if your baby was born prematurely, has poor growth, severe eczema, a known food allergy, low muscle tone, reflux affecting feeding, or difficulty chewing or swallowing. Call emergency services if your baby cannot breathe, cry, cough, or make sound.
What Stage 1 and Stage 2 Baby Food Labels Mean
Baby-food companies use stages to help shoppers compare products, but there is no single Stage 1 or Stage 2 definition that every manufacturer must follow. One brand’s Stage 2 food may be a smooth combination puree, while another may be much thicker.
Before serving a product, check:
- The age and readiness statement: Treat it as a starting point, not a deadline.
- The texture: Open the container and make sure the consistency matches your baby’s current eating skills.
- The ingredients: Look for known allergens, added sugar, sodium, and the foods included in a blend.
- The Nutrition Facts label: A higher stage number does not guarantee more iron, protein, fat, or calories.
- The storage directions: Refrigeration limits can differ between products.
The safest time to advance texture is when your baby has the skills to manage it—not when the calendar or package number says it is time.

Power your essentials anywhere with a 999Wh pure sine wave power station delivering up to 1000W continuous with 2000W surge. It supports fast charging via USB-C PD 60W and USB-A QC 18W, plus simultaneous output for multiple devices through AC, USB, wireless, and car/DC ports. Recharge using AC, car, or solar with a built-in MPPT controller and dual cooling fans, while the upgraded battery management system protects against surges, short circuits, and overheating.

CONVENIENT BABY FOOD: Our Gerber Chicken and Gravy Jar is designed for ease and convenience. These jars of baby food are made in a portable and easy-to-store format for busy parents

CONVENIENT BABY FOOD: Gerber baby puree variety packs are designed for ease and convenience. These jars of baby food are made in a portable and easy-to-store format for busy parents
What You Need to Know About Transitioning to Stage 2 Baby Food
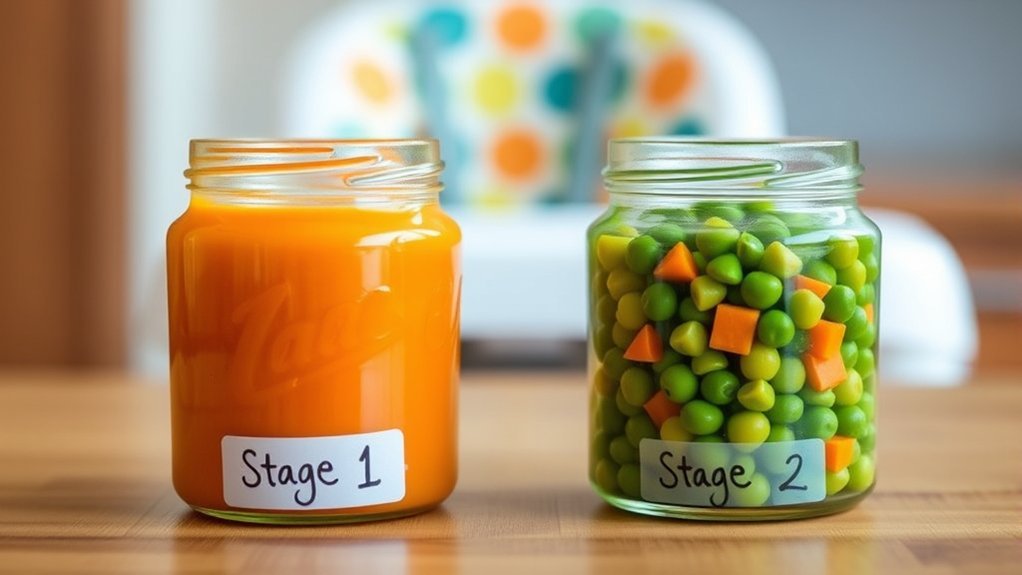
The CDC recommends introducing complementary foods at about 6 months. Foods should become thicker and more varied gradually as the baby’s eating skills develop.
You do not need to finish every Stage 1 flavor or wait until a specific month before offering a slightly thicker food. You also do not need to stop smooth purees completely. It is fine to serve familiar smooth foods alongside newer mashed or thicker foods.
A gradual transition may look like this:
- Start with a familiar puree your baby already handles comfortably.
- Make it slightly thicker by using less liquid or mixing in a small amount of finely mashed food.
- Offer a small spoonful while your baby is upright and alert.
- Allow time to move the food around the mouth and swallow before offering another bite.
- Increase texture slowly over several meals if your baby manages it well.
Pro Tip: Mix a small amount of a thicker food into a familiar smooth puree. Increase the thicker portion over several meals instead of changing the texture all at once.
Signs Your Baby Is Ready to Transition to Stage 2
Readiness is based more on development than age, appetite, or the amount eaten. According to the CDC, babies who are ready for complementary foods can control their head and neck, sit alone or with support, open their mouth for food, and swallow instead of pushing food back out.
Physical and Oral Readiness Signs
Your baby may be ready to try a thicker texture when they:
- Sit upright in a high chair with good head and neck control.
- Swallow smooth puree without repeatedly pushing it out with the tongue.
- Move food from the front of the mouth toward the back to swallow.
- Manage current foods without repeated coughing, choking, or distress.
- Open their mouth for the spoon and show interest in eating.
- Make chewing or gumming motions with soft food.
Babies do not need teeth to manage soft mashed foods. Their gums can break down foods that are soft enough to mash easily between your fingers or with a fork.
Finishing Stage 1 Purees
Finishing a serving or appearing hungry may mean your baby wants more food, but it does not prove that they can safely manage a thicker texture. Continue offering breast milk or infant formula according to your baby’s usual feeding pattern and use physical readiness signs to guide texture changes.
Interest in New Foods
Reaching for food, watching others eat, and opening the mouth for a spoon are useful signs of interest. However, interest should be considered together with upright posture, head control, and effective swallowing.
Note: Pause the texture change and contact your pediatrician if your baby repeatedly coughs during meals, has a wet or gurgly voice after swallowing, turns blue or pale, arches in distress, regularly vomits during feeding, or is not gaining weight as expected.
Key Textural Differences Between Stage 1 and Stage 2 Foods
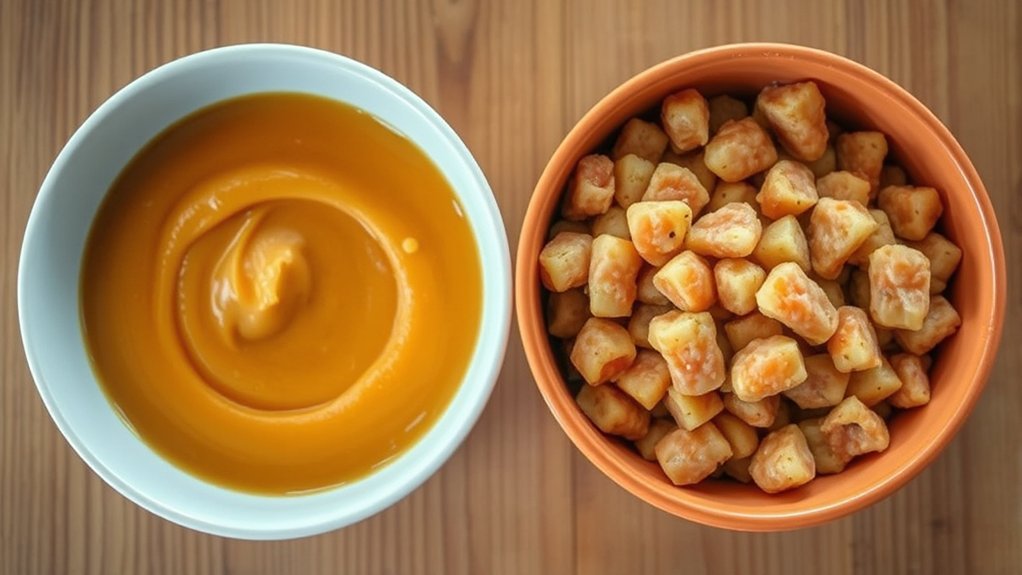
Stage 1 foods are generally smooth, thin, and uniform. They are designed to be easy to move from the front of the mouth to the back and swallow.
Stage 2 foods are usually thicker and may combine several ingredients. Depending on the brand, they may still be fully pureed or may include a very soft mashed texture. Do not assume that every product marked Stage 2 contains chunks.
Texture progression can include:
- Smooth, thin purees.
- Thicker purees that stay on the spoon.
- Finely mashed foods with a soft, even texture.
- Soft foods with tiny, easy-to-manage lumps.
- Developmentally appropriate finger foods as grasping and chewing skills improve.
Gagging Versus Choking
Some coughing, gagging, or spitting may occur while a baby learns a new texture. Gagging is a protective reflex and is often noisy. Stop feeding, stay calm, and allow the baby to clear the food while watching closely.
Choking occurs when the airway is blocked. A choking baby may be unable to breathe, cry, cough effectively, or make sound. Their skin or lips may change color. Review the American Academy of Pediatrics’ choking guidance, and consider completing an infant first-aid and CPR course before solids begin.
Warning: Never leave a baby alone with food. Feed them seated upright, not reclined, crawling, walking, riding in a vehicle, or lying down. If they cannot breathe, cry, cough, or make sound, treat it as choking and call emergency services.
Nutritional Differences Between Stage 1 and Stage 2 Foods
There is no automatic nutritional upgrade from Stage 1 to Stage 2. Nutrition depends on the ingredients and serving size.
For example:
- A Stage 1 meat puree may provide more protein and iron than a Stage 2 fruit blend.
- A Stage 2 vegetable-and-fruit blend may contain little fat or protein.
- A multi-ingredient product is not necessarily more nutrient-dense than a single-ingredient food.
- A thicker product does not automatically contain more fiber or calories.
During the early months of complementary feeding, breast milk or iron-fortified infant formula remains an important source of nutrition while the variety and amount of solid food gradually increase.
Single-Ingredient Versus Multi-Ingredient Foods
Stage 1 products are often single-ingredient foods, which can make it easier to identify a reaction. Stage 2 products more often combine foods, such as apple and blueberry or chicken and vegetables.
Once each ingredient has been tolerated separately, combination foods can provide variety. Check every label because a familiar-looking blend may contain milk, wheat, egg, soy, sesame, or another allergen.
Choosing Nutrient-Dense Foods
From about 6 months, iron-rich foods become especially important. The CDC lists iron-rich options such as meat, iron-fortified infant cereal, beans, and lentils.
Useful foods include:
- Pureed or finely minced beef, lamb, chicken, turkey, or deboned fish.
- Iron-fortified oat, barley, or multigrain infant cereal.
- Mashed beans, peas, or lentils thinned to a safe consistency.
- Well-cooked egg in a soft, safe form.
- Plain, pasteurized, full-fat yogurt without added sugar.
- Avocado or other foods that provide unsaturated fat.
- A variety of cooked vegetables and fruits.
Offer a varied diet rather than relying only on fruit pouches or rice cereal. The CDC recommends rotating fortified cereals such as oat, barley, and multigrain instead of serving only rice cereal.
How to Transition Safely
Change One Feature at a Time
When possible, change either the ingredient or the texture rather than both at once. For example, thicken a familiar sweet potato puree before serving a thick blend containing several unfamiliar ingredients.
Begin With Small Portions
Start with one or two small spoonfuls. Your baby does not need to finish a jar, pouch, or bowl. Watch for hunger and fullness cues and stop when your baby closes their mouth, turns away, pushes food away, or loses interest.
Introduce Allergens Safely
Potential allergens can generally be introduced when a baby is developmentally ready for solids, usually at about 6 months. Current American Academy of Pediatrics guidance does not recommend unnecessarily delaying foods such as egg, peanut, dairy, sesame, wheat, soy, fish, or shellfish.
- Introduce an allergen in a developmentally safe form and begin with a small amount.
- Offer it earlier in the day when you can watch for a reaction.
- Do not give whole nuts or thick spoonfuls of nut butter.
- Thin smooth nut butter with warm water, breast milk, formula, cereal, or a tolerated puree.
- Once tolerated, keep the food in the diet regularly in suitable portions.
Ask your pediatrician before introducing peanut if your baby has severe eczema, an egg allergy, or a previous immediate reaction to food.
Warning: Stop feeding and seek urgent medical advice for hives, repeated vomiting, facial swelling, or sudden coughing after a new food. Call emergency services immediately for trouble breathing, swelling of the tongue or throat, bluish skin, collapse, or unusual limpness.
Foods and Drinks to Avoid
The CDC advises avoiding or limiting several foods and drinks during infancy:
- Honey before 12 months: This includes cooked foods and blends containing honey because of the risk of infant botulism.
- Added sugars: Choose plain foods without syrups, concentrated sweeteners, or added sugar.
- High-sodium foods: Avoid heavily salted foods, processed meats, and many packaged adult foods.
- Unpasteurized foods and drinks: Use pasteurized milk products, juices, yogurt, and cheese.
- Cow’s milk as a drink before 12 months: Yogurt and cheese may be offered earlier, but cow’s milk should not replace breast milk or formula as the main drink.
- Juice before 12 months: Whole fruit is the better choice.
- High-mercury fish: Avoid shark, swordfish, king mackerel, orange roughy, marlin, Gulf of Mexico tilefish, and bigeye tuna.
Best Stage 2 Baby Foods to Start With
Choose soft, nutrient-dense foods with a texture your baby can manage. Useful options include:
- Iron-fortified oatmeal mixed with breast milk, formula, or water and mashed pear.
- Mashed lentils blended with cooked carrot or sweet potato.
- Pureed chicken or turkey with soft vegetables.
- Mashed avocado with well-cooked egg after each ingredient has been introduced safely.
- Plain full-fat yogurt with mashed peach, pear, or berries.
- Mashed beans with soft squash.
- Deboned low-mercury fish blended with potato or vegetables.
- Banana mashed with iron-fortified oat cereal.
Combination foods are easiest to evaluate when the individual ingredients have already been tolerated. Serve new allergens separately at first so a reaction is easier to identify.
Top Mistakes to Avoid When Transitioning to Stage 2 Baby Food

- Following the stage number instead of the texture: Inspect the food because brands define stages differently.
- Advancing based only on age: Use developmental readiness and safe swallowing skills.
- Assuming thicker food is more nutritious: Compare ingredients and nutrients rather than stage labels.
- Making a sudden texture jump: Increase thickness and soft lumps gradually.
- Forcing bites: Respect turning away, mouth closing, fussing, or pushing the spoon away.
- Feeding from a reclined position: Keep the baby upright and securely supported.
- Offering choking hazards: Avoid whole nuts, thick nut-butter globs, uncut grapes, popcorn, raw apple pieces, raw carrot, sausages, hard candy, and large meat or cheese chunks.
- Using a pouch as a meal without checking it: Some pouches are mostly fruit and may be low in iron, protein, and fat.
- Delaying allergens without medical reason: Introduce them in safe forms once the baby is ready for solids.
- Saving saliva-contaminated food: Do not refrigerate food left in the serving dish or a jar that has been repeatedly contacted by a used spoon.
Monitoring Your Baby’s Reaction to Stage 2 Foods
Watch both the immediate feeding experience and what happens afterward.
Positive Feeding Cues
- Opening the mouth for another bite.
- Leaning toward the spoon.
- Moving food around the mouth and swallowing.
- Remaining calm and comfortable in the high chair.
- Showing interest without being pressured.
Fullness or Dislike Cues
- Closing the mouth.
- Turning the head away.
- Pushing away the spoon or food.
- Slowing down or becoming distracted.
- Fussing when another bite is offered.
A refusal does not always mean permanent dislike. Babies often need several low-pressure exposures before accepting a new flavor or texture. End the meal calmly and try the food again another day.
When to Contact a Pediatrician
Ask for medical advice if your baby:
- Repeatedly coughs, chokes, or struggles to breathe during meals.
- Cannot progress beyond very smooth foods.
- Has frequent vomiting, pain, or severe arching during feeding.
- Has a wet or gurgly sound after swallowing.
- Takes an unusually long time to eat or becomes exhausted during meals.
- Shows poor weight gain or dehydration.
- Has hives, swelling, repeated vomiting, or another possible allergic reaction.
Frequently Asked Questions
Can I mix Stage 1 and Stage 2 baby foods together?
Yes. Mixing a small amount of thicker Stage 2 food into a familiar Stage 1 puree can create a gradual texture change. Make sure all ingredients are appropriate for your baby and that unfamiliar allergens are introduced carefully.
How do I store leftover Stage 2 baby food?
Follow the product’s storage instructions. Spoon a serving into a separate clean dish before feeding and refrigerate the untouched remainder promptly. Discard food left in the serving dish or food in a container that was contacted by a used spoon. The FDA advises against saving saliva-contaminated baby food.
When should I introduce allergens in Stage 2 foods?
Common allergens can usually be introduced when your baby is developmentally ready for solids, generally at about 6 months. Use a small amount in a safe texture. Ask your pediatrician first if your baby has severe eczema, an egg allergy, or a previous immediate food reaction.
Are homemade Stage 2 baby foods recommended?
Homemade baby food can be appropriate when it is prepared hygienically, cooked thoroughly, and given a safe texture. Include iron-rich foods and a variety of ingredients. Do not use homemade infant formula, and avoid honey, unpasteurized ingredients, added sugar, and excess salt.
How can I tell if my baby dislikes a Stage 2 food?
Turning away, closing the mouth, pushing the spoon away, or fussing may signal fullness, discomfort, or dislike. Stop without pressure and try again another day. A baby may need several calm exposures before accepting a new food.
Does my baby need teeth before eating Stage 2 food?
No. Babies can gum foods that are soft enough to mash easily. The food must still be prepared in a developmentally safe texture and served while the baby is seated upright and supervised.
What should I do if my baby gags on thicker food?
Stop offering more food, stay calm, and watch closely while your baby clears it. Gagging is often noisy. If your baby cannot breathe, cry, cough effectively, or make sound, treat it as choking and call emergency services. Repeated gagging, coughing, or swallowing difficulty should be discussed with a pediatrician.
Conclusion
Stage 1 baby food is usually smoother and simpler, while Stage 2 is generally thicker and more likely to combine ingredients. However, the labels vary between brands and do not measure nutritional quality or developmental readiness.
Use your baby’s posture, head control, swallowing ability, and response to texture as your guide. Progress gradually, include iron-rich foods, introduce allergens in safe forms, respect fullness cues, and supervise every meal. Seek professional guidance if feeding regularly causes coughing, choking, pain, distress, or poor growth.
Sources
- CDC — When, What, and How to Introduce Solid Foods — readiness signs, timing, textures, food introduction, and preparation.
- CDC — Choking Hazards — foods and shapes that can block a young child’s airway.
- CDC — Foods and Drinks to Avoid or Limit — honey, added sugar, sodium, unpasteurized foods, juice, cow’s milk, and high-mercury fish.
- CDC — Iron for Infants and Young Children — iron needs and iron-rich complementary foods.
- American Academy of Pediatrics — Introducing Common Food Allergens — timing, safe forms, and guidance for high-risk infants.
- FDA — Food Safety Once Baby Arrives — safe handling, storage, freezing, and saliva-contamination precautions.