A strong half pot of drip coffee starts with one simple step: measure the water you are actually brewing. Coffee-maker “cups” are often smaller than an 8-ounce drinking cup, so a fixed scoop count can easily make the batch weak, bitter, or wasteful. Use a scale, begin near a 1:15 to 1:16 coffee-to-water ratio, and adjust one variable at a time.
Quick Answer
Measure the half-pot water in grams or milliliters, then divide by 15 or 16 to find the coffee dose. For 750 milliliters of water, use about 47 to 50 grams of medium-ground coffee. Select the machine’s small-batch setting when available, complete the full brew cycle, and adjust the grind only after tasting.
Key Takeaways
- Do not assume that a coffee-maker “cup” equals 8 fluid ounces; check the manual or measure the reservoir water.
- For a strong but balanced starting point, use 1 gram of coffee for every 15 to 16 grams of water.
- Use a medium grind for drip coffee, then move slightly finer only if the finished coffee tastes thin or watery.
- Use the 1–4 cup or small-batch mode when your machine provides one, and let the cycle finish before pouring.
- Wash the carafe and brew basket after use, and descale on the schedule in your coffee maker’s manual.
At a Glance
| Time Required | About 8–12 minutes, depending on the brewer |
| Difficulty | Easy |
| Tools Needed | Drip coffee maker, filter, kitchen scale, grinder or medium-ground coffee, and fresh water |
| Cost | No added cost if you already have coffee and filters; an optional kitchen scale typically improves consistency |
Why You Should Brew a Strong Half Pot of Coffee

A half pot gives you fresher coffee with less waste when a full carafe is more than you need. The smaller batch can taste just as rich as a full pot, but only when the brewer receives the right amount of coffee for the actual water volume.
The most reliable method is to weigh both ingredients. Water is easy to measure because 1 milliliter of water weighs about 1 gram. If you brew 750 milliliters of water at a 1:15 ratio, use 50 grams of coffee. At 1:16, use about 47 grams.
For repeatable half-pot coffee, measure the water first and calculate the coffee dose from that amount—do not rely on an undefined scoop.
A stronger ratio increases the concentration of the finished drink, but more coffee is not always better. Too much coffee for the brewer’s basket can slow drainage, overflow the filter, or produce an uneven brew. Keep the coffee bed level and stay within the machine’s stated capacity.

Power your essentials anywhere with a 999Wh pure sine wave power station delivering up to 1000W continuous with 2000W surge. It supports fast charging via USB-C PD 60W and USB-A QC 18W, plus simultaneous output for multiple devices through AC, USB, wireless, and car/DC ports. Recharge using AC, car, or solar with a built-in MPPT controller and dual cooling fans, while the upgraded battery management system protects against surges, short circuits, and overheating.

EASY — SCOOP YOUR FAVORITE GROUND COFFEE, PLACE AND BREW. Simplify your morning routine and save time. The mesh brew basket of this single cup coffee maker doubles as a scoop, so there's no need to measure or pour coffee grounds.Filter type:Paper

QUICK INSTANT BREW TIME: With the personal single-serve coffee maker, you can brew fresh coffee at home in under 60 seconds. And immediately take it on the go to reduce precious time in the early mornings.
What Does “Half a Pot” Mean?
“Half a pot” depends on the coffee maker. Many carafe machines label capacity in 5-fluid-ounce cups rather than standard 8-fluid-ounce measuring cups. For example, a 12-cup machine may hold about 60 fluid ounces at full capacity, making a half pot about 30 fluid ounces. Other models use different serving sizes, so the manual and reservoir markings take priority.
Note: Hamilton Beach specifies that the markings on one 5-cup model are based on a 5-ounce cup, and Mr. Coffee lists approximately 5 fluid ounces per cup on a current 12-cup model. Measure your own machine instead of treating “cup” as a universal volume.
To remove the guesswork, fill the reservoir to the desired half-pot line, then pour that water into a measuring jug or weigh it on a scale. Record the amount so you can repeat the recipe.
How Much Coffee Should You Use for a Half Pot?
For bold drip coffee, start at a 1:15 or 1:16 ratio by weight. Divide the water weight by 15 for a stronger starting dose or by 16 for a slightly lighter one. The National Coffee Association’s drip guide gives a broad volume-based range of 1 to 2 tablespoons per 6 ounces of water, but weighing is more precise because spoonfuls vary with grind size and density.
| Measured Water | Coffee at 1:16 | Coffee at 1:15 | Typical Use |
|---|---|---|---|
| 500 ml / 16.9 fl oz | 31 g | 33 g | Small half batch |
| 600 ml / 20.3 fl oz | 38 g | 40 g | Half of many 8-cup brewers |
| 750 ml / 25.4 fl oz | 47 g | 50 g | Half of many 10-cup brewers |
| 900 ml / 30.4 fl oz | 56 g | 60 g | Half of many 12-cup brewers |
If you do not own a scale, begin with the amount recommended in your coffee maker’s manual. Then make small changes, such as adding or removing one level tablespoon, instead of changing the dose and grind at the same time.
How to Brew a Strong Half Pot Step by Step
- Measure the water. Use the reservoir marking only after confirming what it represents, or measure the water in milliliters.
- Calculate the coffee dose. Divide the water amount by 15 or 16. For 750 milliliters, use about 47–50 grams of coffee.
- Grind medium. A texture similar to kosher salt is a sensible starting point for most drip brewers.
- Prepare the brewer. Insert the correct paper or reusable filter, add the grounds, and gently level the bed without packing it down.
- Select the small-batch mode. Use the 1–4 cup, small-batch, or similar setting if your machine offers one. This mode may change the flow or heating pattern for lower volumes.
- Complete the full cycle. Avoid removing the carafe early unless the manual permits it. Early pouring can make one cup stronger and the remaining coffee weaker.
- Stir and taste. Gently swirl or stir the carafe so the stronger early brew and lighter later brew are evenly mixed. Record the ratio and grind setting before making one small adjustment.
Pro Tip: Change only one variable per batch. First adjust the coffee dose, then the grind. This makes it clear which change improved or harmed the flavor.
Warning: Coffee makers, carafes, warming plates, and fresh coffee can cause burns. Keep the lid and basket closed during brewing, return a pause-and-serve carafe promptly, and unplug a leaking, smoking, sparking, or damaged machine.
How to Get the Perfect Steeping Time for Strong Coffee
In an automatic drip machine, you normally do not set a separate steeping time. The brewer controls how quickly water reaches and passes through the grounds. Your job is to use the correct batch size, filter, dose, and grind, then let the complete cycle run.
The National Coffee Association lists about five minutes of coffee-and-water contact as a general drip-coffee reference. Actual cycle time varies with the machine and batch. A half pot may finish faster than a full pot, and a small-batch setting may deliberately slow or pulse the flow.
Optimal Steeping Times
Use the following timing checks instead of forcing every machine to hit one exact number:
- Let the brewer complete its programmed cycle.
- If the half pot runs unusually fast and tastes thin, use the small-batch setting or move the grind one small step finer.
- If the basket drains slowly, overflows, or tastes harsh, use a slightly coarser grind or reduce the dose.
- Compare the cycle with the timing and minimum-batch guidance in your model’s manual.
Brewing Method Comparisons
Different brewing methods need different contact times and grinds. Automatic drip commonly uses a medium grind and a cycle of roughly five minutes. Pour-over often uses a medium grind with about two to four minutes of contact, while French press uses a coarse grind and about four minutes of immersion. A Moka pot uses steam pressure and requires its own technique rather than a drip-coffee steep time.
Do not copy a grind recommendation from one method to another. A grind that works in a Moka pot may restrict a paper-filter drip basket and cause bitter coffee or overflow.
Grind Size Impact
Grind size controls how quickly water extracts soluble material from the coffee. Finer particles offer more surface area and usually slow drainage; coarser particles extract more slowly and usually allow faster flow.
- Start with a medium, even grind for drip coffee.
- Move slightly finer if the coffee is watery and the brew drains too quickly.
- Move slightly coarser if the coffee is bitter, drying, muddy, or slow to drain.
- Use a burr grinder when possible because a more even grind makes adjustments easier to repeat.
Understanding Coffee-to-Water Ratio for Bold Brews
The coffee-to-water ratio describes how many grams of water are used for each gram of dry coffee. A 1:16 recipe uses 16 grams of water for every gram of coffee. A 1:15 recipe uses less water per gram and usually tastes more concentrated.
| Ratio | Coffee for 600 ml Water | Expected Result |
|---|---|---|
| 1:17 | 35 g | Lighter starting point |
| 1:16 | 38 g | Balanced and full |
| 1:15 | 40 g | Stronger and more concentrated |
| 1:14 | 43 g | Very bold; may exceed some baskets |
A ratio changes beverage concentration, while grind, time, temperature, and water distribution affect extraction. If you add much more coffee without changing anything else, each particle may receive less water and the cup can become strong yet sour or hollow. Start near 1:15–1:16 before making more aggressive changes.
Choosing the Right Grind Size for Stronger Coffee
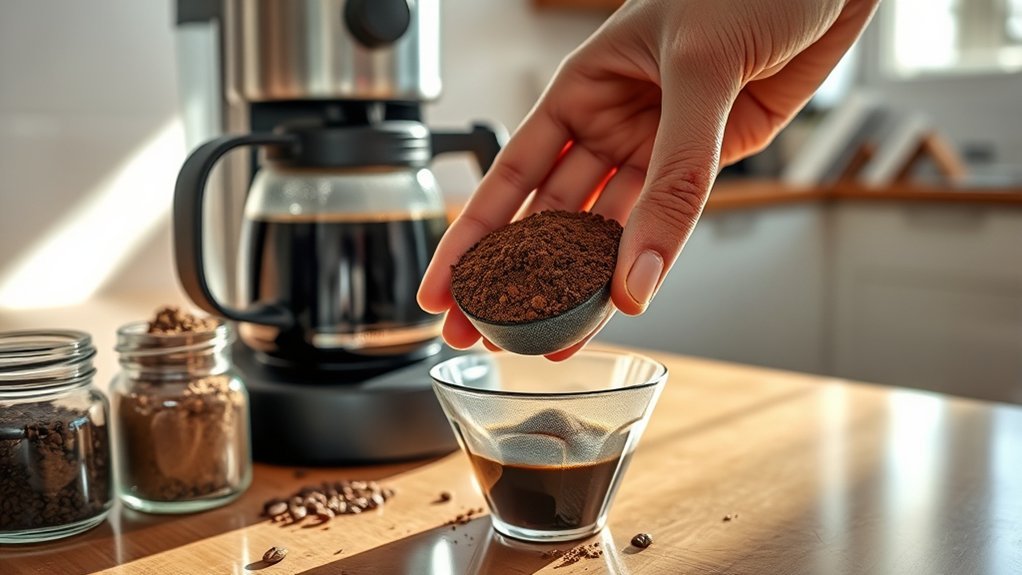
For most automatic drip makers, begin with a medium grind. Small batches sometimes benefit from a slightly finer setting because the water spends less time in the coffee bed, but “slightly finer” does not mean espresso-fine.
Grind just before brewing when practical. Freshly ground coffee generally preserves more aroma, and a consistent burr grinder makes it easier to repeat a successful setting.
Grind Size Impact on Extraction
A finer grind usually extracts faster and increases resistance to water flow. A coarser grind extracts more slowly and lets water pass more freely. The correct setting balances flavor and drainage for your particular basket shape, filter, batch size, and coffee.
- Too coarse: fast drawdown, thin body, weak or sharp flavor.
- About right: even bed, clean flow, sweet and full flavor.
- Too fine: slow drawdown, sediment, bitterness, dryness, or basket overflow.
- Uneven grind: mixed weak, sour, and bitter flavors in the same cup.
Adjusting Grind for Strength
First set a repeatable dose, such as 1:16. If the coffee still tastes weak and the cycle runs quickly, move the grinder one or two small clicks finer. If it tastes bitter or the basket drains slowly, move one or two clicks coarser.
Do not pack or tamp drip grounds. Level them gently so the spray head can wet the bed evenly.
Testing Various Grind Types
Test grind changes with the same beans, water amount, ratio, filter, and machine setting. Record the grinder number and tasting result. A simple three-batch test—medium-coarse, medium, and medium-fine—usually reveals the useful range without wasting much coffee.
Pre-ground coffee can work well when it is labeled for automatic drip machines. If it tastes flat, try a slightly stronger ratio before buying a finer pre-ground product that may clog the basket.
Heating Water to the Ideal Temperature for Brewing

For manual hot brewing, a common target is about 195°F to 205°F (90°C to 96°C) when the water contacts the grounds. Automatic drip machines control this internally, so you normally add fresh cold water rather than preheating it.
If a machine repeatedly produces lukewarm, sour, or thin coffee even with a correct dose and grind, compare its performance with the manual and consider whether it needs descaling. Measuring the temperature inside an operating brew basket can cause burns and may interfere with the machine, so do not probe a closed or moving brewer unless the manufacturer provides a safe procedure.
Water quality matters too. Use clean, fresh water that tastes good on its own. The National Coffee Association recommends cold water, filtered if possible, and advises against distilled or softened water for drip coffee because some mineral content supports flavor extraction.
Maintaining Your Coffee Maker for Great Flavor
Coffee oils, old grounds, and mineral scale can create stale flavors and reduce water flow. Clean the parts that contact coffee after each use, then descale on the schedule recommended for your machine and water hardness.
- Wash the carafe and removable brew basket with warm, soapy water after use.
- Rinse or clean a reusable filter thoroughly, then let it dry.
- Wipe the warming plate only after it has cooled and the machine is unplugged.
- Replace water filters according to the manufacturer’s schedule.
- Use only a descaling solution or vinegar method approved for your exact model.
A universal “clean monthly with equal parts vinegar and water” rule is not appropriate for every machine. Cuisinart, Keurig, and other manufacturers publish model-specific products, mixtures, cycles, and intervals. Follow the manual to avoid damaging seals, coatings, pumps, or sensors.
Best Alternative Brewing Methods for a Robust Flavor
If your drip maker performs poorly with small batches, another brewer may give you more control:
- Pour-over: lets you control water temperature and flow; start with a medium grind and a ratio near 1:15–1:16.
- French press: creates a full-bodied cup with a coarse grind and about four minutes of immersion.
- Moka pot: makes a concentrated, espresso-like drink through steam pressure; use a Moka-specific grind and follow the pot manufacturer’s fill and heat instructions.
- AeroPress-style brewer: makes one or two strong cups with adjustable ratio, time, and grind.
Each method has its own safe fill level, filter, grind, and technique. Do not apply the drip machine’s temperature, steep-time, or basket advice without checking the alternative brewer’s instructions.
Troubleshooting Common Issues With Half Pot Brewing
When a half pot tastes wrong, diagnose the flavor and flow before changing the recipe.
| Problem | Likely Cause | Best First Fix |
|---|---|---|
| Weak or watery | Too little coffee, grind too coarse, fast small-batch cycle, or cool brewing | Confirm the water volume and use 1:16; select small-batch mode |
| Sour or sharp | Under-extraction from a coarse grind, fast flow, or low temperature | Grind one step finer and descale if the machine is overdue |
| Bitter or drying | Grind too fine, too much coffee, old residue, or long hot-plate holding | Grind coarser, clean the brewer, and serve promptly |
| Basket overflow | Fine grind, excessive dose, wrong filter, blocked outlet, or carafe not seated | Turn off and cool the machine; correct the filter, dose, grind, and carafe position |
| Grounds in coffee | Torn or folded paper filter, fine sediment, or overflow | Seat a fresh filter correctly and use a slightly coarser grind |
| Slow brewing | Mineral scale, clogged showerhead, or grind too fine | Clean removable parts and descale as the manual directs |
A strong recipe should still taste sweet and clear. Bitterness, overflow, or a stalled brew is a sign to correct the grind, dose, filter, or maintenance—not simply add more coffee.
Frequently Asked Questions
Can I use pre-ground coffee for a stronger brew?
Yes. Choose coffee ground for automatic drip machines and strengthen the recipe by using a measured 1:15–1:16 ratio. Do not assume that finer pre-ground coffee is automatically better; coffee that is too fine can slow drainage, add sediment, and cause overflow.
How do I store leftover brewed coffee?
For the best flavor, cool black coffee promptly, transfer it to a clean covered container, and refrigerate it instead of leaving it at room temperature all day. Coffee containing milk or creamer is perishable; follow the FDA two-hour refrigeration rule, or one hour when the surrounding temperature is above 90°F.
Is it necessary to clean the coffee maker regularly?
Yes. Wash the carafe, basket, and reusable filter after use. Descale at the interval stated in the manual, which may range from every one to six months depending on the model, water hardness, and usage. Use only a cleaning method approved by the manufacturer.
Can I use flavored coffee grounds for a half pot?
Yes. Measure flavored coffee the same way as regular coffee, then adjust the ratio to taste. Clean the basket, grinder, and reusable filter well because flavoring oils and aromas can carry into the next batch.
What type of water is best for brewing coffee?
Use fresh, cold water that tastes clean. Filtered water is a practical choice when tap water has noticeable chlorine, odors, or excessive hardness. Avoid distilled or heavily softened water unless your coffee maker’s instructions specifically allow it.
Should I use the 1–4 cup setting for a half pot?
Use it when your batch falls within the range listed in the manual. The feature is designed to improve small-batch brewing on compatible machines, but its exact operation differs by model. Do not use it for a larger batch than the manufacturer permits.
Does stronger coffee always contain more caffeine?
Not always. Flavor strength and caffeine are related but not identical. Using more grounds often raises the total caffeine in the pot, while bean type, serving size, and brewing method also matter. The FDA says 400 milligrams per day is an amount not generally associated with negative effects for most adults, but sensitivity and medical circumstances vary.
Why is my half pot weaker than a full pot?
A smaller batch may pass through the grounds too quickly or may not reach the same brewing temperature and water distribution as a full batch. Confirm the ratio, use the small-batch mode, start with a medium grind, and make sure the brewer is clean and designed to handle that minimum volume.
Conclusion
Brewing a strong half pot is not about memorizing a scoop count. Measure the water your machine actually uses, start near a 1:15–1:16 ratio, use a medium grind, and select the small-batch setting when available. Let the cycle finish, mix the carafe, and adjust one variable at a time. With a clean brewer and a repeatable recipe, a smaller batch can be full, balanced, and every bit as satisfying as a full pot.
Sources
- National Coffee Association: Drip Coffee — drip ratio, grind adjustments, water guidance, approximate contact time, and routine cleaning.
- Scientific Reports: Brew Temperature, Sensory Profile, and Consumer Acceptance — research context for hot-coffee brewing temperatures.
- Hamilton Beach 5-Cup Coffee Maker Use & Care Guide — example of a manufacturer defining one coffee-maker cup as 5 fluid ounces.
- Cuisinart Coffee Maker Cleaning Guide — model-specific cleaning, descaling, and safety guidance.
- U.S. Food and Drug Administration: Caffeine Intake — caffeine variability and the 400-milligram reference for most adults.
- U.S. Food and Drug Administration: Safe Food Handling — refrigeration timing for coffee containing milk or creamer.