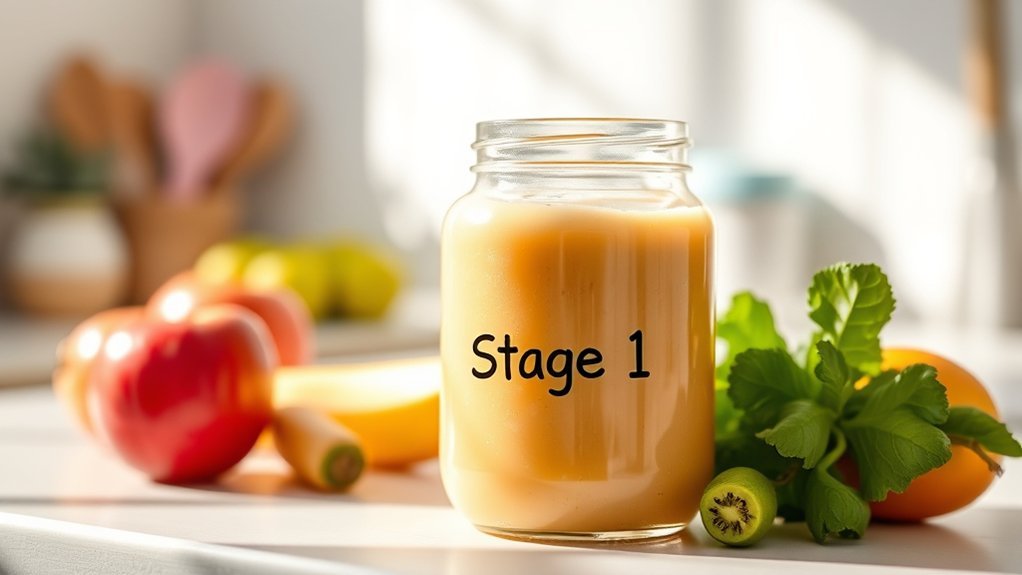
Choosing baby food storage containers is easier when you focus on how each container will actually be used. Look for food-contact materials, secure lids, practical portion sizes, and clear freezer, microwave, and dishwasher instructions. The best option is one that fits your routine without making safe storage, reheating, or cleaning harder.
Quick Answer
Choose baby food storage containers made for food contact, with secure lids and clearly stated freezer, microwave, and dishwasher limits. Match the capacity to the portions you normally prepare. Glass resists stains, plastic is lightweight, silicone is flexible, and stainless steel works well for transport but cannot go in a microwave.
Key Takeaways
- Choose containers specifically intended for food storage and follow the manufacturer’s limits for freezing, heating, dishwashing, boiling, and sanitizing.
- Check the complete lid design. A silicone gasket or locking tabs may improve leak resistance, but the container should still be transported upright unless it is advertised as leak-proof.
- Use smaller containers to freeze individual portions, but let your baby’s hunger and fullness cues guide how much is served.
- Refrigerate freshly made baby food promptly and use it within one to two days, or freeze it in dated portions for about three months.
- Discard cracked, chipped, warped, deeply scratched, or damaged containers and lids.
At a Glance
| Time Required | About 10–15 minutes to compare labels, sizes, lids, and cleaning instructions |
| Difficulty | Easy |
| Tools Needed | Product label, capacity checklist, and your refrigerator, freezer, and reheating routine |
| Cost | Varies by material, set size, lid design, and whether replacement parts are available |
Why Safe Baby Food Storage Containers Matter

Containers come into direct contact with food, so they should be manufactured and labeled for that purpose. In the United States, the FDA regulates food-contact substances and evaluates authorized uses based on how the material is expected to contact food.
A “BPA-free” label may be useful when that feature matters to you, but it is not a complete safety test. You should also check whether the container is suitable for acidic foods, hot food, freezing, microwaving, dishwashing, and repeated use. A container that is safe in a refrigerator may not be suitable for a microwave or boiling water.
Secure containers also make it easier to date portions, prevent spills, reduce freezer burn, and avoid mixing freshly prepared food with older batches. Those benefits help with organization, but they do not replace safe temperatures. Keep your refrigerator at 40°F or below and your freezer at 0°F.
Warning: Discard a container or lid that is cracked, chipped, warped, deeply scratched, permanently sticky, or unable to seal correctly. Do not continue heating food in a damaged container.

Power your essentials anywhere with a 999Wh pure sine wave power station delivering up to 1000W continuous with 2000W surge. It supports fast charging via USB-C PD 60W and USB-A QC 18W, plus simultaneous output for multiple devices through AC, USB, wireless, and car/DC ports. Recharge using AC, car, or solar with a built-in MPPT controller and dual cooling fans, while the upgraded battery management system protects against surges, short circuits, and overheating.

100% Safe: Our baby food pouches are made of food-grade silicone material which is BPA, PVC, lead and phthalate free. If you are a health-conscious parent who wants the convenience of high-quality material without the fear, this set is your choice
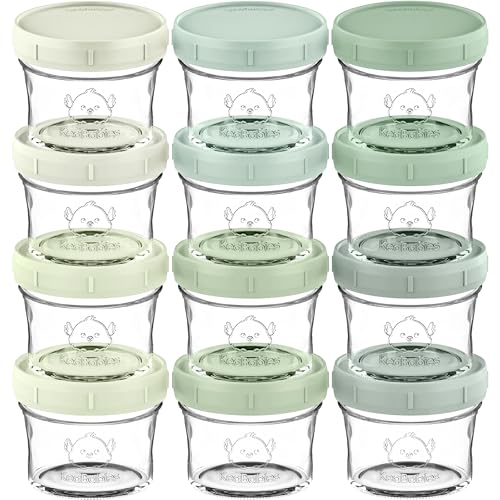
12-Pack, Durable 4oz Glass Jars with Lids – KeaBabies Baby Food Jars Glass check all the right boxes for a reliable baby snack containers. Ideal for busy parents as baby food containers for prepping and storing homemade meals smoothly.
Top Features to Look for in Baby Food Containers
The material matters, but it is only one part of the decision. Lid construction, capacity, shape, labeling, and ease of cleaning often make a greater difference in daily use.
Food-Contact and Intended-Use Labels
Choose a product that is clearly sold for food storage. Review the packaging or manufacturer instructions for these terms when they apply to your routine:
- Freezer-safe: The container is intended to tolerate normal freezer temperatures.
- Microwave-safe: The material may be used in a microwave under the stated conditions. Remove or vent the lid as directed.
- Dishwasher-safe: Check whether the whole container or only certain parts belong on the top rack.
- Boil- or steam-safe: Do not assume a plastic, silicone, gasket, or glass container can be boiled unless the manufacturer specifically permits it.
- Food-contact safe: This is more useful than relying on color, softness, price, or a general “eco-friendly” claim.
BPA-free, phthalate-free, and PVC-free claims may help you narrow your choices, but they should be considered together with the container’s intended-use instructions.
Airtight and Leak-Resistant Lids
An airtight lid helps limit air exchange, odors, drying, and freezer burn. A leak-resistant lid is designed to keep liquid from escaping during normal handling. These terms are not always interchangeable.
Look for locking tabs, a continuous silicone gasket, or a lid that presses evenly around the rim. Test new containers with water over a sink before carrying them in a diaper bag. Unless the manufacturer guarantees leak-proof performance, transport containers upright in a separate washable pouch.
Inspect removable gaskets regularly. Food can collect underneath them, and a stretched or torn gasket may prevent the lid from sealing.
Shape, Measurement Marks, and Stackability
Wide openings are easier to fill and scrub than narrow containers. Rounded internal corners leave fewer places for puree to collect. Clear walls make the contents easier to identify, while measurement marks can help you divide a batch consistently.
Stackable containers save refrigerator and freezer space, but they should remain stable when full. Also check whether lids nest together and whether replacement lids or gaskets can be purchased separately.
Pro Tip: Before buying a large set, test one or two containers with your usual puree, freezer shelf, bottle brush, dishwasher rack, and diaper bag. A practical shape is often more valuable than a larger piece count.
How to Choose the Right Container Size
Choose capacity according to how you prepare and serve food, not according to a rigid feeding target. Small containers reduce waste when your baby is trying a new food, while larger containers are useful for older children, mixed meals, or batch storage.
| Capacity | Useful For | Considerations |
|---|---|---|
| About 1 ounce | Small tastes, sauces, mix-ins, or freezing individual cubes | May require several portions for a larger meal |
| About 2 ounces | Small purees and single-food portions | A flexible starting size for many families |
| About 4 ounces | Larger portions, mixed foods, snacks, or toddler servings | Avoid filling to the rim when freezing |
| Multiple sizes | Families who prepare different foods and portion types | Confirm that mixed sizes stack neatly |
Note: Container capacity is a planning tool, not an amount your baby must finish. The CDC recommends following hunger and fullness cues and allowing children to decide how much they want to eat.
A smaller container can reduce waste, but it should never turn a stored portion into a feeding requirement.
Best Practices for Storing and Thawing Baby Food

Safe storage depends on time and temperature as well as the container. Transfer freshly prepared food into clean, covered containers and refrigerate or freeze it promptly. Do not leave perishable baby food at room temperature for more than two hours.
Safe Storage Duration
The FDA’s baby-food safety guidance lists freshly made baby food for one to two days in the refrigerator and three to four months in the freezer. A simple conservative routine is to use refrigerated homemade baby food within one to two days and frozen portions within about three months.
Commercial baby food can have different instructions after opening. Follow the package directions and use the shorter limit when the package and a general guide differ.
Label each container with the food and preparation date. Place newer food behind older food so the oldest safe portion is used first.
Prevent Saliva Contamination
Place the amount you expect to serve in a separate bowl. Do not feed directly from a storage jar or batch container and then return the remainder to the refrigerator. A used spoon can transfer saliva and microorganisms into the stored food.
Discard food left in the feeding bowl after the meal. Repeated reheating and cooling also increases handling, so warm only the amount you plan to serve.
Freezing Baby Food Safely
Use containers specifically labeled freezer-safe. Food expands as it freezes, so do not fill a container to the rim. The FDA recommends leaving about one-half inch of space at the top of a small jar used for freezing.
For glass, confirm that the container is designed for freezing. Avoid sudden temperature changes, such as moving hot glass directly into a freezer or placing frozen glass into very hot water. Do not use chipped or cracked glass.
Safe Thawing Methods
Thaw a portion in the refrigerator or use a microwave defrost setting when the container or reheating dish is labeled microwave-safe. Do not thaw perishable baby food on the counter.
After refrigerator thawing, use the food promptly. Keep it refrigerated until the meal, and discard it if it develops an unusual odor, appearance, or texture or if you are unsure how long it has been stored.
Proper Heating Techniques
Baby food does not always need to be served warm. When you do reheat it, warm only one serving. Remove sealed lids and follow the container manufacturer’s microwave instructions.
The FDA advises transferring food out of a commercial baby-food jar before microwaving because the food may heat unevenly. Stir the food thoroughly, allow it to stand briefly, and test the temperature before feeding. Check more than one area because hot spots can remain even when the outside of the dish feels cool.
Warning: Never microwave a tightly sealed container. Steam pressure can build, and unevenly heated food can burn a baby’s mouth. Open or vent the lid as directed, stir well, and check the temperature before serving.
Comparing Glass, Plastic, Silicone, and Stainless Steel

No single material is best for every family. Consider where the container will be used, whether it will be heated, and how likely it is to be dropped or carried outside the home.
| Material | Advantages | Limitations | Best Fit |
|---|---|---|---|
| Glass | Resists stains and odors, easy to see through, and often suitable for reheating when labeled for that use | Heavier, breakable, and vulnerable to thermal shock if used incorrectly | Home use and parents who reheat food frequently |
| Plastic | Lightweight, affordable, stackable, and less likely to break when dropped | May scratch, stain, absorb odors, or warp if used outside its temperature limits | Travel, daycare, and lightweight storage |
| Silicone | Flexible, lightweight, difficult to break, and convenient for freezer trays | Can retain odors or oily residue and may be less rigid when filled | Freezing individual portions and compact storage |
| Stainless steel | Durable, lightweight for its strength, and resistant to breakage | Opaque and not microwave-safe | Transporting chilled food and avoiding breakable containers |
Whichever material you select, follow the stated temperature range and appliance instructions. The lid may be made from a different material than the container and may have different care limits.
Maintenance and Care for Baby Food Containers
Clean containers soon after use so food does not dry in the corners, lid channels, or gasket grooves. Take apart all removable pieces and wash them according to the manufacturer’s instructions.
Dishwasher-safe items can be washed in the dishwasher. For handwashing, use hot or warm water, dish soap, and a clean brush that reaches the lid channels and corners. Rinse thoroughly and let every part air-dry before reassembly or storage.
The CDC’s infant-feeding-item cleaning guidance notes that careful washing may be enough for older, healthy babies. Extra sanitizing is especially important for items used by babies younger than two months, babies born prematurely, or babies with weakened immune systems.
When sanitizing is appropriate, use only a method approved for that product. Depending on the manufacturer’s instructions, that may include a dishwasher sanitizing cycle, steam, boiling, or a properly prepared sanitizing solution. Never boil an item simply because it is plastic, silicone, or glass.
Routine Inspection Checklist
- Check glass for chips, cracks, and damaged rims.
- Check plastic for deep scratches, clouding, warping, or a lid that no longer fits.
- Check silicone for tears, tackiness, persistent odors, or damaged edges.
- Remove gaskets when permitted and clean underneath them.
- Replace stretched, torn, or hardened seals.
- Confirm that measurement markings remain readable.
- Store every part completely dry to discourage odor and mold growth.
Baby Food Container Buying Checklist
Before choosing a set, confirm that you can answer yes to the features that matter for your routine:
- Is the product clearly intended for food contact?
- Does the capacity match the portions and batch sizes you prepare?
- Are the freezer, microwave, dishwasher, and sanitizing limits clearly stated?
- Can the lid be opened, vented, and cleaned easily?
- Does the seal remain secure without being difficult to remove?
- Are the containers stable and easy to stack?
- Can you see or label the contents and preparation date?
- Will the container fit your freezer shelf, lunch bag, or diaper bag?
- Are replacement lids or gaskets available?
- Can every groove and corner be reached with your normal cleaning tools?
Frequently Asked Questions
Can I use regular food containers for baby food?
Yes, provided they are intended for food contact, are in good condition, have secure lids, and are suitable for the temperature and appliance use you need. Small containers are often more convenient because you can remove one portion without exposing the whole batch.
How long can I store homemade baby food?
A conservative routine is to refrigerate freshly made baby food for no more than one to two days and use frozen portions within about three months. Label every portion and discard food that has been at room temperature for more than two hours or has contacted a used feeding spoon.
Are specific baby food container brands best?
No single brand is best for every family. Compare food-contact labeling, lid security, temperature limits, capacity, replacement-part availability, and ease of cleaning. Test a small set before buying a large collection.
What is the best way to label baby food containers?
Write the food name and preparation date on a freezer-safe label or use a removable marker approved for the container. Keep the label visible after stacking, and place newer portions behind older ones.
Can I freeze baby food in glass containers?
Yes, but use only glass containers labeled freezer-safe. Leave expansion space, avoid sudden temperature changes, and never freeze food in chipped or cracked glass. The lid must also be suitable for freezer use.
Can I microwave baby food in its storage container?
Only when the container is labeled microwave-safe. Remove or vent the lid as directed, heat one portion, stir thoroughly, let it stand briefly, and test several areas before feeding. Transfer commercial jarred food to a microwave-safe dish rather than heating it in the jar.
Do baby food containers need to be sterilized after every use?
Not necessarily. Careful cleaning after every use may be sufficient for an older, healthy baby. Extra sanitizing is more important for babies younger than two months, babies born prematurely, or babies with weakened immune systems. Use only a sanitizing method approved by the container manufacturer.
Conclusion
The best baby food storage containers are not defined by one material or marketing label. Choose containers intended for food contact, sized for your normal portions, and clearly approved for the way you plan to freeze, heat, wash, and carry them. Secure lids, easy-to-clean shapes, readable labels, and routine damage checks will make safe storage simpler as your baby’s eating habits change.
Sources
- U.S. Food and Drug Administration: Once Baby Arrives — baby-food storage, freezing, serving, and microwave safety
- U.S. Food and Drug Administration: Food-Contact Substances — regulation and safety review of materials that contact food
- U.S. Food and Drug Administration: Are You Storing Food Safely? — refrigerator, freezer, and general cold-storage guidance
- Centers for Disease Control and Prevention: Signs Your Child Is Hungry or Full — responsive feeding and hunger or fullness cues
- Centers for Disease Control and Prevention: Clean, Sanitize, and Store Infant Feeding Items — washing, air-drying, sanitizing, and higher-risk infant guidance