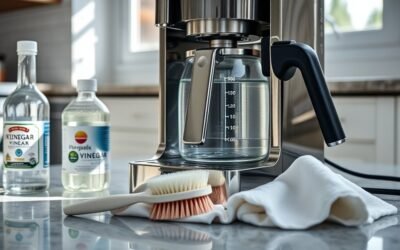
If your Keurig’s descale light won’t turn off, the brewer usually has not completed the exact descaling and fresh-water rinse sequence required for that model. The correct buttons vary by brewer, so first identify your model instead of repeatedly trying a universal reset. Once you follow the model-specific procedure, the light should either turn off automatically or respond to the documented reset.
Quick Answer
Finish the complete Descale Mode sequence for your exact Keurig model, including every fresh-water rinse. The 8 oz + 10 oz reset applies to certain K-Duo brewers only. Other models use different controls and clear the light automatically. If two complete official cycles fail, contact Keurig Support.
Key Takeaways
- Check the model number before pressing any reset or Descale Mode buttons.
- Many Keurig brewers keep the light on until the programmed solution and fresh-water stages are fully completed.
- The 8 oz + 10 oz reset is for certain K-Duo models and is not a universal Keurig reset.
- Use the descaling product, quantity, brew size, and button sequence specified in the official guide for your brewer.
- Clean the pod holder and needles if water flow is weak, but do not expect needle cleaning alone to reset the descale notification.
- After two complete unsuccessful descale attempts, stop repeating the process and contact Keurig Support.
At a Glance
| Time Required | About 20 minutes or more, depending on the model and number of rinse cycles |
| Difficulty | Easy, provided you use the correct instructions for your brewer |
| Tools Needed | Large ceramic mug, fresh water, sink access, model-approved descaling product, and an optional straightened paper clip |
| Cost | The cost of the descaling product specified for your model |
Warning: Descaling dispenses very hot liquid. Use a large ceramic mug rather than a paper cup, keep your hands away from the stream, and do not lift the handle during dispensing. Turn off, unplug, and cool the brewer before cleaning the pod holder or needles.
Identify Your Keurig Model Before Resetting the Light
Keurig does not use one reset procedure for every brewer. Look for the model name on the front, side, base, or manufacturer label, then compare the control panel with the official use-and-care guide. Similar-looking machines may use different button combinations.
This check is important because the buttons may perform different jobs:
- Entering Descale Mode: Starts a programmed cleaning and rinse sequence.
- Continuing Descale Mode: Requires repeated brews of a specified size until the brewer advances or exits.
- Resetting an indicator: Applies only to certain models after descaling is complete.
- Disabling maintenance alerts: Is not the same as descaling and should not be used to hide an unresolved maintenance problem.
Note: If your buttons do not match the combinations shown below, do not guess. Find your brewer on Keurig Support and follow its official guide.

Power your essentials anywhere with a 999Wh pure sine wave power station delivering up to 1000W continuous with 2000W surge. It supports fast charging via USB-C PD 60W and USB-A QC 18W, plus simultaneous output for multiple devices through AC, USB, wireless, and car/DC ports. Recharge using AC, car, or solar with a built-in MPPT controller and dual cooling fans, while the upgraded battery management system protects against surges, short circuits, and overheating.
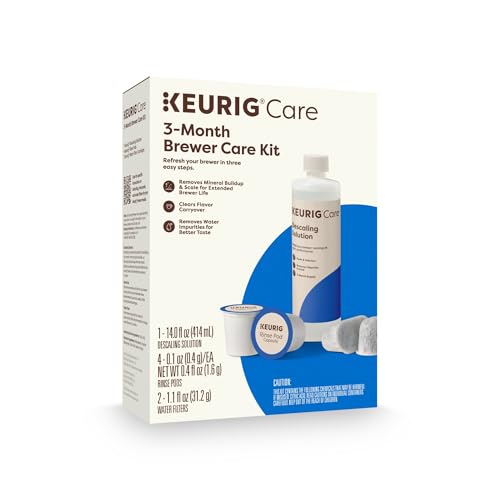
INCLUDES: 4 Keurig Rinse Pods, 1 Descale Solution, and 2 Water Filter Cartridge Refills
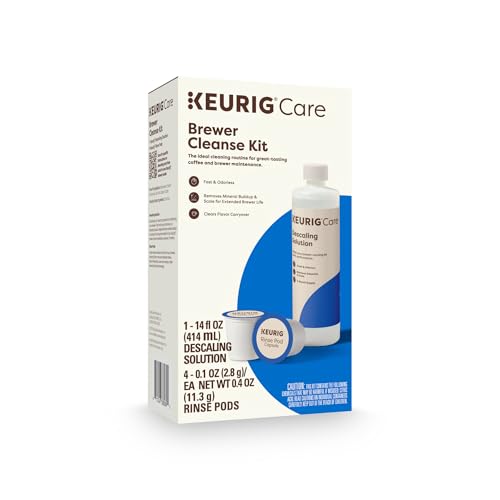
Better tasting beverages: Reduces flavor carry over between brews
What Does the Descale Light Mean?

The descale light is a maintenance reminder that tells you to remove calcium and other mineral deposits from the brewer’s internal water path. Scale is not normally toxic, but it can reduce water flow, slow brewing, interfere with heating, and affect beverage quality when allowed to accumulate.
Keurig’s general guidance is to descale every three to six months, while some individual brewer manuals specify every three months or whenever the descale notification appears. Hard water and frequent use can make earlier maintenance necessary.
The descale light often stays on because the brewer has not completed its programmed fresh-water rinse—not because the machine needs a random universal reset.
Common Causes for the Descale Light Staying On
The most common causes are procedural rather than electronic:
- The brewer never entered Descale Mode. Running ordinary water brews may clean the water path but may not satisfy the programmed maintenance sequence.
- The rinse phase ended too early. Many models require you to continue a specified brew size until the descale notification turns off or the brewer exits the mode.
- The wrong model instructions were used. An 8 oz + 10 oz combination intended for one K-Duo model will not replace the guided controls on a K-Slim, K-Express, K-Iced, or newer K-Duo.
- The reservoir ran dry, was removed, or is not fully seated. This can interrupt water delivery before the cycle is complete.
- Heavy scale is restricting flow. The brewer may dispense little water or make an air-blowing sound before the rinse is complete.
- The pod holder or needles are clogged. Coffee grounds can reduce output, although needle cleaning is not itself a descale-light reset.
- The controls are not responding correctly. A persistent light after two complete official cycles may require manufacturer support rather than more acid.
Step-by-Step Descaling Guide

The following workflow applies broadly, but the button combination, brew size, descaler quantity, and number of rinse brews must come from the guide for your exact brewer.
Proper Descaling Solution Usage
- Remove any K-Cup pod. Do not place coffee grounds in a carafe basket during descaling.
- Remove the water-filter cartridge from the reservoir if your brewer uses one.
- Empty the reservoir.
- Add the model-approved descaling product. Many current guides call for a bottle of Keurig Descaling Solution followed by a specified amount of water, but quantities vary.
- Place a large ceramic mug on the drip tray. For a dual brewer, the carafe may also need to be positioned on its heating plate.
- Start Descale Mode using the exact control combination in the manual.
Do not make the mixture stronger, combine different acids, or add citric acid unless the manufacturer’s instructions for that exact model specifically direct you to do so.
Essential Rinse Cycle Steps
The rinse stage is the part most likely to be stopped too soon. Use this sequence unless your brewer’s guide says otherwise:
| Step | Action |
|---|---|
| 1 | Complete every descaling-solution brew directed by the machine or manual. |
| 2 | Discard the hot liquid safely and rinse the reservoir thoroughly. |
| 3 | Refill the reservoir to the required line with fresh water. |
| 4 | Continue the specified fresh-water brew size each time the appropriate button flashes. |
| 5 | Do not stop simply because one reservoir has been emptied; continue until the guide’s completion signal appears. |
| 6 | Run additional water-only brews if an acidic smell or taste remains after the notification has cleared. |
Pro Tip: Refill and reseat the reservoir before it is completely dry during the fresh-water stage when your manual permits it. An interrupted water supply can prevent the programmed sequence from reaching its completion point.
Resetting the Descale Light
First allow the full model-specific process to clear the light automatically. Do not press random combinations during a guided cycle, because that can interrupt the sequence or activate an unrelated setting.
If you have a supported original K-Duo and the full descaling and rinsing process is complete, Keurig’s K-Duo instructions say to press and hold the 8 oz and 10 oz buttons together to turn off the indicator. That step should not be applied to every Keurig brewer.
For guided models, continue the required rinse brews until the descale notification turns off. If the machine exits Descale Mode but the light immediately returns, confirm that you followed the correct manual and did not skip the carafe side on a dual brewer.
How to Reset the Descale Light on Keurig Duo Models
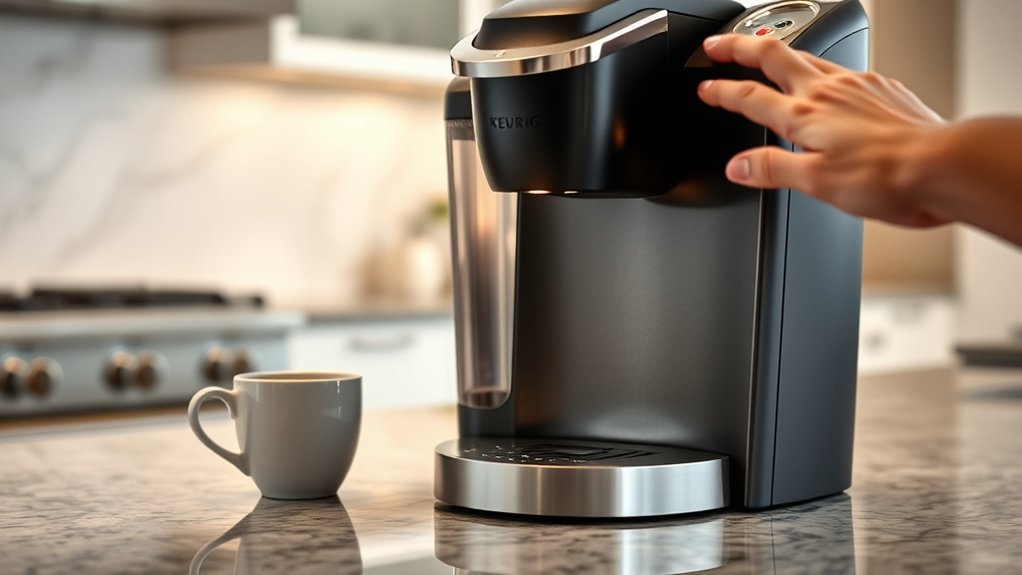
“K-Duo” covers more than one control-panel design. Match your brewer before proceeding:
| Brewer | Verified Control Method | How the Light Clears |
|---|---|---|
| Certain original K-Duo models | After completing descaling, hold the 8 oz and 10 oz buttons together. | The indicator flashes and turns off. See the official K-Duo instructions. |
| K-Duo Essentials Gen 2 | With the brewer powered off, hold CUPS and OZ together for three seconds to enter Descale Mode. | Complete the single-serve and carafe solution cycles, two single-serve rinses, and the carafe rinse. The brewer then exits Descale Mode and turns the light off. See the K-Duo Essentials Gen 2 guide. |
| K-Slim and many K-Express models | With the brewer powered off, hold 8 oz and 12 oz together for three seconds. | Continue the guided solution and rinse brews until the brewer exits Descale Mode. Check the K-Slim guide or K-Express guide. |
| K-Iced Essentials | With the brewer powered off, hold 6 oz and 10 oz together for three seconds, then use the 8 oz button when directed. | Continue 8 oz fresh-water brews until the notification turns off. See the K-Iced Essentials guide. |
If your brewer has a display, arrows, a Brew Over Ice button, or controls not shown here, use the onscreen prompts or the guide for that exact model. Do not substitute one of the combinations in the table.
Tips for Cleaning the Exit Needle and Water Reservoir
A clogged pod holder or needle can cause slow flow, grounds in the cup, or partial brews. Cleaning these parts can help the machine complete a rinse, but it may not directly reset the descale notification.
Warning: The entrance and exit needles are sharp. Turn off and unplug the brewer, allow it to cool, and never place your fingers inside the K-Cup pod-holder chamber.
Clean the Exit Needle
- Lift the handle and remove the pod-holder assembly according to the brewer manual.
- Detach the funnel when the design permits it.
- Locate the exit needle inside the bottom of the pod holder.
- Carefully insert a straightened paper clip into the opening and move it gently to loosen coffee grounds.
- Rinse the removable parts thoroughly and reinstall them correctly.
Clean the Entrance Needle
- Keep the brewer unplugged and raise the handle.
- Locate the entrance needle or needles on the underside of the lid.
- Without touching the sharp metal with your fingers, carefully work a straightened paper clip through each opening.
- Lower the handle and reconnect the brewer.
- Run two water-only cleansing brews without a pod.
Keurig provides additional official needle-cleaning guidance.
Clean the Water Reservoir
Hand-wash the removable reservoir and lid periodically with warm, soapy water when the model guide permits it. Rinse thoroughly so no soap remains. Do not assume the reservoir is dishwasher-safe, and do not dry its interior with a lint-producing cloth.
| Cleaning Task | When to Do It | Important Detail |
|---|---|---|
| Clear the exit needle | When flow slows or grounds appear | Use a straightened paper clip with the brewer unplugged |
| Clear the entrance needle | When output is restricted or grounds appear | Keep fingers out of the sharp needle chamber |
| Wash the reservoir | Periodically or when residue appears | Follow the model guide’s hand-wash instructions |
| Rinse removable parts | After every washing | Remove all soap before brewing |
| Run water-only brews | After needle cleaning | Run two cycles without a K-Cup pod |
What to Do When Your Descale Process Fails
If the light remains on after one complete attempt, work through these checks in order:
- Confirm the exact model and manual. Verify that the controls and brew sizes you used match your brewer.
- Repeat the fresh-water stage. If the brewer is still in Descale Mode, keep performing the specified rinse brew until the notification turns off.
- Reseat the reservoir. Remove it, refill it, and place it firmly back on its base.
- Check the pod holder and needles. Clean them safely if output is slow or incomplete.
- Watch for little or no output. If the brewer dispenses almost nothing and sounds as though it is blowing air, turn it off and unplug it. Discard any remaining descaling mixture, rinse the reservoir, refill it with fresh water, and repeat the fresh-water stage.
- Allow a documented pause when flow will not resume. Several Keurig guides advise leaving the brewer unplugged for at least 30 minutes before continuing the rinse when the no-flow problem persists.
- Perform one more complete official cycle if needed. Do not repeatedly increase acid strength or improvise longer soaking times.
If the brewer still produces partial cups or keeps the light on after two complete model-correct descale procedures, contact Keurig instead of continuing to expose the machine to descaler.
When to Seek Professional Help for Your Keurig
Contact Keurig Support when:
- The descale notification remains after two complete official procedures.
- The brewer repeatedly produces only a partial cup after the reservoir, pod holder, and needles have been checked.
- Buttons remain nonresponsive after the brewer has been unplugged and reconnected.
- Several control-panel lights flash together or an error message appears.
- The brewer leaks from its body or base rather than from a removable reservoir that simply needs reseating.
- You smell burning, see smoke, hear electrical arcing, or the power cord becomes unusually hot.
Warning: If liquid reaches the power cord, outlet, or electrical base, unplug the brewer only when it is safe to do so. Do not operate it again until the leak has been resolved.
Check your warranty and proof of purchase before arranging service. Do not open the brewer housing; the internal electrical and hot-water components are not intended for routine owner repair.
How Often Should You Descale Your Keurig?
Keurig’s general recommendation is every three to six months, but the exact interval depends on the brewer, water mineral content, and frequency of use. Some current model guides call for descaling every three months or whenever the notification turns on.
Recommended Descaling Frequency
- Follow the notification: Descale when your brewer displays its maintenance alert.
- Follow the manual: Use the interval listed for your exact model even if it differs from general guidance.
- Account for hard water: Faster mineral accumulation may require earlier descaling.
- Respond to performance changes: Slow flow, reduced volume, or longer brewing can justify maintenance before the normal interval.
A water filter can improve water quality, but it does not replace descaling. Remove the filter cartridge before adding descaling solution when the manual directs you to do so.
Signs of Scale Buildup
Common signs include:
- Slower water flow
- Longer brewing times
- Reduced cup volume
- Unusual pump noise
- Water that does not reach the expected temperature
- A recurring descale notification
- Changes in coffee flavor that remain after normal cleaning
These symptoms can also have other causes, including a clogged needle, poorly seated reservoir, damaged seal, or pump problem. Descaling is a maintenance step, not a guaranteed repair for every brewing fault.
Troubleshooting Other Common Keurig Issues
Keurig Brews a Partial Cup
Confirm that the reservoir contains enough water and is fully seated. Clean the pod holder and exit needle, then run a water-only brew. If the problem continues, complete the official descale process. Contact support after two unsuccessful complete procedures.
Keurig Does Not Pump Water
Reseat and refill the reservoir, remove any pod, and try the fresh-water rinse step. If the brewer was heavily scaled and now produces only an air-blowing sound, discard any remaining descaler, rinse the reservoir, refill it with water, and retry after the brewer has been unplugged as directed by its manual.
Coffee Tastes Like Descaling Solution
Do not brew coffee until the odor and taste are gone. Rinse the reservoir and run additional water-only brews. A cleared light means the programmed procedure is complete, but extra rinse cycles may still be needed to remove flavor residue.
Keurig Does Not Heat Properly
Mineral buildup can affect components that contact water, but a complete loss of heat may require service. Confirm that the brewer is connected directly to a working grounded outlet and contact Keurig if normal cleaning and descaling do not restore operation.
Frequently Asked Questions
Can I use regular vinegar for descaling my Keurig?
Use vinegar only if the official guide for your exact model permits it. Some older Keurig B-series instructions used white vinegar, but many current guides specify Keurig Descaling Solution and a guided Descale Mode. Vinegar is not a universal substitute, and an equal-parts mixture should not be assumed without model-specific instructions.
How long does the descaling process take?
Several current single-serve guides estimate approximately 15–20 or 20 minutes. A dual brewer, heavily scaled machine, interrupted rinse, or additional water-only cycles can take longer. Continue until the completion signal described in the manual appears.
Will descaling affect the taste of my coffee?
Removing mineral buildup can improve water flow and beverage quality. However, coffee may taste acidic if descaling solution remains in the water path. Rinse the reservoir and run additional water-only brews until no odor or taste remains.
Can I descale my Keurig without a descaling solution?
Plain water can rinse the brewer but will not effectively dissolve established mineral scale. Use the descaling product approved in the official guide. Use vinegar only when the exact model instructions specifically allow it.
What should I do if my Keurig leaks after descaling?
Turn off the brewer and inspect the reservoir, lid, drip tray, pod holder, and removable seals. Reseat the reservoir and wipe away spilled water before testing. If liquid comes from the brewer body or electrical base, unplug it and contact Keurig rather than continuing to operate it.
Why did the 8 oz and 10 oz reset not work?
That combination is documented for certain K-Duo brewers after descaling is complete. It will not replace the guided procedure on models that use 8 oz + 12 oz, 6 oz + 10 oz, CUPS + OZ, onscreen prompts, or another control method. Confirm the exact model and follow its guide.
How many times should I repeat the descale process?
First make sure the initial procedure was completed correctly, especially the fresh-water stage. One additional complete model-correct attempt may help with heavy scale. If the light or partial-brew problem remains after two complete attempts, contact Keurig Support.
Sources
- Keurig Descaling Guidance — explains scale buildup and the general three- to six-month maintenance interval.
- How to Descale a Keurig K-Duo — supports the model-specific 8 oz + 10 oz indicator reset.
- K-Duo Essentials Gen 2 Use and Care Guide — supports the CUPS + OZ Descale Mode procedure and automatic light clearance.
- K-Slim Use and Care Guide — supports the 8 oz + 12 oz guided descaling procedure, timing, and no-flow troubleshooting.
- K-Iced Essentials Use and Care Guide — supports its 6 oz + 10 oz entry sequence and continued 8 oz rinse brews.
- Keurig Needle-Cleaning Instructions — supports safe cleaning of the entrance and exit needles with a straightened paper clip.
Conclusion
When a Keurig descale light won’t turn off, the best fix is usually to complete the exact Descale Mode and fresh-water rinse sequence for that brewer. Do not assume every model uses the 8 oz + 10 oz reset. Verify the controls, finish every rinse, and clean restricted needles when flow is poor. If two complete official procedures fail, contact Keurig Support rather than repeatedly using stronger or improvised acids.