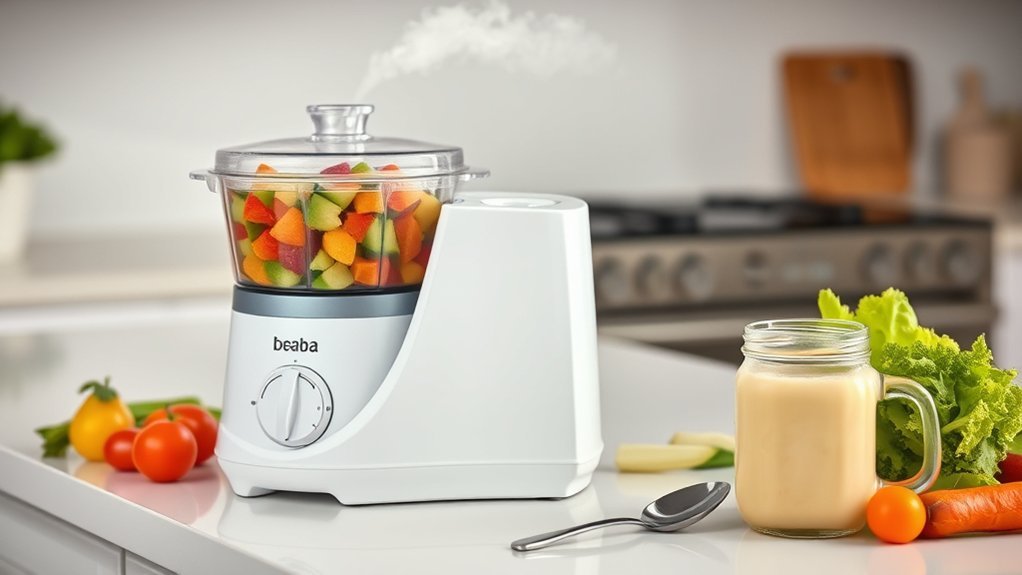
Using a BÉABA Babycook baby food maker is straightforward once you know your model’s controls. You prepare the ingredients, add the amount of water shown in the model-specific cooking chart, steam the food, transfer it for blending, and pulse until it reaches a texture your baby can safely manage. Because Babycook Original, Solo, Duo, Neo, and Express models differ, check the name on your appliance before you begin.
Quick Answer
Wash and cut the ingredients, place them in the steaming basket, add the water level listed in your Babycook model’s chart, and start the steam cycle. When the cycle has completely stopped, remove the hot basket with the spatula, transfer the food to the blending bowl, add a little cooking liquid if needed, and pulse to the desired texture.
Key Takeaways
- Identify your exact Babycook model and follow its official manual or cooking chart because the controls, water markings, and alerts vary.
- Cut ingredients into even pieces and leave enough room around them for steam to circulate.
- Do not rely on cooking time alone for meat, poultry, fish, or eggs; confirm a safe internal temperature with a clean food thermometer.
- Open the lid away from your face and use the supplied spatula or a heat-safe utensil to lift the hot basket.
- Refrigerate homemade baby food promptly and use it within one to two days, or freeze dated portions for up to three months.
- Wash removable parts after every use and descale the heating reservoir according to BÉABA’s instructions.
At a Glance
| Time Required | About 15–30 minutes, depending on preparation time, ingredients, water level, and Babycook model |
| Difficulty | Easy |
| Tools Needed | BÉABA Babycook, model manual or cooking chart, knife, cutting board, spatula, clean containers, and a food thermometer for animal proteins |
| Cost | The cost of your chosen ingredients if you already own the appliance |
Warning: The steam, cooking liquid, basket, bowl, and lid can be extremely hot. Keep your face and hands away from the steam outlet, open the lid slowly, and never touch the metal blade edges. Unplug the appliance before removing, cleaning, or adjusting the blade assembly.
Identify Your BÉABA Babycook Model First
Before following any operating instruction, check the model name printed on the appliance or its label. BÉABA publishes separate instructions for Babycook Original or Classic, Pro, Solo, Duo, Neo, and Express models in its official manuals and booklets directory.
The overall steam-and-blend process is similar, but the following details may differ:
- The direction or method used to lock the bowl and lid.
- Whether the appliance uses numbered water levels, a measuring cup, a cooking chart, or an automatic program.
- Whether steaming begins with a button, dial, or program selection.
- The color and behavior of the indicator light.
- Whether a completion sound is used.
- Whether the model includes a separate mixing lid.
- Where blending is performed on a two-bowl Duo unit.
Note: Do not force the bowl, lid, handle, or control dial. If a part does not lock easily, remove it and check its alignment against the diagrams in your model manual.
Power your essentials anywhere with a 999Wh pure sine wave power station delivering up to 1000W continuous with 2000W surge. It supports fast charging via USB-C PD 60W and USB-A QC 18W, plus simultaneous output for multiple devices through AC, USB, wireless, and car/DC ports. Recharge using AC, car, or solar with a built-in MPPT controller and dual cooling fans, while the upgraded battery management system protects against surges, short circuits, and overheating.

The nutribullet Baby Turbo Steamer is fast, easy to clean, and a real go-getter just like you. Not only does it steam cook fresh ingredients for homemade baby food, it also defrosts frozen foods and sterilizes baby bottles, pacifiers, utensils, and toys for easier baby times, all around.

𝗦𝘁𝗲𝗮𝗺𝗶𝗻𝗴 𝗮𝗻𝗱 𝗕𝗹𝗲𝗻𝗱𝗶𝗻𝗴 𝗶𝗻 𝗢𝗻𝗲: The height of the blender container is 4.13 inches, and the outer diameter is 4.17 inches.This GROWNSY baby food maker thoughtfully designed for babies 6 months+ during the weaning stage.It seamlessly combines steaming and blending in a single device, simplifying meal prep and eliminating the need for extra kitchen tools. The built-in sterilizer mode saves time and effort, giving you more precious moments with your baby.
Before the First Use
Wash the removable bowl, steaming basket, lid, spatula, and other food-contact accessories before preparing food. Rinse them well and allow them to dry. Wipe the electrical base with a slightly damp cloth, but never place the base under running water or immerse it.
Inspect the blade, gasket, locking nut, and bowl before each use. The gasket must be seated correctly to help prevent leaking. If your model includes a mixing lid, install it before blending as directed in the manual. BÉABA notes that the Babycook Neo is designed differently and does not use the same separate mixing lid found with some earlier models.
How to Prepare Ingredients for Steaming
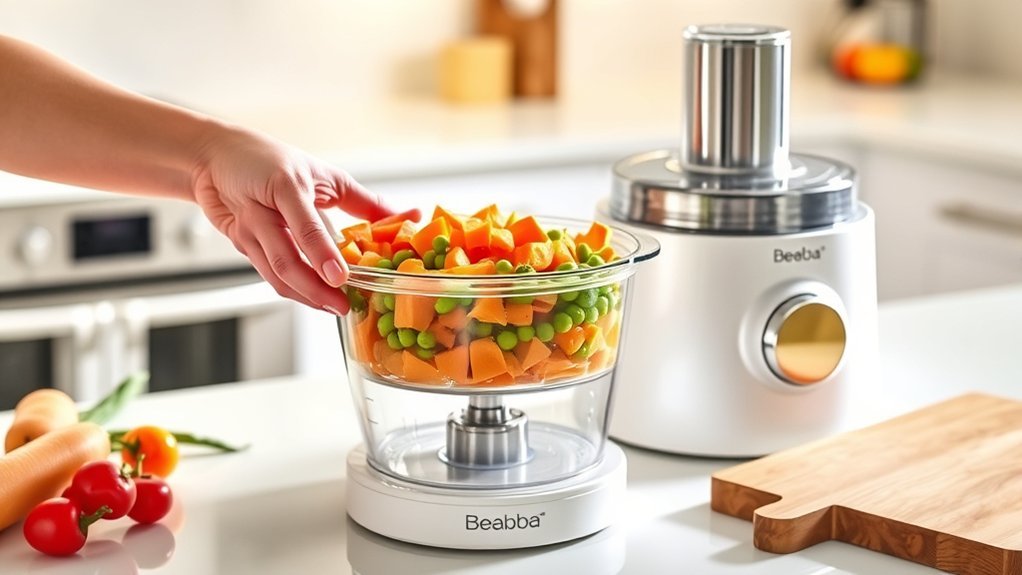
Wash your hands, preparation surface, knife, cutting board, fruits, and vegetables before you begin. Peel produce when the recipe or your baby’s texture needs call for it. Remove pits, seeds, tough stems, bones, skin, and excess fat.
Cut the ingredients into pieces of similar thickness so they cook at a similar rate. Small, even pieces generally steam more consistently than a mixture of large and tiny pieces. Do not pack the basket tightly or fill it above the limit shown in your manual because the steam needs space to move around the food.
Keep raw meat, poultry, seafood, and eggs away from ready-to-eat produce and clean every surface they touch. When preparing animal proteins, use a clean food thermometer rather than judging doneness by color or cooking time alone.
| Food | Minimum Internal Temperature |
|---|---|
| Poultry, including ground poultry | 165°F (74°C) |
| Ground beef, pork, veal, or lamb | 160°F (71°C) |
| Egg dishes | 160°F (71°C) |
| Fish and shellfish | 145°F (63°C) |
Setting Up Your BÉABA Baby Food Maker
Place the appliance on a dry, stable, level, heat-resistant surface with room around the steam outlet. Keep it away from the edge of the counter and out of a child’s reach.
- Confirm that the appliance is unplugged before assembling removable parts.
- Check that the blade and gasket are installed correctly.
- Place the prepared food in the steaming basket.
- Measure the water using your model’s chart or marked bowl.
- Pour the water only into the heating reservoir specified in the manual.
- Seat and lock the bowl and lid until they click or reach the locked position shown for your model.
- Plug the appliance into a suitable outlet with dry hands.
The correct water amount comes from the cooking chart for your exact Babycook model—not from one universal measurement for every ingredient or machine.
How Much Water Do You Need for Steaming?
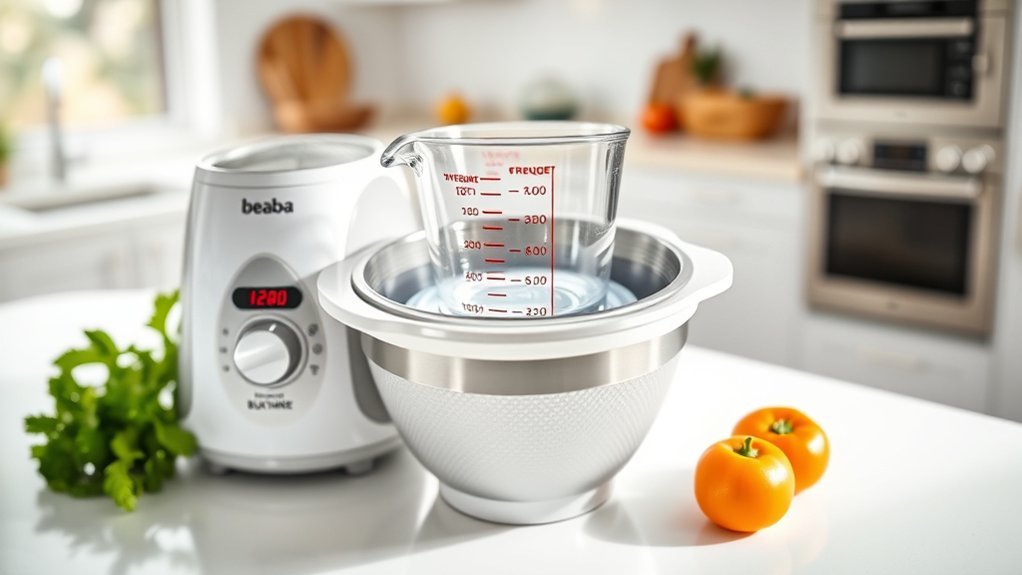
Use the water level or quantity listed for the ingredient in your model’s manual, recipe booklet, or cooking chart. Do not estimate by filling the reservoir to the top.
On Babycook models that use the traditional three-level system, BÉABA describes the approximate cycle lengths as:
- Water level 1: about 5 minutes.
- Water level 2: about 10 minutes.
- Water level 3: about 15 minutes.
These times are approximate and do not apply automatically to every Babycook model. Babycook Express, for example, has its own cooking chart and operating instructions. Ingredient temperature, quantity, piece size, mineral buildup, and the appliance model can all affect the result.
Pro Tip: Write down the water level, ingredient weight, cut size, and final texture when a batch turns out well. That gives you a reliable starting point the next time you prepare the same food.
Using Your BÉABA Baby Food Maker: Step-by-Step Instructions
| Step | Action | Important Check |
|---|---|---|
| 1. Prepare | Wash, trim, and cut the ingredients into even pieces. | Remove bones, pits, tough skins, and choking hazards. |
| 2. Load | Place the ingredients in the steaming basket. | Do not exceed the model’s maximum-fill line. |
| 3. Measure Water | Measure the amount shown in the model cooking chart. | Use the correct chart for the food and model. |
| 4. Assemble | Seat and lock the bowl and lid. | Do not force a misaligned component. |
| 5. Steam | Start the steam cycle using your model’s control. | Keep hands away from the steam outlet. |
| 6. Confirm Completion | Wait until the cycle stops and the model-specific completion signal appears. | Do not confuse a maintenance light with a cooking signal. |
| 7. Check Doneness | Test produce for softness and animal proteins for a safe temperature. | Run another approved cycle if the food is not fully cooked. |
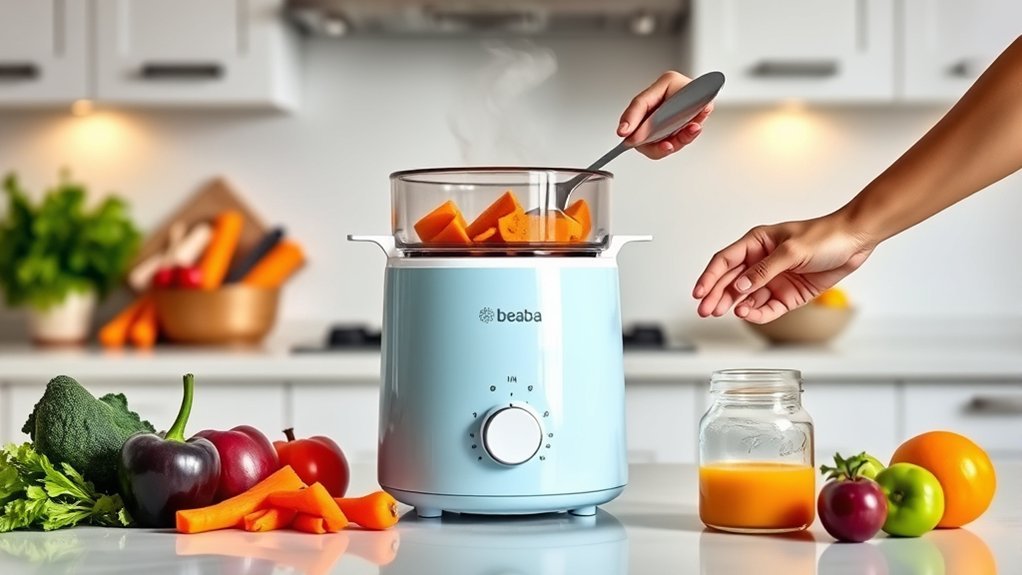
| 8. Transfer | Open the lid away from your face and lift the basket with the spatula. | The basket and liquid will be hot. |
| 9. Blend | Transfer the food to the blending bowl and pulse using the model’s blending control. | Install the mixing lid if your model requires one. |
| 10. Serve or Store | Check the serving temperature or portion the food into clean storage containers. | Refrigerate promptly and label stored portions. |
Recognizing Completion Indicators
Do not assume that every Babycook uses the same combination of flashing lights, steady lights, beeps, or display messages. Use the completion description in your model manual and wait until the steam cycle has fully stopped before touching the lid.
Flashing Light Indicator
Some Babycook models use an illuminated steam button or indicator during the cooking cycle. The light may flash, remain lit, change color, or turn off at a particular stage depending on the model. Treat the manual—not a generic online instruction—as the final authority for what the light means.
Beeping Alert Sound
If your model produces a completion sound, wait for that signal and confirm that steaming has stopped before opening the lid. A sound tells you that the programmed cycle has ended; it does not replace checking the softness of produce or the internal temperature of meat, poultry, fish, or eggs.
Automatic Shut-Off Feature
Applicable Babycook steam cycles stop automatically when the programmed cycle or available reservoir water is complete. Remain near the appliance and do not use automatic shut-off as a reason to leave hot food or water unattended around children.
Note: On certain Babycook Pro, Solo, Duo, or Pro 2X-family units, a red steam light may be a descaling reminder rather than a food-ready signal.
Safely Releasing the Lid and Removing the Basket
After the steam cycle ends, pause briefly so the strongest burst of steam can settle. Keep children away from the counter and follow this sequence:
- Make sure the steam cycle has completely stopped.
- Keep your face, arms, and hands away from the steam outlet.
- Unlock the lid using the movement shown in your model manual.
- Open the lid slowly and angle it so escaping steam travels away from you.
- Use the supplied spatula or another heat-safe utensil to lift the steaming basket.
- Set the hot basket on a heat-resistant surface.
- Check that the food is fully cooked before blending or serving.
What to Do After Steaming Your Food
Once the food is safely cooked, transfer it from the steaming basket into the blending bowl. On a Babycook Duo, use the side designated for blending in the model instructions. Install the mixing lid if your model includes and requires one.
Before blending, decide whether you want to use some of the collected cooking liquid. A small amount can loosen a thick puree, but adding all of it at once can make the food too thin. Keep the liquid separate at first and add it gradually.
If you cooked meat, poultry, seafood, or eggs, verify the safe internal temperature before mixing the food with other ingredients. If it has not reached the required temperature, continue cooking according to the manual rather than blending partially cooked food.
How to Use or Discard Steaming Water
BÉABA recipes commonly reserve some cooking liquid and add it during blending to adjust texture. You can do the same when the ingredients are fully cooked, the liquid has been handled cleanly, and the recipe is appropriate for your child.
- For a thinner puree: Add one small spoonful at a time and pulse between additions.
- For a thicker mash: Use little or no cooking liquid.
- For combination foods: Keep allergen-containing liquid separate from another child’s food and clean the appliance before the next batch.
- To discard it: Allow it to cool enough for safe handling and pour it away without splashing.
Do not save warm cooking liquid at room temperature for later use. If you intend to store it, transfer it to a clean container and refrigerate it promptly with the prepared food.
How to Puree Steamed Food to the Right Consistency
Lock the blending bowl into its correct position and install every blending component required for your model. Pulse in short bursts rather than running the motor longer than the manual allows.
Stop periodically and check the texture. Add cooking liquid, water, breast milk, prepared infant formula, or another recipe-approved liquid only in small amounts. Never change the water-to-powder ratio of infant formula; prepare it exactly as directed on its label before using it as an ingredient.
The correct texture depends on your child’s developmental skills. Early foods may be smooth, but children should gradually experience mashed, lumpy, finely chopped, and other safe textures as their eating abilities develop. The CDC advises that complementary foods generally begin at about six months when a child is developmentally ready.
Warning: Homemade baby food is not homemade infant formula. Do not use a Babycook to make a substitute for breast milk or commercial infant formula. Ask your pediatrician about feeding readiness, allergies, medical needs, and appropriate textures.
Important Baby-Food Safety Checks
- Introduce complementary foods when your child is developmentally ready, generally at about six months. Foods should not be introduced before four months unless a qualified healthcare professional directs otherwise.
- Do not give honey to a child younger than 12 months.
- Avoid raw or unpasteurized milk and unpasteurized juice for infants and young children.
- Watch your child throughout every meal and use a texture that matches their chewing and swallowing skills.
- Introduce common allergens using guidance from your child’s healthcare professional, especially when there is severe eczema, a known allergy, or another medical concern.
- Do not return food from the baby’s used bowl or spoon to the main storage container.
How to Cool and Store Your Purees
Do not leave a large bowl of puree on the counter until it has cooled completely. Instead, divide the food into small, shallow, clean containers so it can cool faster, then refrigerate or freeze it promptly.
- Follow the two-hour rule: Refrigerate or freeze perishable puree within two hours of cooking. Reduce that limit to one hour when the surrounding temperature is above 90°F.
- Refrigerate short-term portions: Keep homemade baby food at 40°F or below and use it within one to two days.
- Freeze longer-term portions: Freeze puree in covered portion trays or small freezer-safe containers. Once solid, transfer portions to a labeled airtight container or freezer bag.
- Date every batch: Record the food and preparation date, and use frozen homemade baby food within three months.
- Leave expansion room: Leave space at the top of rigid freezer containers because food expands as it freezes.
- Discard feeding leftovers: Throw away food remaining in the serving dish after the baby has eaten from it.
How to Thaw and Reheat Baby Food
Thaw frozen puree in the refrigerator, in a sealed container placed in cold water, or with a microwave defrost setting. Do not thaw perishable food on the counter.
Reheat only the portion you need. Stir the food thoroughly, let it stand, and check several areas for hot spots. Food should be lukewarm—not hot—when served. Do not repeatedly cool and reheat the same serving.
How to Clean the BÉABA Babycook After Use
Unplug the appliance and allow it to cool before cleaning. Remove food from the bowl, basket, lid, spatula, and blade assembly promptly so residue does not dry onto the parts.
- Remove the blade only as directed in your model manual.
- Handle the blade by its plastic or non-cutting surfaces.
- Wash food-contact parts with hot water and dish detergent, then rinse thoroughly.
- Check that the blade gasket and locking nut are clean and correctly reinstalled.
- Wipe the motor base with a slightly damp cloth and dry it.
- Never immerse the electrical base or pour cleaning water over it.
BÉABA USA states that the bowl, basket, lid, and spatula are top-rack dishwasher-safe, while hand-washing is recommended to help extend accessory life. Check your exact model manual before placing any additional part in the dishwasher.
How to Descale the Water Reservoir
Minerals in water can build up inside the heating reservoir and shorten steam cycles. BÉABA recommends descaling at the first sign of buildup and gives a general recommendation of every six to eight uses, with more frequent attention in mineral-rich water areas.
- Unplug the appliance and let it cool completely.
- Pour a mixture of 1/2 cup water and 1/2 cup white distilled vinegar into the reservoir. BÉABA allows one cup of vinegar for more stubborn buildup.
- Let the cold solution sit overnight or for up to 24 hours.
- Pour it out carefully without running a cooking cycle.
- Repeat the soak if visible buildup remains.
- After the reservoir is clean, run two steam cycles with plain water at water level 3, or use the equivalent rinse procedure stated in your model manual.
- Reset the maintenance counter if your model requires it.
Warning: Do not use CLR, coffee-machine descaler, or another chemical descaler unless BÉABA specifically approves it for your exact model. Do not scrape inside the reservoir with a metal or sharp object.
BÉABA Babycook Troubleshooting
| Problem | What to Check |
|---|---|
| The unit will not steam | Confirm that it is plugged in, the correct amount of water is in the reservoir, and the bowl and lid are fully locked. Let an overheated unit cool before retrying. |
| The steam cycle is unusually short | Check for mineral buildup and descale the reservoir according to BÉABA’s instructions. |
| Water remains after the cycle | A small amount may depend on the model, but repeated excess water can indicate scale buildup or an incorrect water measurement. |
| The unit will not blend | Check the power, bowl position, lid, blending side on a Duo, blade installation, mixing lid when required, and maximum-fill limit. |
| The bowl leaks | Unplug the appliance and inspect the blade gasket, locking nut, bowl, and lid for incorrect assembly, damage, or trapped food. |
| The steam light is red | On applicable models, this is usually a descaling reminder. Descale and reset the counter using the model instructions. |
Stop using the appliance if the cord, plug, bowl, blade assembly, locking mechanism, or electrical base is damaged. Contact BÉABA support rather than attempting an electrical repair at home.
Frequently Asked Questions
Can I use frozen fruits or vegetables in a BÉABA Babycook?
Yes, when your model’s cooking chart or recipe supports them. Separate frozen pieces before placing them in the basket and allow extra cooking time when directed. Do not thaw raw meat, poultry, fish, or egg mixtures on the counter.
How do I clean the BÉABA Babycook after use?
Unplug it, let it cool, remove the food-contact parts, and wash them with hot soapy water. Handle the sharp blade carefully and reinstall its gasket correctly. Wipe the electrical base with a damp cloth and never immerse it.
Is the BÉABA Babycook dishwasher-safe?
The electrical base is not dishwasher-safe and must never be immersed. BÉABA USA states that the bowl, basket, lid, and spatula are top-rack dishwasher-safe, although hand-washing can help extend their life. Check the manual before washing any other component.
What foods can I steam in a BÉABA Babycook?
Depending on the model and recipe, you can prepare many fruits, vegetables, meats, poultry, fish, eggs, and combination meals. Certain grains require a compatible rice, pasta, or grain insert. Always use the model chart and verify safe temperatures for animal proteins.
How long does food take to steam in a Babycook?
On applicable three-level models, BÉABA lists approximate cycles of 5 minutes for level 1, 10 minutes for level 2, and 15 minutes for level 3. Other models, including Express, use different charts or programs. Food quantity, cut size, starting temperature, and scale buildup can affect the result.
Can I add the cooking liquid to the puree?
Yes. Reserve the liquid cleanly and add it one spoonful at a time after the food is fully cooked. Pulse between additions so the puree does not become thinner than intended.
Why is water left in the Babycook reservoir?
Repeated leftover water can be a sign of mineral buildup, an incorrect water measurement, or a part that is not assembled correctly. Let the unit cool, inspect it, and follow BÉABA’s descaling procedure if buildup is present.
How long can homemade Babycook puree be stored?
Refrigerate homemade baby food promptly and use it within one to two days. For longer storage, freeze clean, dated portions and use them within three months. Discard food left in a dish after the baby has eaten from it.
Conclusion
The safest way to use a BÉABA Babycook is to combine the common steam-and-blend workflow with the manual for your exact model. Measure the listed water amount, keep steam and blades away from your hands, confirm animal proteins with a thermometer, and adjust the finished texture to your child’s developmental skills.
Prompt storage, careful cleaning, and regular descaling are just as important as the cooking cycle. Once those habits become routine, the Babycook can make small batches of fruit, vegetables, proteins, and combination meals with less guesswork.
Sources
- BÉABA Manuals & Booklets — model-specific Babycook manuals, quick-start guides, and cooking charts.
- BÉABA: How Long Does Food Need to Cook? — standard water levels and approximate steam-cycle durations.
- BÉABA: Cleaning the Babycook and Accessories — dishwasher guidance, hand-washing, blade caution, and electrical-base cleaning.
- BÉABA: How to Descale the Babycook Reservoir — vinegar descaling, rinsing, maintenance lights, and chemical-descaler warnings.
- U.S. Food and Drug Administration: Once Baby Arrives — homemade baby-food storage, freezing, reheating, contamination, honey, and food-safety guidance.
- USDA Safe Minimum Internal Temperature Chart — safe cooking temperatures for poultry, ground meat, eggs, fish, and other foods.